This guide will show you how to create and connect your Stripe account to use WordPress.com payments blocks. These steps do not apply to WooCommerce stores, which use a separate connection process.
In this guide
To accept credit and debit card payments through your website, create a free Stripe account. Stripe is a safe and secure payment processing platform trusted by millions of websites selling online. Using Stripe, your website can accept payments, issue receipts, and transfer funds to your bank account.
The steps in this guide will show you how to connect Stripe to use the following payment features provided by WordPress.com:
If you use the WooCommerce plugin for an online store, the steps in this guide do not apply. Instead, see WooCommerce Payments.
Supported Countries and Currencies (click to reveal)
To start accepting payments using a Stripe account, you must be a citizen or own a company in one of the countries where Stripe is available for business. We officially support the countries listed below.
Your customers can pay using a credit card issued anywhere in the world.
- Australia
- Austria
- Belgium
- Brazil
- Bulgaria
- Canada
- Cyprus
- Czech Republic
- Denmark
- Estonia
- Finland
- France
- Germany
- Greece
- Hong Kong
- Ireland
- Italy
- Japan
- Latvia
- Lithuania
- Luxembourg
- Malaysia
- Malta
- Mexico
- Netherlands
- New Zealand
- Norway
- Poland
- Portugal
- Romania
- Singapore
- Slovakia
- Slovenia
- Spain
- Sweden
- Switzerland
- United Kingdom
- United States
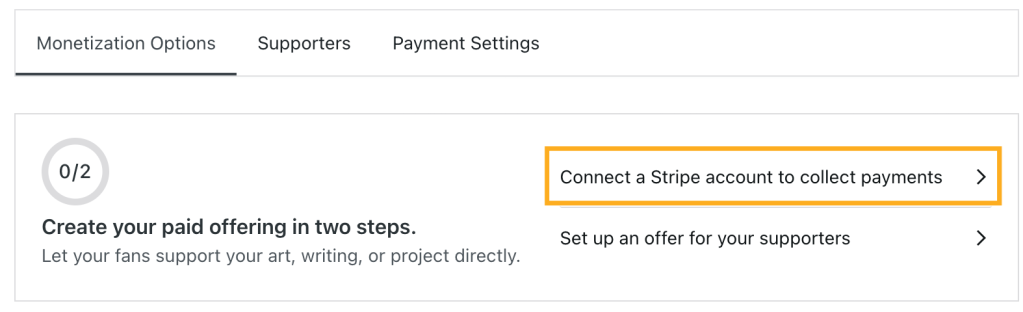
To get started with setting up Stripe for WordPress.com payment features, take the following steps:
- Visit your site’s dashboard.
- In the left sidebar, navigate to Tools → Monetize (or Hosting → Monetize if using WP-Admin).
- Near the top, click the “Connect a Stripe account to collect payments” link:
- Click the button that says “Connect Stripe to Get Started“.
- You will be taken to the Stripe website to create your account (jump to next steps) or sign in to your existing account (jump to next steps.)
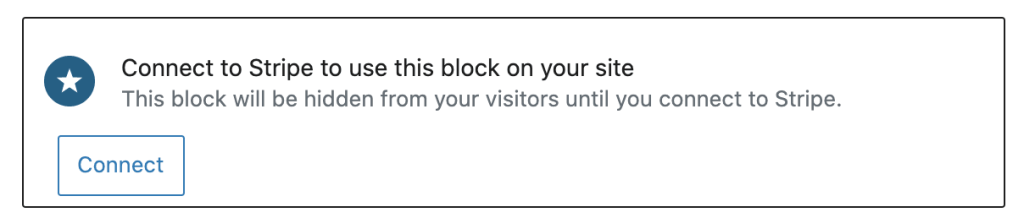
You can also start the Stripe connection process when adding any payments block in the WordPress editor. If you haven’t yet connected a Stripe account, a banner will appear above the Payments block, Donations block, or Paid Content block with a Connect button:
After clicking the Connect button, as described in the previous section, you will be redirected to the Stripe website to register your information with Stripe.
First, you’ll provide an email address and set up a password to secure your account.
Next, you’ll provide your location and business details, including a business address, phone number, and type. No special business registration or license is required to sign up with Stripe. Your business address can be your mailing address or another address you have. Your business phone can be your mobile phone, landline, or another phone number where you can be reached.
If you have registered your business legally, you can select the appropriate business type, but for most people, this will be an individual, sole proprietor, or single-member LLC.

In the following steps, you will provide the following:
- Personal details (like your name, address, and contact information) to verify your identity and keep your account safe.
- Your website URL (your WordPress.com site’s domain.)
- A description of what you will accept payments for, such as physical or digital goods, donations, gifts, services, or memberships.
- Your bank account details where you will receive the funds.
- A “statement descriptor” that will appear on your customers’ bank and credit card statements.
After successfully connecting your Stripe account, you will be redirected back to WordPress.com where you can begin using WordPress.com payments blocks.
If you already have a Stripe account, clicking the Connect button will take you to the Stripe website where you can enter your account details to log in and connect your Stripe account to WordPress.com.
After authorizing the connection between WordPress.com and your Stripe account, you will be redirected back to WordPress.com, which is now ready to use payments blocks.
Disconnecting your Stripe account will:
- Remove Stripe from all your WordPress.com and Jetpack sites.
- Prevent visitors from making donations or other payments via payment blocks you have added to your site.
- Block renewals of any recurring payments.
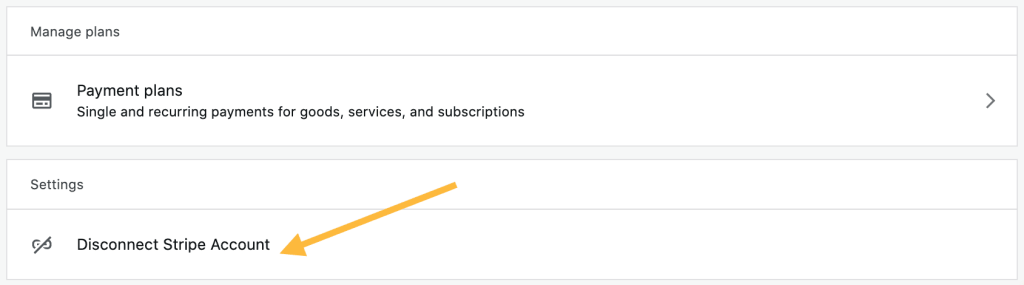
To disconnect your Stripe account from WordPress.com:
- Visit your site’s dashboard.
- In the left sidebar, navigate to Tools → Monetize (or Hosting → Monetize if using WP-Admin).
- Click on the “Payment settings” tab.
- Click the “Disconnect Stripe Account” option: