The Single Posts template controls the layout of individual posts on your site. When you make a change to this template, the change will reflect on all your posts, ensuring a consistent experience for visitors browsing through your blog. This guide will show you how to customize the Single Posts template.
In this guide
If your site uses a theme that supports the site editor, you can access and edit templates. A quick way to determine if your site uses the site editor is to check for Appearance → Editor in your site’s dashboard.
Edit the Single Posts template if you want to change the overall layout of all posts that use this template.
If you want to change the content of one post only, do not edit the Single Posts template. Instead, go to Posts in your site’s dashboard and click on that particular post to edit it directly.
To find and edit the Single Posts template, follow these steps:
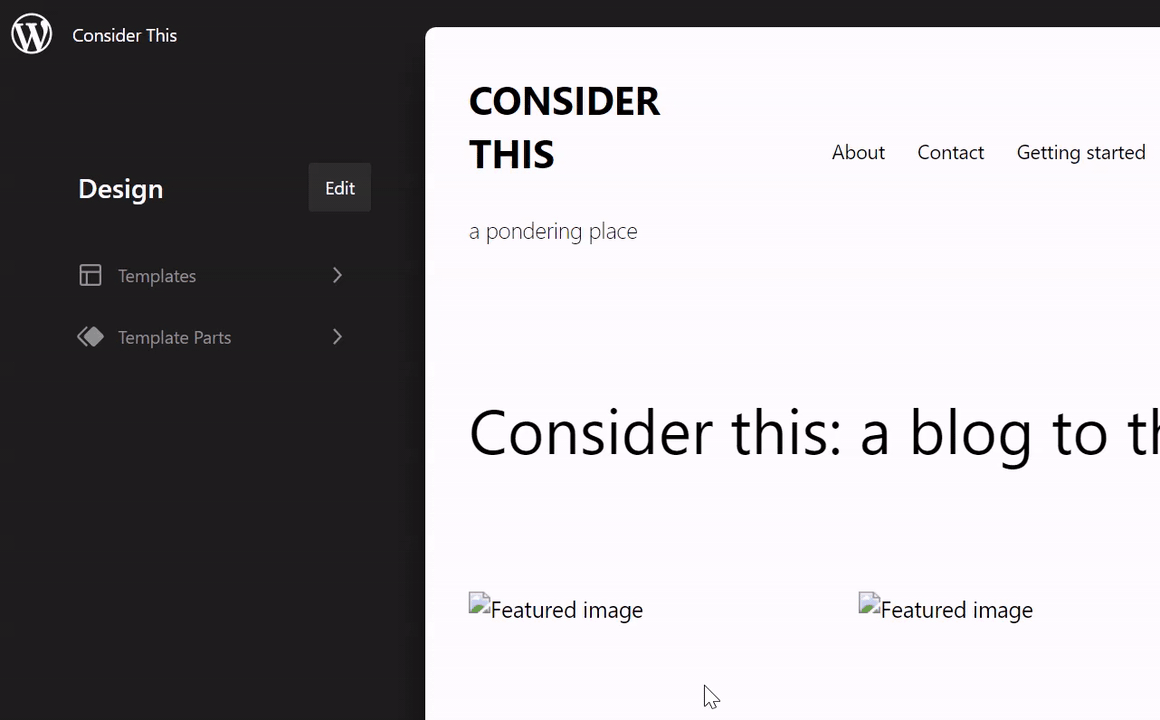
- From your site’s dashboard, click on Appearance → Editor.
- In the left side panel, click “Templates” and select the Single Posts template.
- Click the pencil icon to start editing the template. The left sidebar will close so you can focus on editing.
First, it’s helpful to understand the blocks already part of the template. Open List View to see a list of all blocks in the template. List View is the icon at the top left of the screen that looks like three horizontal lines above each other:
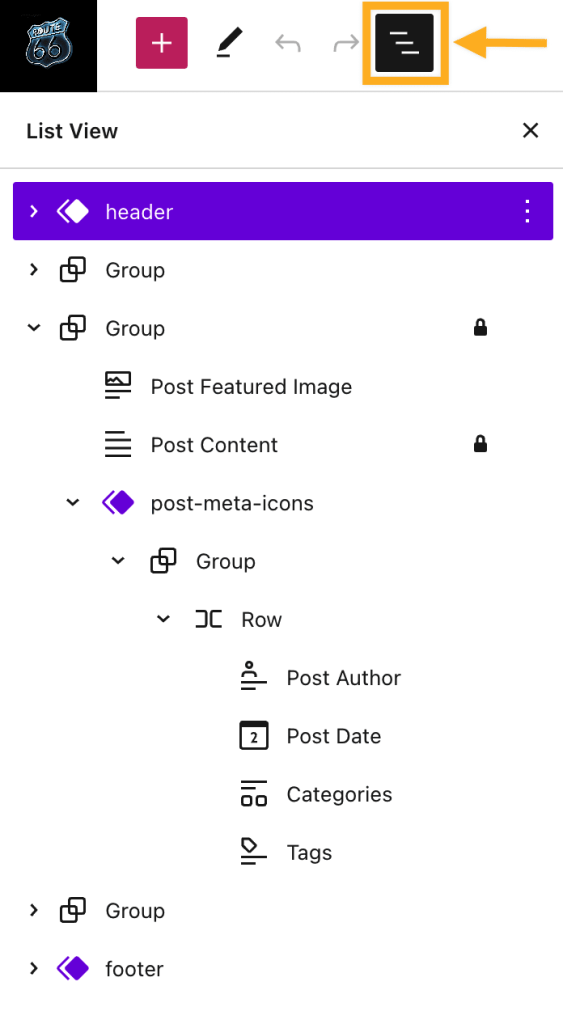
Here, you’ll see all of the elements (known in the WordPress editor as blocks) of your template. A typical Single Posts template will have the following elements:
- Header: The header contains elements like a site title, logo, and menu. The header is a template part that appears across the entire site. Any edits you make to this header will apply to all pages on your site where the header template part is inserted.
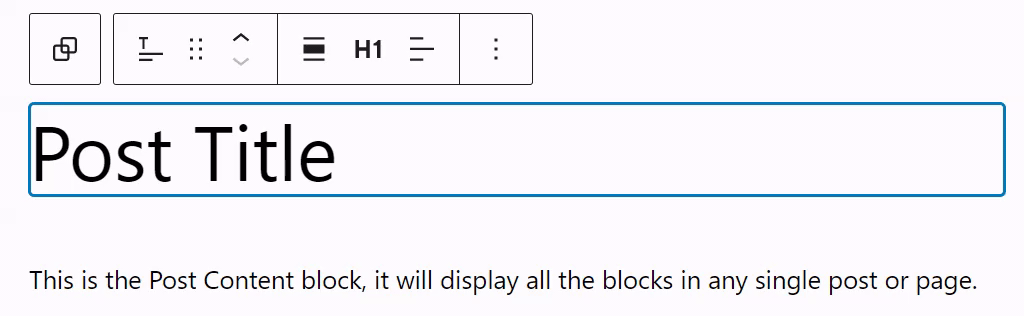
- Title: The post title is shown as the Title block in the template. When viewing an actual post on your site, the title you have written for that post will show in this spot.
- Featured Image: The featured image is a single image to represent your post.
- Content: The post’s content is shown as the Content block in the template. When you view an actual post, the content of that post will show here instead. If you remove the Content block, any posts using this template will appear to have no content until you add it back.
- Post Meta: This refers to extra information about the post, such as the author, date, categories, and tags.
- Like button: Gives your readers the ability to click a Like button to show appreciation for your posts.
- Comments: This is where comments on your post will be shown.
- Footer: The footer contains elements like a site title, contact information, and a WordPress footer credit. The footer is a template part that appears on every page and post. Any edits you make to this footer will apply everywhere on your site where the footer template part is inserted.
While every WordPress theme is different, these are the standard elements of a Single Posts template that you can expect to see on most themes. You may see other elements included in your Single Posts template, which you can edit as you wish.
Your theme’s templates provide you with a professional, well-designed layout to start from. To personalize the default design, you can swap out the text and images for your own content and add or remove any elements of the layout.
Here, we’ll explain a few common adjustments you may wish to make to your Single Posts template.
If you want to add an element to your posts, such as a subscription box, a contact form, or a button, you can add it to the Single Posts template to appear on all posts that use this template.
Click the + block inserter to add a new block where you’d like the content to appear. You can use the List View to accurately select the position where the block will go. Once you save your changes, the new block you add will appear on all posts that use the template you’re editing.
You can move and remove all the various elements that make up the template, such as the featured image, the title, author, and main content area.
Click on the List View button at the top left to see a list of all the blocks used in the template. You can change the order of blocks by clicking and dragging them in the List View:

Post meta refers to elements like Author, Date, Categories, and Tags for individual posts. Some themes may include a template part called Post Meta or Post Meta Icons.
You can remove the date, author, and other meta information here to stop them from displaying on your posts.
You can also add individual blocks for Author, Date, Categories, and Tags if your theme does not have the Post Meta or Post Meta Icons template parts.
Similar to editing the Post Meta above, you can also select the Comments area to change or remove how this appears on your posts. View our Comments block guide for more detail on the elements that make up the Comments area.
When editing the Single Posts template as described above, you will see the Title block, which represents where the post’s title will be shown on your individual blog posts. If there is no Title block, you can add it. The block has settings to change the alignment, size, color, and more.
When editing the Single Posts template described above, you will see the Featured Image block that shows a featured image on your individual posts. If there is no Featured Image block, you can add it.
The Featured Image block contains many settings you can adjust, such as size, position, spacing, and overlay color.
For the Featured Image block, you can also select the aspect ratio —the proportional relationship between an image’s width and height. The default Original aspect ratio maintains the aspect ratio of the uploaded featured image. You can also choose one of the custom aspect ratios. When you select a custom aspect ratio, you must also select one of the following Style options to decide how the image interacts with the image frame.
- Cover: Image is scaled and cropped to fill the entire space without being distorted.
- Contain: Image is scaled to fill the space without clipping or distorting.
- Fill: Image will be stretched and distorted to completely fill the space.
If you wish to hide the featured image so that it does not appear on a post or page, you can remove the Featured Image block. To hide the featured image, select the block, click the three dots icon in the toolbar above it, and choose the “Delete” option. See Remove a Block for more information.
If, instead, you wish to update or remove a featured image from a specific post or page, follow the steps in this guide to Replace or Remove a Featured Image.
Blog posts often have a sidebar to show information such as an author bio, links to social profiles, categories, and top posts. Visit Add a Sidebar Using the Site Editor to learn how to add a sidebar to any template.
If you want the content of your posts to appear wider or narrower, you can control this in the Single Posts template.
When viewing the contents of the Single Posts template, the width is typically controlled by the blocks named Group. To change the width, follow these steps:
- Using List View, select the Group that contains the content.
- A toolbar will appear alongside the Group of content. Select the width option as shown here:
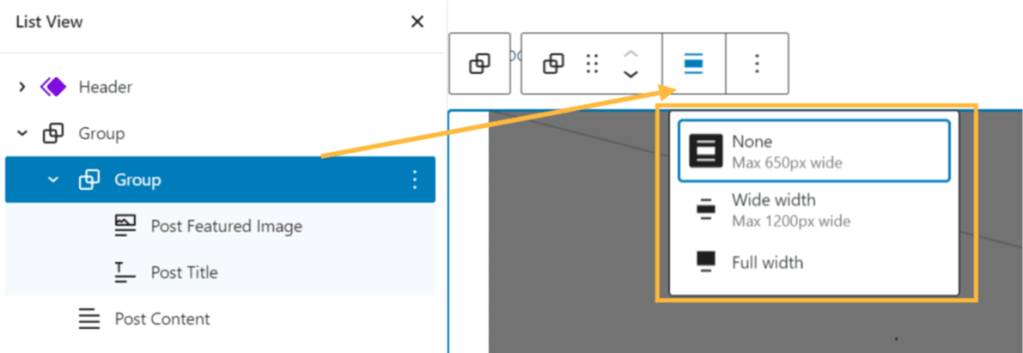
- Select wide width or full width to change the width of your content.
If your Content block is nested within a Group block, you may need to toggle the option “Inner blocks use content width” off in the Group block’s settings.
The Group block includes a lot of additional settings for layout, color, and more. Learn all about the Group block.
By the end of this guide, you might have finalized the layout of your Single Posts template. By default, any posts you create will use the Single Posts Template. You can use the following steps to ensure a post uses the Single Posts Template:
- Starting in your site’s dashboard, click on Posts.
- Click on a post to edit that post.
- In the Settings sidebar on the right, click on the Template as shown in the next image. If you don’t see the Settings sidebar, click the settings icon next to Publish or Update to open your Settings sidebar.
- If you are editing a standard post, the Template should show as Default template. Otherwise, click the template name and select Single Posts template from the drop-down.
- Click Update/Publish to save the change.
- View the post to check your post has the intended layout.

