Last updated:
In this lesson, we’re going to create and edit some pages. Then we’ll talk about why the terms website and blog are used interchangeably, the difference between pages and posts, and what some of the most common pages are that a website should have.
If you went through the Quick Launch course, and chose to add pages during the process, then you may already have some, or all, of these pages in your list of pages. You can use these steps to add different pages (just give them a different name), even if it’s just a test page, to learn more about this process.
The process of adding additional pages is pretty much a rinse and repeat type action. So once you’ve learned to set up one page, you can repeat the steps for other pages.
As you’ll find when working through the steps below, thinking about what you want to say on each page, and which images you want to use, will take longer than creating the actual pages.
Remember, the content included with any theme is just demo content that you can edit and change to suit your needs.
As you start working with the content and blocks within your pages, posts, and templates we want to mention that you’ll encounter many customization options per block. This can include typography settings, color options, and even layout features for padding and margins. In some cases you’ll want to apply these customizations on a per block basis. But in other cases it will make more sense to adjust the site-wide Styles.
When you manage certain design customizations, such as the base color of your fonts, from the Styles section of the Site Editor, it allows you to apply a particular style across the entire site with one setting. Whereas per block customizations need to be applied to each individual block. Also, per block settings will override your global Styles. So if you start out by applying customizations per block, then change your mind later, you will still need to edit those customizations per block. Applying a global Style won’t replace block-level customizations.
So before you go too deep with per block customizations, be sure to review the Customizing Styles lesson to ensure you’re applying customizations in the most efficient way possible.
Every website has a homepage, and every theme comes with a Default Homepage. The easiest and quickest way to get your site up and running is to use the Design your own feature showcased in our Quick Launch course, where you design the layout of your Default Homepage using patterns. Alternatively, use the Default Homepage as provided by your theme of choice and edit the demo content to replace it with your own content, while keeping the provided layout.
We’ve provided extensive details on working with the homepage of your site in our Getting Started lessons of Homepage and Posts Page and Plan Your Homepage.
Unless you’ve intentionally changed the set up of your theme, your site is automatically using the Default Homepage template as provided by the theme. If you’re building a blog style homepage, and you choose a blog style theme that you like as is, you won’t even need to edit the Default Homepage.
You access the Default Homepage template to edit your homepage content by going to Appearance > Editor. The template that loads initially is where your homepage content lives and is where you will edit it if necessary. The Default Homepage template is a single-use template that works differently to the multi-use templates used by your regular pages and posts. We recommend reviewing our Templates Explained lesson to further understand the relationship between templates and content.
Also known as your Blog page, this is the page that will display any posts that you publish, when you’re not using your homepage for this. We recommend setting up a Custom Posts Page as explained in our Homepage and Posts Page lesson.
To set up a Custom Posts Page:
- create a new regular page
- add the desired page layout or block patterns (ensuring to include dynamic blocks that will display posts)
- use the default Pages template
You can then add this page to your menu the same as any other regular page.
Under Settings > Reading↗︎ make sure that you do not have any specific published page assigned as the Posts Page. In the default WordPress.com view, this is achieved by leaving the drop down box as – None –.

You can also review our support guide: Create a Separate Page for Blog Posts and our webinar: Custom Blog Pages for more information and inspiration.
Now that you have a Posts Page to display all of your posts, you can head the main dashboard and click on Posts↗︎ to see your existing posts and to add new ones. Your newly published posts will then display on your Posts Page.
There are multiple locations to add new pages from: the main dashboard, the Pages section, the left panel when exiting the page editor, or even within the Site Editor.
The process we recommend for creating a new page is:
- Click on Pages↗︎ in the left sidebar of the main Dashboard (that way you can see what pages you already have first)
- Click on the Add New Page button
- A Page Layout modal will open where you can browse and select from page layouts within different categories
- Clicking a page layout will add all of the blocks to the page editor
- You can now edit all of the demo content that was added
- Publish your page in the top right corner, or save it as a draft for later
If you decide you don’t like the layout you chose, you can select all of the blocks and delete them, leaving you with a blank page. Or, from the Page Layout modal there’s an option to start with a Blank Page as well.
From a blank page, you could start adding individual blocks and arranging them as desired. You do that by clicking on the Block Inserter icon, which is the + symbol in the top left corner of the editor.
But when you open the Block Inserter, you’ll notice there’s a section called Patterns. Again, if you went through the Quick Launch course, you’re already familiar with these patterns. But either way, you can click on this Patterns tab and browse through a large library of professionally designed patterns that you can simply click to drop into the editor for your page. You can then edit the content as desired. You can also add multiple patterns to the same page.
You can see this entire process in action starting at the 30:10 time stamp of the video below:
If you then jump the video back to the 22:30 time stamp, you can see the process of editing blocks in action. This portion of the recording is taking place within the Site Editor, but the process of editing blocks is exactly the same whether you’re editing a template, a page, or a post.
Our webinar recording of Site Editor vs Page Editor is another great resource for those who are more visual:
-

Site Editor vs. Page Editor
Take full control of your site’s design. Learn how you can customize every part of your site, code-free, with the Site Editor and Page Editor.
We also provide a list of all the different blocks that are available and you can learn more about them by clicking on each block name.
For example, you can learn more about how to use the Form block for your Contact page.
The act of editing blocks is a matter of:
- Select the block (use the List View to make sure you’ve selected the correct block since some may be nested).
- Investigate the options in the block toolbar and in the Settings sidebar on the right.
- Each block has its own unique set of options, so clicking and exploring, or reviewing the block documentation are the best ways to ensure you’re getting the most out of each block.
- Our support guide on working with the WordPress Editor is a great resource for learning how to work with blocks.
There are a number of different page settings that you can also explore, and our support guide on creating a new page covers these options in detail.
All new pages will automatically be paired with the default Pages templates. You can also choose to assign a different multi-use template or create a new custom template, but most often sticking with the default is the simplest option.
Take a moment now to experiment with creating a new page following the above steps.
A common question is whether you need a website, a blog, or a website with a blog? Many people think of a “website” and a “blog” as two entirely different things. When you’re building a WordPress website, these are simply two aspects of the same software and site.
To simplify this, think of a “website” as a collection of static “pages”, and a “blog” as a feature within a website to display dynamic content that is created using “posts”. But often, the terms “site”, “website”, and “blog” are used interchangeably.
Some sites will set the homepage to display their posts, which is often when a site is referred to as a “blog”.
If your site includes a blog feature, calling it either a website or a blog is correct.
Sometimes, people who are only familiar with blogging will call any type of site a blog as well. It’s not really a point to get hung up on.
If you don’t want a blog anywhere within your site, don’t create posts, and make sure you don’t have a Blog menu item. There’s no other special action needed.
A page is an area of your site where you display “static” content that rarely changes. A page can be about anything at all. Some of the most common pages on a website include Home, About, and Contact pages.
You can add as many pages to your site as you’d like, and you can update your published pages as many times as you want. After you create a page, you can add it to your site’s navigation menu so your visitors can find it easily.
A post is used to display “dynamic” content. This is often content that is time-sensitive, such as news topics or documented travel adventures. Posts are also typically organized into categories, such as with recipes or educational content. You define your own categories, so they can be whatever makes the most sense for your particular content.
You set up a Blog (or Posts) Page to display the posts that you publish, as covered in the Posts page section above..
The basic “process” of creating posts is the same as pages, though there are a few differences in the features that are available between the two types of content. For starters, when you create a new post, you won’t see the Page Layout modal, but you can still add Patterns. And when working with a page, you won’t have options for tags or categories. But with both pages and posts, you open their respective sections from the main dashboard↗︎, and add blocks or patterns for your content.
Pro tip:
If you find yourself regularly adding new content to a particular page to keep your visitors “up to date”, consider using the more dynamic blog posts feature instead. It’s much easier to manage and navigate posts than a page with a massive amount of information. Remember, the concept of “blogging” has evolved. It’s no longer the online journal it used to be, it’s now a strategic and organizational function of your site.
You can add whatever pages you’d like, but many creators overlook the essential pages that their site should have. While there are no right or wrong pages to include, and ultimately the purpose of your site will determine which pages you need, but at the bare minimum we recommend:
- Homepage
- About page
- Contact page
- Blog page (optional)
Fortunately, these pages are also incredibly straightforward to set up using the WordPress.com Page Layouts feature previously mentioned. Since this feature populates the page with sample content, it becomes a process of editing rather than trying to design layouts. You’re not limited to these layouts, but they’re a great help when starting out — you can always change the page content later, or create new pages from scratch when you’re ready to be more adventurous.
What should each page include?
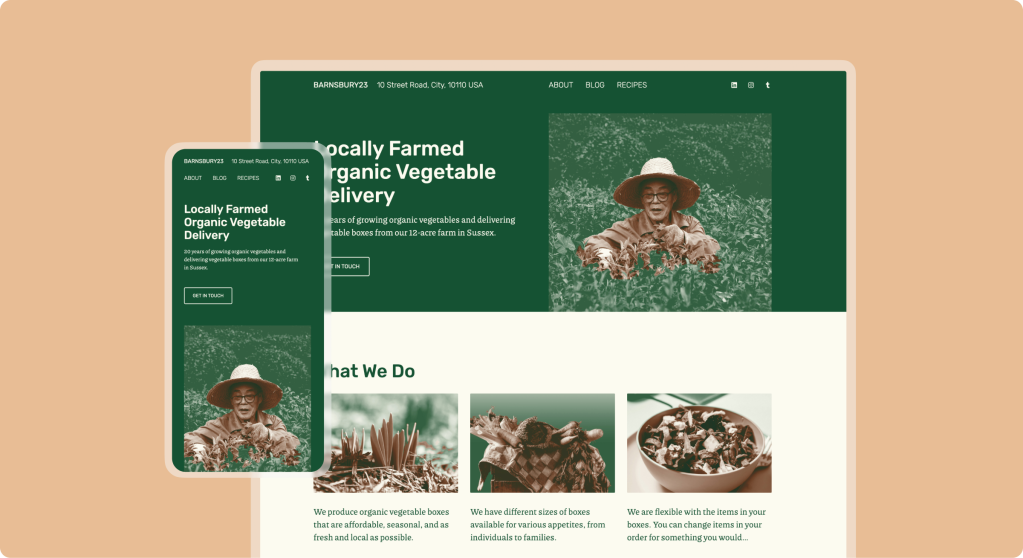
Homepage
For some visitors, this will be the first impression they get when they visit your site. But even if they enter your site through a direct link to another page or post, there’s a good chance that they will also check out your Homepage. So it’s arguably the most important page of your entire site.
With that in mind, you want to make sure that your Homepage shines and truly speaks to your audience.
Regardless of the intent for your website, use your Homepage to entice your visitors to stick around by designing it to look like a static page. Even if the primary purpose of your site is blogging, there’s no reason the homepage has to include all of your full posts one after the other. In fact, we advise against it.
For starters, if someone can read each of your entire posts directly on the homepage, they have no reason to click into the post. If they don’t click to open the full post, you won’t be gathering any useful stat information about which posts are more popular.
A homepage that just displays each of your posts in full also becomes a very long page to scroll, and isn’t particularly compelling to a visitor.
So regardless of the intended purpose of your site, we encourage you to design a compelling homepage that will attract and entice visitors.
It’s up to you to decide what information to include but your sections might look something like this:
- Header with hook
- Intro with Welcome message
- Highlights of your primary offerings
- Latest posts
- About Me / Us
- Subscribe option
- Footer
When it comes to your homepage, you want to put your best foot forward. To that end, we also recommend reviewing our lessons on Homepage and Posts Page to understand the structure of your homepage and Plan Your Homepage to really dig into some ideas of what to include in the above sections. Our Compelling Homepage webinar is also a must for further inspiration:
-
Compelling Homepages
Your homepage, often the highest traffic page on your site, is essential for creating a solid first impression with your visitors.
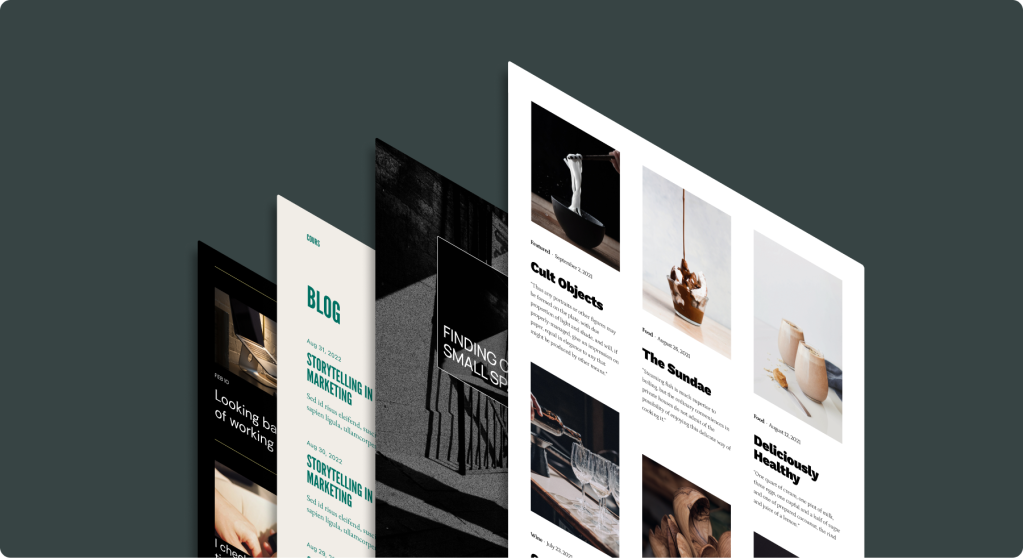
Blog page
Also called the Posts page, this is the page that will display your published posts in reverse chronological order (that’s the most common option, though other options are available).
It’s worth including additional information on this page — maybe a secondary welcome message at the top, a mini ‘about you’ column, like a sidebar, on the right, or a subscription form at the bottom — to jazz it up a bit.
You can choose whether to include the post Featured Images, post titles, excerpts, dates, and more. You can display the posts in a list or a grid. Break up the page into sections based on Category utilizing multiple instances of different dynamic blocks. There are countless possibilities of what you can do with this page.
You can also choose from pre-designed Blog Posts patterns for a quick start to getting this page setup.
There are a few different options for creating and working with a Blog page, as covered in our Homepage and Posts Page lesson. But we recommend creating a Custom Blog Page and to watch our Custom Blog Pages webinar:
-
Custom Blog Pages
Few things will set the tone of your WordPress blog like your main blog page, where all your posts are displayed.
If you’re planning to include any blogging on your site, whether it’s the main focus or not, we also recommend going through our Intro to Blogging course.
Note:
If you don’t have any published posts in your site yet, the placement of dynamic blocks will display a “nothing found” message.
About page
This is the page where you can really dive into all the things you’d love for your readers to know about you. It’s your bragging rights page. Some creators will be less excited about putting this page together than others — but that’s okay. It can be as much or as little as you want it to be, based on what makes sense for your audience.
Keep in mind that when a site visitor goes to an About page, they are expecting to learn as much as possible about you (or your company). So, for starters, you don’t need to feel shy about bragging — tell them what makes you unique, qualified and/or passionate about the topic of your website. Show your vulnerabilities. Make it real. That’s what they expect to see here, and this is the right place to do it.
This is your chance to create a connection with your audience that will make you relatable to them. You’ll of course be doing that throughout the rest of the content you provide. But your About page is where you can get really detailed in order to attract your ideal audience.
And again, the About Page Layouts or Block Patterns make this as simple as a click and a few edits.
Contact page
This page will vary from site to site. Not all creators want their audience to reach out to them. However, having some form of a contact page adds a level of credibility and authenticity to your site.
What you include on this page is going to be a personal choice based on what makes sense for the purpose of your website. Some ideas include:
- Contact form
- Physical address
- Map
- Phone number
- Hours of operation
- Email addresses for different departments
- Delivery, shipping, and return information
- FAQs
These options won’t be applicable for all sites, however, at very least, we recommend including a contact Form block that allows people to reach out to you. You can connect this block to send to any email address you want and the block will also collect the form submissions within the Feedback section of your site.
Did you already guess? A simple click on a Contact Page Layout or Block Patterns, followed by a few edits, will have this up and running on your site in minutes.
Creating new pages, or editing existing ones, is a rinse and repeat of the steps we’ve covered in this lesson. The most time-consuming portions of this process is deciding:
- Which pages you want to include
- What content you want to add to each page
- Which blocks you want to use to arrange that content
Using pre-designed Page Layouts or Block Patterns will make arranging your content go much faster.
With a WordPress site you have the simplicity of working with predefined patterns, and the power to control them to suit your needs. You can also create your own custom look simply by adding the blocks you’d like to use. Over time you can get to know the different blocks and the features they offer to add more variety and unique layouts to your content.
