
Need to add JavaScript to WordPress but not sure where to start?
JavaScript can help you add all types of useful functionality to your WordPress site. However, if you want to take advantage of those benefits, you can’t just copy and paste the JavaScript into the WordPress editor.
Thankfully, there are still some easy ways to add JavaScript to WordPress, either using free WordPress plugins or your own DIY snippets.
In this post, you’ll learn all about how JavaScript can benefit your site and how you can properly add JavaScript to WordPress.
Beyond the manual method, that includes step-by-step tutorials for three of the most popular JavaScript WordPress plugins – all of which are free to use.
What Is JavaScript?
JavaScript, sometimes abbreviated as JS, is a popular client-side programming language that you can use to add a range of functionality to your WordPress site.
Most of WordPress is written in PHP, which is a server-side language. This means that your website’s server executes the code before delivering the final product to visitors’ browsers.
JavaScript, however, is a client-side language, which means it runs in your users’ browsers and not on your server. This opens up a lot of opportunities for adding dynamic functionality to your website, even after the page has already loaded.
Beyond that, you’ll also commonly use JavaScript to integrate third-party services into your site, such as tracking snippets like Google Analytics or live chat tools.
Can You Use JavaScript In WordPress?
Yes – you can absolutely use JavaScript in WordPress. In fact, you already enjoy the power of JavaScript on your site.
For example, while the core WordPress software is primarily written in PHP, it still relies on JavaScript for a lot of important functionality, such as the content editor and its many blocks.
Many WordPress themes and plugins also use JavaScript to power their functionality, such as slick navigation menus and slide-out effects.
And of course, as you’d expect from the fact that this post exists, you can also add your own custom JavaScript to your site when needed.
What Can JavaScript Do for WordPress Sites?
The possibilities of adding JavaScript to WordPress are pretty endless.
For most users, the most common use case for adding JavaScript to WordPress is integrating third-party tools and services into your site.
For example, most analytics/tracking services rely on adding a JavaScript snippet to your site. This is true of Google Analytics, Facebook Pixel, the Pinterest tag, and so on.
Similarly, a lot of third-party services use JavaScript snippets to integrate with your site. Here are a few examples, but these are by no means a complete list:
- A live chat tool might give you a JavaScript snippet to add the live chat widget to your site.
- Your email marketing service might use JavaScript to let you embed custom opt-in forms or other functionality on your site.
- A contact form tool might use JavaScript to help you embed the form on your site. For example, Typeform embeds its conversational forms using JavaScript.
Finally, you can also add your own custom JavaScript to your site to add all types of different functionality. For this last one, though, you’ll need some development knowledge if you want to customize your site using your own JavaScript (or you’ll need to pay a developer to do it for you).
Three Ways to Add JavaScript to WordPress
When it comes to adding JavaScript to WordPress, you have multiple options.
For most people, using a WordPress JavaScript plugin offers the simplest approach, but there are also manual methods if you prefer a more DIY approach.
1. Use a JavaScript WordPress Plugin (Best for Most People)
The best and simplest option for most people is to use a JavaScript WordPress plugin, which you might also see called a code snippet manager plugin, or something similar.
While the exact features will depend on the plugin, the basic idea is that these plugins give you an easy-to-use interface to add and manage JavaScript snippets directly from your WP Admin.
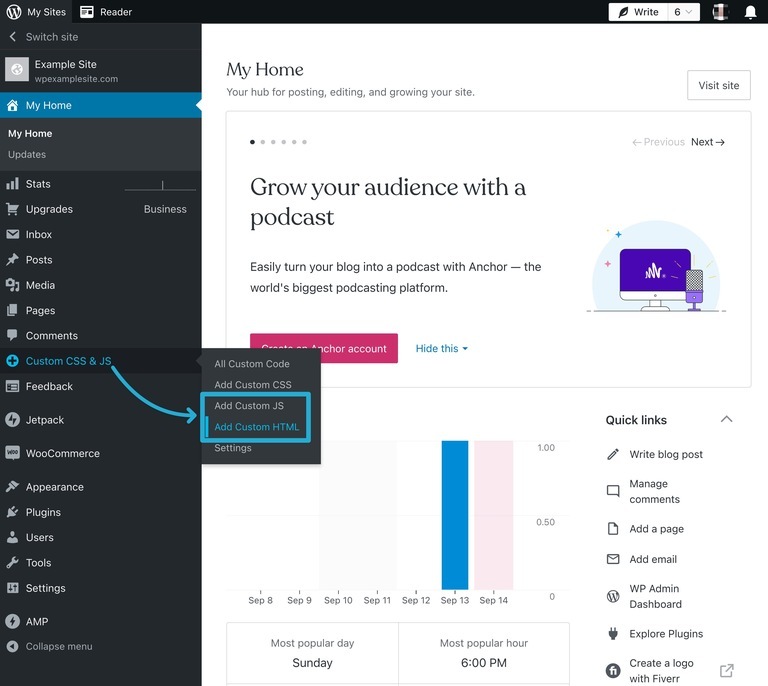
Here’s an example:

This approach has several advantages:
- Snippet management – if you’re adding multiple snippets to your site, these plugins make it easy to manage each snippet. You can give each snippet a title and use categories/tags to organize them. You can also easily enable and disable individual snippets as needed.
- Theme-independent – by storing your snippets in a plugin, they’ll still be active even if you change themes. This can be important if you’re adding theme-agnostic functionality, such as using JavaScript to add Google Analytics to WordPress.
- Conditional rules – if you don’t want to add your JavaScript snippets sitewide, you can easily add conditional rules to only load the JavaScript on certain content, for certain users, for users browsing on certain devices (smartphone vs desktop), and so on.
Here are some of the best WordPress plugins for JavaScript management:
- WPCode – previously known as Insert Headers and Footers
- Simple Custom CSS and JS
- Header Footer Code Management
A little further down in this post, you’ll find step-by-step tutorials for how to use three of the most popular plugins (all of which are free).
2. Use WordPress Hooks and the functions.php File of Child Theme (A Little More Complex)
If you don’t want to install a WordPress JavaScript snippet plugin, you can also manually add JavaScript to WordPress using your WordPress theme’s functions.php file and the WordPress hook system.
This method is a little more complex, but it lets you achieve a similar end result as the plugins above.
Essentially, the WordPress hook system lets you inject any content in your site’s header or footer, including JavaScript.
When combining some PHP code for the hook with your JavaScript, you can automatically inject it in your site. Here’s an example of the code that you would use to add JavaScript to your site’s header:
function wpcom_javascript() {
    ?>
    <script>
        Replace with your JavaScript
    </script>
    <?php
}
add_action('wp_head', 'wpcom_javascript');
You can also use more complex PHP to add conditional IF statements, such as only adding the JavaScript to a certain post or page on your site.
Here’s an example of only adding JavaScript to a single page by targeting the page’s ID:
function wpcom_javascript() {
if (is_page ('42')) {
    ?>
    <script>
        Replace with your JavaScript
    </script>
    <?php
   }
}
add_action('wp_head', 'wpcom_javascript');
If you do use your theme’s functions.php file, it’s important to use a WordPress child theme so that your JavaScript snippets don’t get overwritten when you update your theme.
As an alternative to using your child theme’s functions.php file, you can also create your own custom plugin to house these snippets.
The main advantage of using a custom plugin instead of your child theme’s functions.php file is that it makes your code snippets theme-agnostic. That is, you can change themes, and all of your JavaScript snippets will still be active.
You can still use the same code examples from above when creating a custom WordPress plugin.
3. Enqueue the JavaScript Using wp_enqueue_script (Mainly Just for Developers)
This last method is a little more complex and won’t apply to most use cases where you’re adding JavaScript to your site.
However, you might have more complex situations where you need to upload your own JavaScript file to your site and use it, rather than embedding a JavaScript snippet from a third-party service such as Google Analytics or Facebook.
This usually only applies to developers who are working on custom themes or plugins, but it could happen in other situations.
In this case, you would want to use the wp_enqueue_script function to register that JavaScript file with your WordPress site and tell WordPress where to load the file.
How to Add JavaScript in WordPress Using Plugins
While all of the methods above offer viable ways to add JavaScript to WordPress, the plugin approach is the best route for the reasons discussed above. Here’s a quick recap of those reasons:
- They make it easier to manage multiple snippets because each snippet is a separate entry and you can use titles, categories, and tags to organize snippets.
- You can store your snippets outside your theme, which means they’ll still be active on your site even if you switch themes.
- You can use conditional rules to only load snippets in certain situations.
Below, you’ll find tutorials for three of the most popular WordPress JavaScript plugins.
If you’re using WordPress.com, you’ll need to be on at least the WordPress.com Business plan to install your own custom plugins. If you haven’t already upgraded, you can upgrade by following these instructions.
If you’re on the Business or eCommerce plans already but you’re not sure how to install custom plugins, you can check out this guide for installing plugins on WordPress.com.
How to Use WPCode to Add JS to WordPress
Formerly known as Insert Headers and Footers, WPCode is one of the most popular WordPress plugins for JavaScript snippets.
While the plugin makes it easy to just inject sitewide scripts in your header and footer, one of its standout features is that it also lets you add conditional rules to control when to load scripts.
For example, you could only load JavaScript on certain content or for users who are logged in to your site (or not logged in). Or, you could do both at the same time! That is, add JavaScript to one specific page on your site and only load that script if the user is logged in.
Here’s how to get started:
- Install and activate the free plugin on your site.
- Go to Code Snippets → + Add Snippet in your WP Admin.
- Hover over the option to Add Your Custom Code (New Snippet) and choose Use Snippet.

Now, you’ll be in the full snippet editor interface.
At the top, you’ll want to do three things:
- Add a title to help you remember what the snippet does. You’re the only person who will see this.
- Set the Code Type equal to JavaScript Snippet.
- Add the code for your snippet to the Code Preview. The plugin will automatically add the opening and closing <script> tags so you don’t need to include that portion of the JavaScript snippet.

Below that, you can choose where to add this JavaScript snippet on your site.
The most important options here are the Insertion settings. You can add your snippet sitewide to the header, footer, or body. For important snippets, you should choose the header, though the footer is slightly better from a performance perspective.
Alternatively, you can target it to specific content or even manually place it using a shortcode.
You can ignore the Basic Info section, though you’re free to add tags or internal notes to help you organize your snippets.
Finally, you have the option to use Smart Conditional Logic to add more rules for where/when to insert the snippet. For example, this is where you could configure the plugin to only load your snippet for logged-in users.
Again, you’re free to ignore these settings if you don’t need them.

When you’re finished configuring your snippet, make sure to click the Save Snippet button in the top-right corner.
Then, use the toggle beside that button to switch the snippet to Active to make it live on your site.

And that’s it! To insert additional snippets on your site, you can repeat the process to add each snippet separately.
How to Use Simple Custom CSS and JS to Add JS to WordPress
Simple Custom CSS and JS doesn’t offer as many conditional rule options as the WPCode plugin unless you pay for the Pro version. However, if you just want to add sitewide JavaScript snippets, it delivers on its name by offering a simple way to do so, even with the free version.
Once you’ve installed and activated the plugin, you can hover over the Custom CSS & JS menu in your WP Admin to choose between two options:
- Add Custom HTML – use this if you’re embedding a script from a third-party service, such as Google Analytics or your live chat service.
- Add Custom JS – use this to add your own custom JavaScript code.
Most of the time, you’ll probably want to use the Add Custom HTML option, even if it sounds a little unintuitive.
This will open the interface to manage this snippet. Many of the settings require the Pro version to access, but you still get a good amount of flexibility with the free version of the plugin.
Here’s what to configure:
- Add an internal title to help you remember what the snippet does.
- Paste the snippet into the text editor.
- Use the Where on page options to choose where to inject the snippet.
- Use the Where in site option to choose whether to add it on the frontend of your site or only in your WP Admin. Usually, you want to add it to the frontend.
Once you’ve made your choices, click the Publish button to make your JavaScript snippet live.

If you want to add more JavaScript, you can repeat the process for each additional snippet.
How to Use Header Footer Code Manager to Add JS to WordPress
Header Footer Code Manager is another popular free plugin that uses a similar approach to WPCode.
One advantage that it has is that it lets you target your JavaScript snippets to users browsing on certain devices (e.g. a smartphone or desktop).
However, the free version lacks the option to target specific users based on their logged-in status or role like WPCode allows, though you can access this feature by paying for the premium version of Header Footer Code Manager.
To get started, install and activate the plugin and then go to HFCM → Add New in your WP Admin:

Now, you should be in the interface where you can add your snippet.
At the top, you can use the box to configure details about your snippet:
- Snippet Name – an internal name to help you remember it.
- Snippet Type – set equal to JavaScript.
- Site Display – choose to display it sitewide or only on certain content.
- Exclude Pages / Posts – manually exclude certain content from having the snippet.
- Location – choose to add it in the header or footer.
- Device Display – only add the snippet for users with certain devices.
- Status – set to Active if you want to make this snippet live.
Below that, you can add your actual snippet into the Snippet / Code box.

When you’re finished, make sure to click the Save button at the bottom of the interface.
You can then repeat the process to add more JavaScript snippets as needed.
Summary
Adding JavaScript to WordPress opens up a lot of flexibility for your site. You can use it to add tracking scripts or integrate third-party services.
Or, you can add your own custom JavaScript (or hire a developer to help you do that).
For most WordPress users, using one of the WordPress JavaScript plugins is the best way to get started.
However, if you prefer the DIY approach, you can also manually add JavaScript using a child theme or a custom plugin.
If you want the ability to use these JavaScript plugins on your WordPress.com site, you’ll need to be on at least the WordPress.com Business plan so that you’re able to install your own custom plugins.
Sign up or upgrade today, and you can be adding JavaScript to WordPress in no time.
Want more tips? Get new post notifications emailed to you.

