When adding blocks of content using the WordPress editor, you can customize how that content looks. This guide will show you how to access each block’s settings and customization options.
The first step is to select the block you want to customize. Select a block by clicking on the block or using List View to find a specific block.
You can then access the block’s customization options in two places: the block toolbar and the block settings:
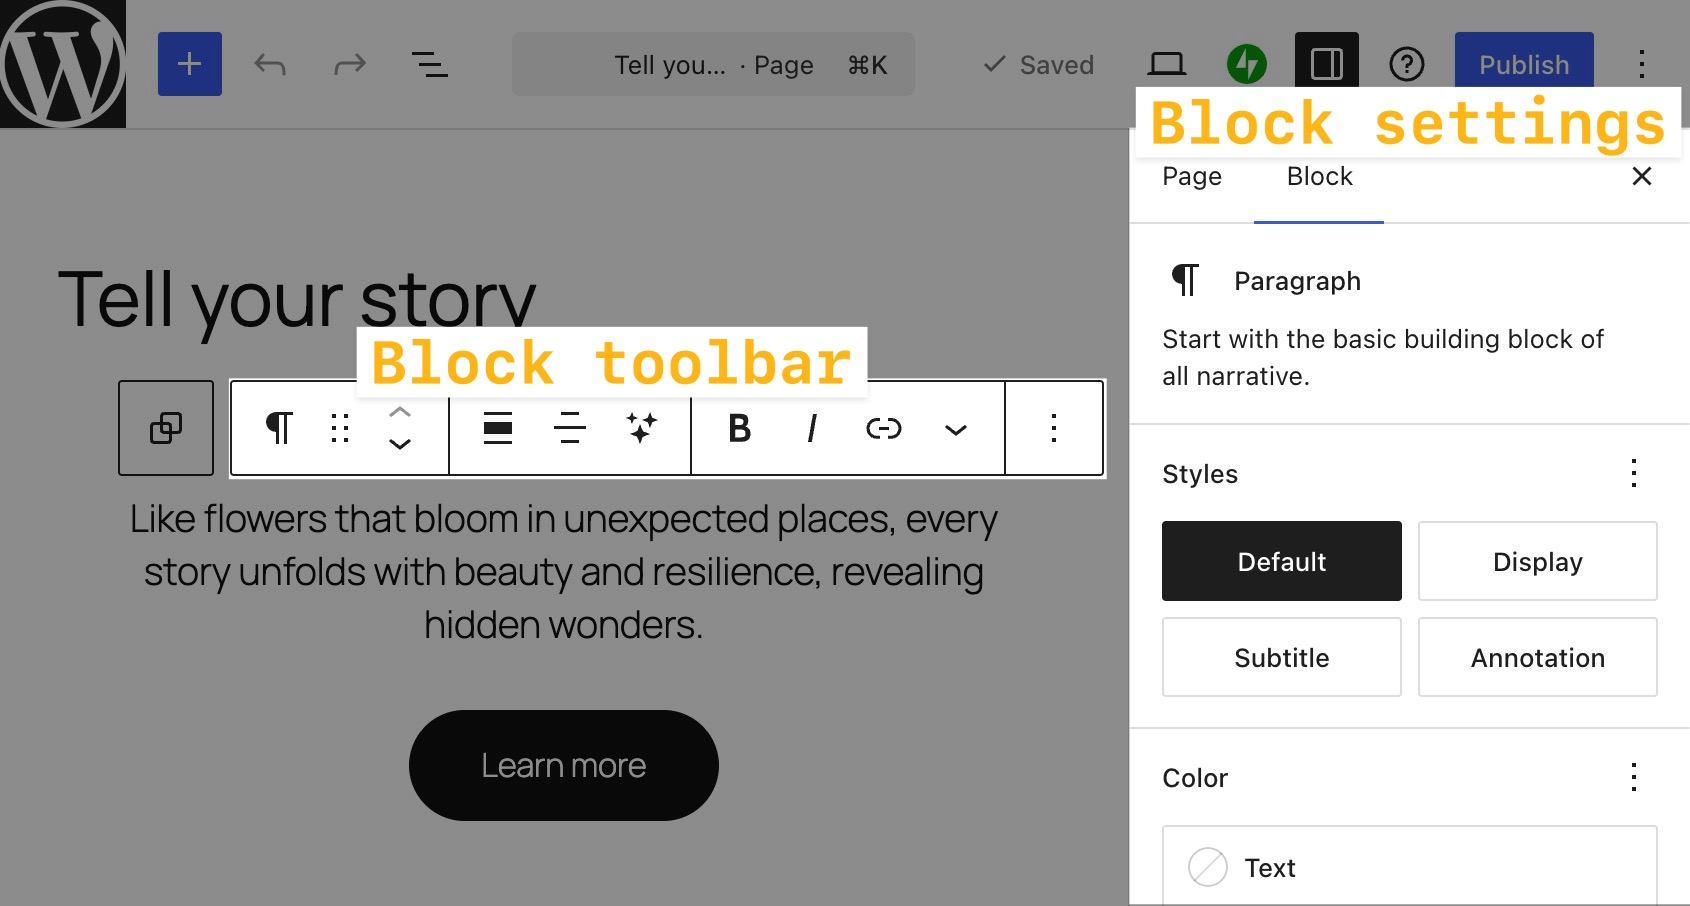
When you click on a block, the block’s toolbar will appear above or below it. The toolbar contains essential options for working with that block:

Some options will show in most blocks’ toolbars. These are explained below:

- Transform: Change a block to a similar block type. For example, if you add an Image block and want to change it to a Gallery block, clicking this icon will give you the option. Click here to learn more.
- Drag: Click and hold the icon that looks like six dots to drag the block to another section of the page.
- Move up/down: Click the up or down arrow to move the block up/down one position on the page.
- Alignment: Change the positioning of the block. If available, you will usually find left, right, and center, as well as wide and full width if supported by your theme.
- More Options: The three vertical dots at the end of the toolbar opens a menu with additional settings:
- Copy: Make a copy of the block to your clipboard, which you can then paste elsewhere.
- Cut: Move the selected block to your clipboard, removing it from its original location so you can paste it elsewhere.
- Duplicate: Create a copy of the block directly below the original.
- Add before: Create a space above the current block to add a new block.
- Add after: Create a space under the current block to add a new block.
- Add note: Add a note to collaborate with other authors.
- Copy styles: Copy the Styles used on the block.
- Paste styles: After copying a block’s Styles, paste those Styles onto the selected block.
- Group/Ungroup: Using this option, you can group multiple blocks together – useful for applying colors and padding to a set of blocks. More on Group blocks.
- Lock: Disable the option to move and/or delete the block.
- Rename: Assign a new name to a block as it appears in List View.
- Hide: Open the “Hide block” dialog, where you can hide the block on specific devices — “Hide on Desktop”, “Hide on Tablet”, or “Hide on Mobile”. You can also check “Omit from published content” to remove the block from your published page on all devices. Hidden blocks appear in List View with a visibility indicator. Learn more about hiding blocks on specific devices.
- Create Pattern: Save the block with your customizations so you can add it to other areas throughout your site. More on pattern blocks.
- Set as featured image: Specific to the Image block, choose the image as your page/post’s featured image.
- Move to: Click this option, and then click on another section of your page to move the block to that section of the page.
- Edit as HTML: Edit the block content in HTML.
- Delete: Removes the current block from your page.
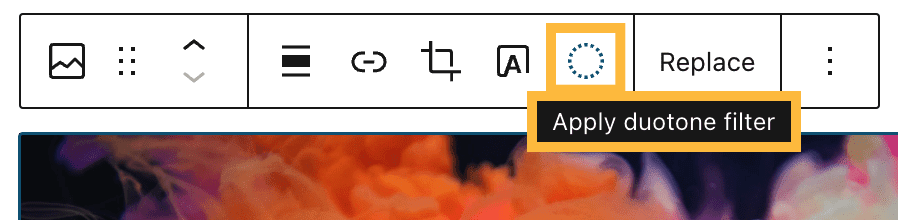
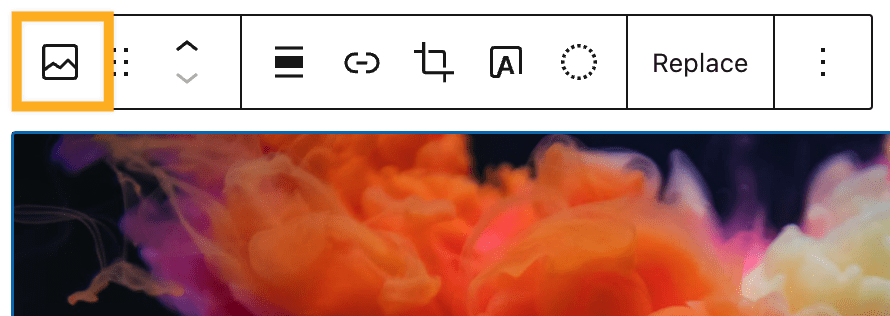
Each block will also have its own toolbar options specific to that block. For example, the Image block toolbar contains settings to add a link, crop the image, and more:

Hover over the icons in your Block Toolbar to display a tool tip explaining what each icon does:
Each block has a guide you can view to learn more about each setting.
By default, the block toolbar will appear directly above or below the block you’re working on:

You can pin the block toolbar to the top of the screen instead, with the following steps:
- While in the editor, click the ellipses (three dots) in the upper right corner of the screen to open the editor preferences.
- Click the “Top Toolbar” option. A check mark will appear next to it to show that it is enabled.
- Block toolbars will now be fixed to the top of the screen:

The Block Settings sidebar contains more customization options for the block you’re working on. Each block has its own settings that you can find in the settings sidebar.
To open the Block Settings sidebar:
- Select the block you want to customize.
- Click the Settings icon in the top-right corner of the editor. This icon looks like a square with two uneven columns:
- Click the Block tab at the top of the sidebar to view the selected block’s settings.
Many blocks contain settings for color, typography, dimensions, and advanced block settings. Each block also has a guide you can view to learn more about each block-specific setting.
Many blocks include Styles settings to change the color, typography, dimensions, and more.
In some cases, the style settings will be in the main block settings sidebar. Most blocks will have a separate tab for styles, represented by a black and white circle.
If you have added a block and want to change it to a different type of block, you can use the transform option:
- Select the block you want to change.
- Click on the Transform option, which is the first option in the block toolbar:
- Select from one of the blocks in the Transform To drop-down list.
- If the block you wish to transform to is not shown in the list, it means the block cannot be transformed to this block. Instead, remove the block and add your desired block as a new block.
In this example, we can change a Paragraph block to a different type of text-based block (such as a heading or list):

![]()
This section applies to sites created with the AI Website Builder (all paid plans) or sites that have enabled the AI assistant (Business and Commerce plans). Open the AI assistant by clicking the AI icon (a four-pointed star) at the bottom of the screen.
The AI assistant on WordPress.com can help you adjust and improve the appearance of your blocks. Here are some sample prompts you can copy and use:
- “Suggest a color scheme for my homepage that matches my logo colors.”
- “What font sizes should I use for headings and body text on a professional site?”
- “Center all image blocks on my About page.”
- “Add padding of 40 pixels to all section blocks on my homepage.”
![]()
You can use AI agents like Claude, Cursor, ChatGPT, and more to read and edit your website securely. Enable MCP tool access for AI agents.
You can use AI agents like Claude to update block settings across your site. After enabling MCP tool access, try a prompt, and your AI agent will make the changes on your site for you to review.
Here are more prompts to try:
- “Set all heading blocks on my homepage to use the Large font size.”
- “Change the button style on my Services page to use the outline design.”
- “Suggest how to style this call-to-action block to stand out more.”
- “Change the background color of the Cover block on my homepage to dark blue.”
