When you start a new site, a menu is created for you automatically. However, if you need to add a new menu from scratch, this guide will show you how.
📌
To determine which section of this guide to follow, visit your dashboard and check under Appearance on the left side. If you see Editor, use the Site Editor section of this guide. Otherwise, use the WP Admin or Customizer instructions.
In this guide
In the Site Editor, your menu comes from the Navigation block. Follow these steps to make a new menu.
- Visit your site’s dashboard.
- Navigate to Appearance → Editor.
- Select the Template or Template Part you want the navigation menu to appear.
- Click the + Block Inserter icon.
- Use the search field in the block inserter to search for “navigation”
- Click the Navigation block to add the block to your site.
If your site is new, or if you want to create a different menu from the one that was pre-selected when you added the Navigation block, you can do that by following the steps below:
- Visit your site’s dashboard.
- Navigate to Appearance → Editor.
- Select the Template or Template Part you want the navigation menu to appear.
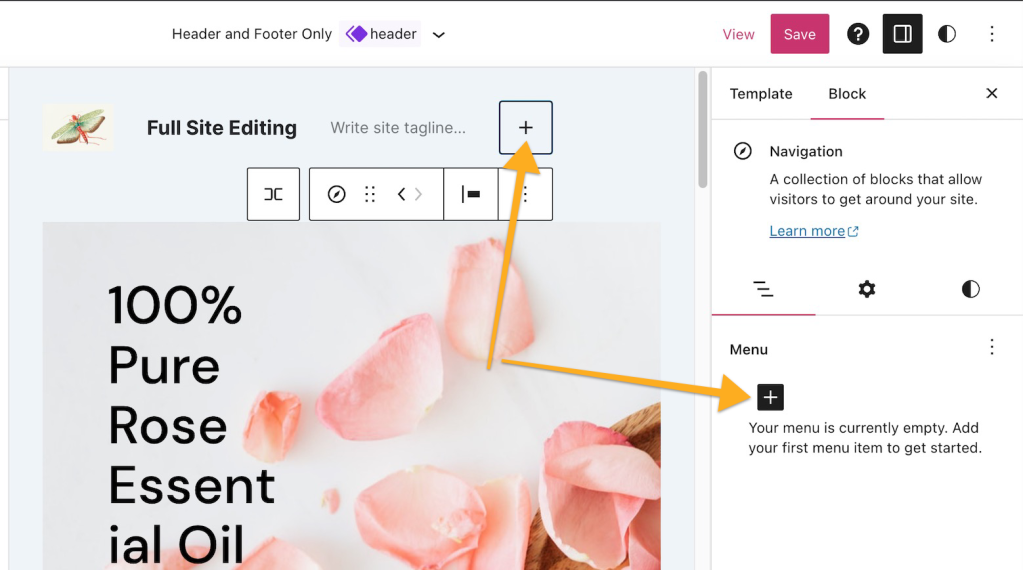
- Click on the existing menu on the page.
- Click the Settings icon in the top right corner of the editor to open up the sidebar settings area. This icon looks like a square with two uneven columns.
- In the sidebar settings on the right, where it says Menu, click on the three dots/ellipses icon.
- Scroll to the bottom of the popup and click the “Create new menu” link.
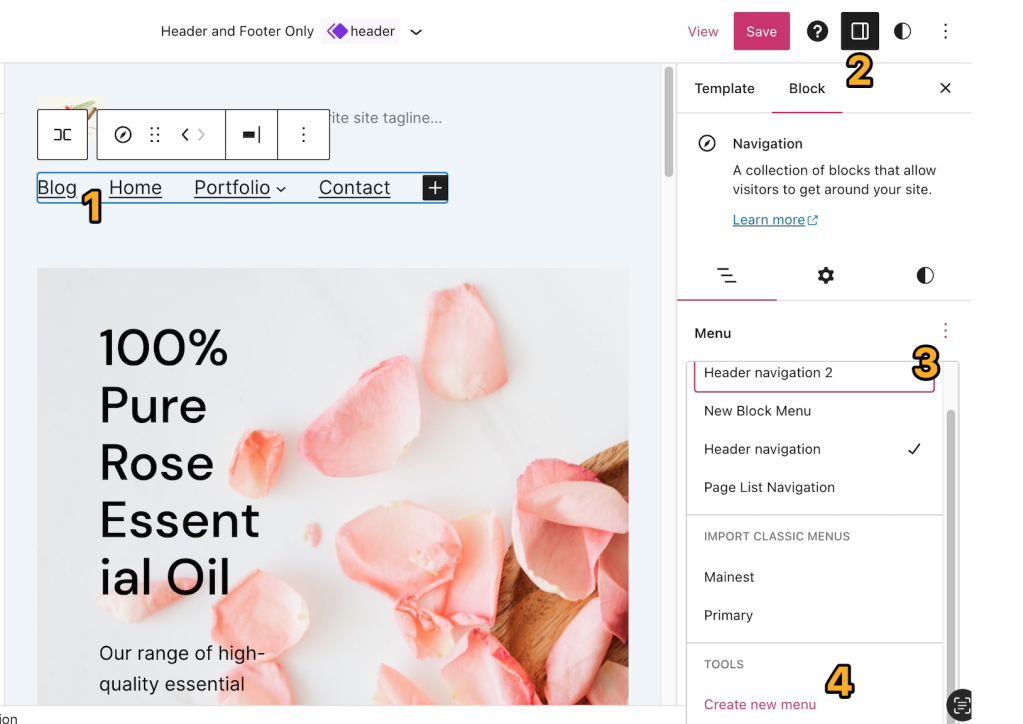
- After you click on the “Create new menu” link, the existing menu will be removed from the page, and a new, empty Navigation block will be added in its place.
- The new menu will automatically be named Navigation or Header navigation. You can change this name later in the Advanced section of the Navigation block settings.
- Click the + Block Inserter to begin adding new menu items to the Navigation block:
- When you’ve finished adding the menu items, click Save in the top right corner of the editor to update the page and save your new menu.
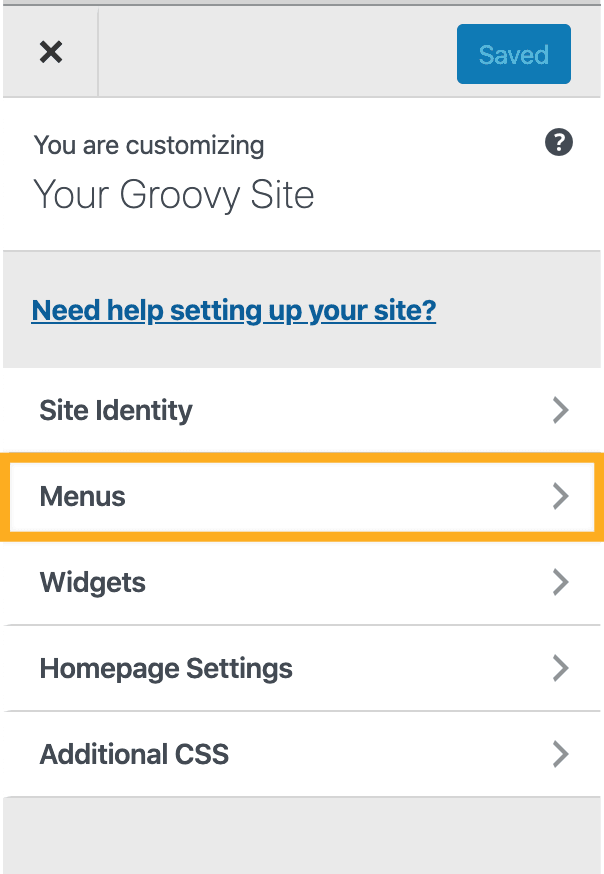
In most cases, you will create your site’s menu using the Site Editor described above. However, if your site uses a classic or third-party theme, you may need to use WP-Admin or the Customizer to edit your menus.
Select the appropriate tab for your interface:
- Visit your dashboard.
- Go to Appearance → Menus
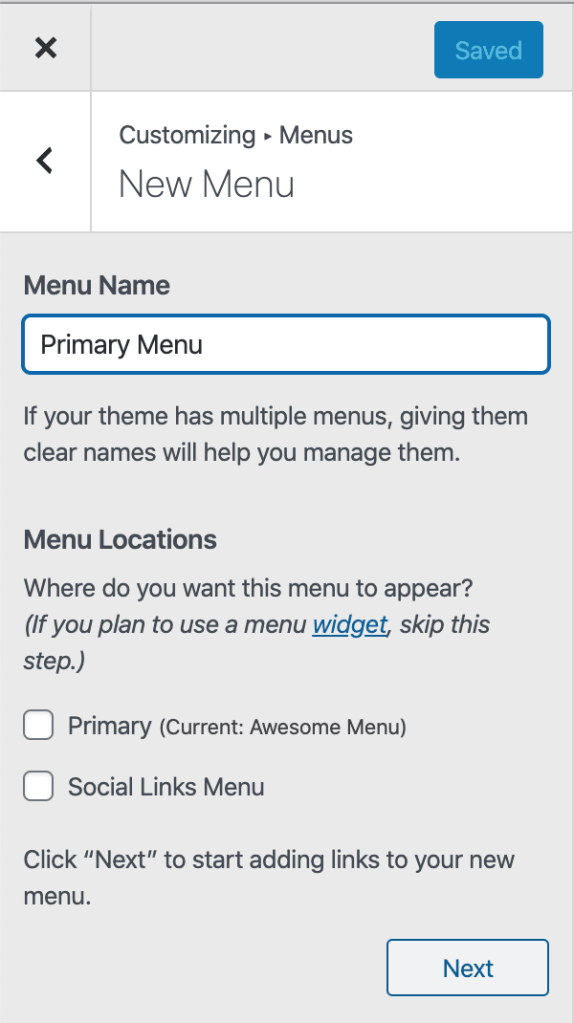
- Click the create a new menu link, and type in a name for your menu (to help you remember what it is).
- Click Create Menu.
- Auto add pages: If checked, new pages will be added automatically when you create them.
- Theme locations: Allows you to decide where your custom menu will appear in your theme. By default, your menu will appear in your theme’s main navigation area. However, you can select a different location if your theme allows for it.
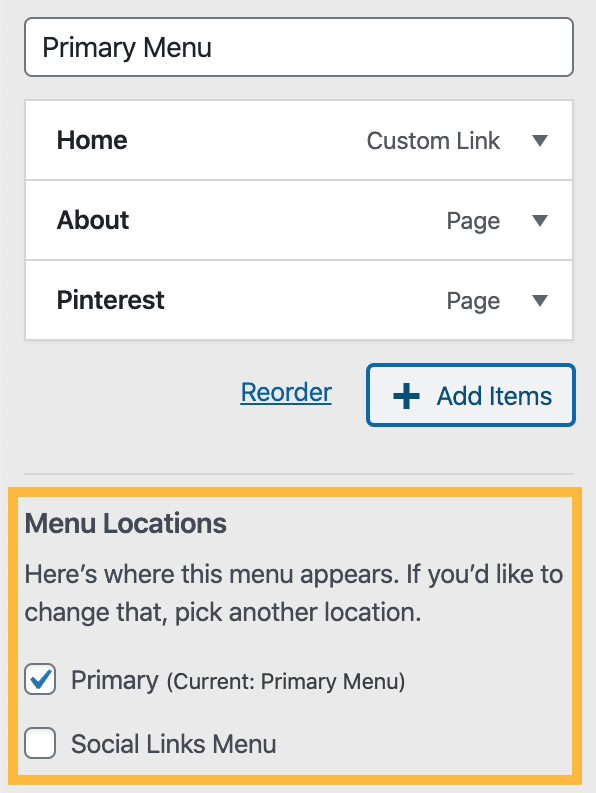
After you make your first menu, you will notice that two new options appear: