You can create a subdomain of any domain you own. This guide will show you how to connect a subdomain to an external website.
A subdomain has an extra piece of text before your main domain (called the root domain.) For example, if your root domain is yourgroovydomain.com, you can create subdomains such as shop.yourgroovydomain.com and members.yourgroovydomain.com.
This guide will teach you how to set up a subdomain to point to an external hosting provider. If your root domain is registered or connected to WordPress.com, you can connect a subdomain to an external site using a CNAME, A record, or Nameservers.
If you want to create a subdomain for a specific landing page, our subdomain forwarding guide will help you through the process. If you want to connect a subdomain to a website hosted on WordPress.com, see Connect a Subdomain to WordPress.com.
You must obtain the DNS records (CNAME, A, or NS) from the hosting provider or service where the subdomain will point to.
Check your external hosting provider’s support documentation, or contact their support team to determine which DNS record(s) you need to set up a subdomain that points to their platform.
Once you have obtained the DNS records from your hosting provider, navigate back to WordPress.com and follow these steps to create the subdomain:
- Visit your WordPress.com dashboard.
- Navigate to Upgrades → Domains (or Hosting → Domains if using WP-Admin).
- Select the root domain (i.e., the domain to which you wish to add the subdomain.)
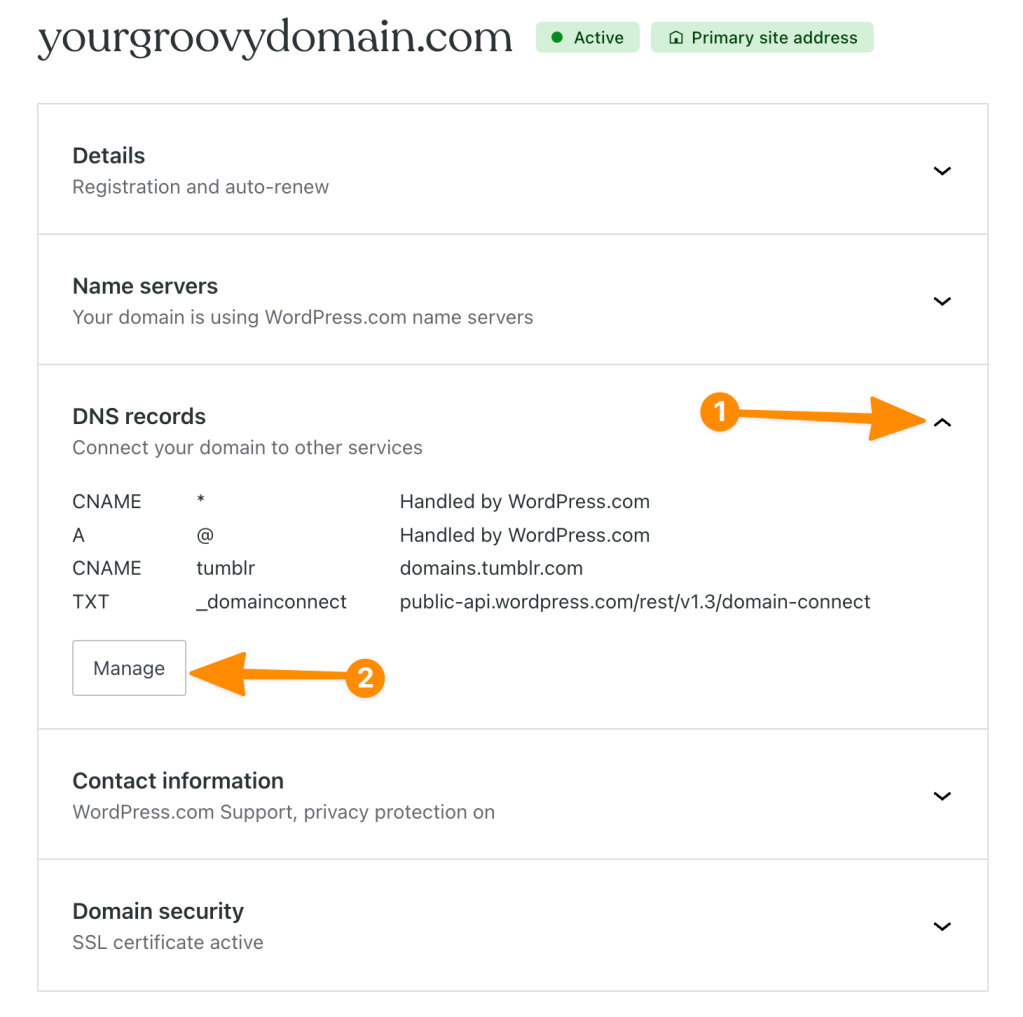
- Click “DNS Records” and then the “Manage” button:
- Click “Add a record” in the upper right corner.
- In the Type dropdown, select the type of your DNS record (typically a CNAME, A, or NS record).
- In the Name box, type what you want the subdomain to be.
- In the Points to box, enter the value provided by the service you’re connecting to.
- If you add a name server (NS) record, the field will be labeled Host instead of Points to.
- In the TTL (time to live) box, enter the provided TTL value or leave the default 3600.
- Keep in mind that TTL is measured in seconds, so a TTL value of 3600 = 3600 seconds, or 1 hour.
- Click the “Add DNS Record” button.
Your subdomain is created once you add the required DNS record(s) to your root domain. You may need to take additional steps with the hosting provider/ external platform to finish the subdomain connection.
