
When you activate a theme on your WordPress.com website, you’ll need to get rid of the dummy text and generic images and fill your pages with content that represents your brand. Fortunately, the WordPress.com Customizer streamlines the entire process.
Choose a theme
When you log in to your WordPress.com account and click on the My Site tab in the upper left-hand corner, you’ll see a menu down the left side of the page.
In this menu, scroll down to Customize.

To choose a theme, click on the Theme button.
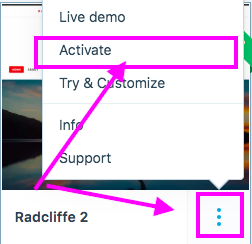
Scroll through until you find the theme most similar to how you want your website to look. When you find the one you want, click on the three little dots on the lower right-hand corner, then select Activate. You can also test a theme before activating by clicking Try & Customize.
Launch the Customizer
When you click on the Customize menu option, your website will launch with a menu bar on the left side. This menu bar isn’t a part of your website; it’s the Customizer itself, which lets you make modifications to your WordPress.com website and see the updates in real time.
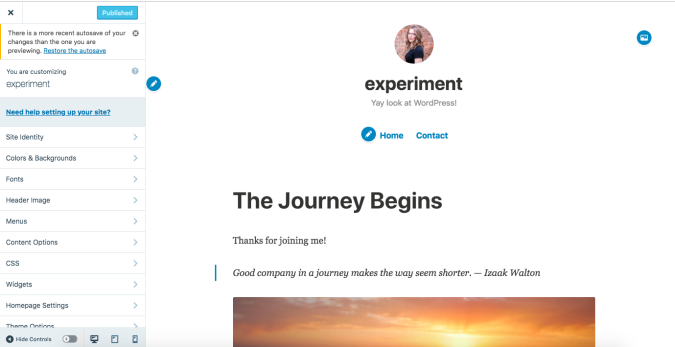
Once you update the five sections below, you’ll have a website that looks and feels the way you want it to, ready to be filled with content.
1. Site identity
Site Identity is where you enter the most basic information for your website. Here, you can update your logo, tagline, website title, and even the little favicon that shows up on your website’s tab in a visitor’s browser.

Here’s how the experimental website looks different after updating this information:

There’s clearly some progress — but you’d still want to add a little more to make it the perfect website, right?
2. Colors and backgrounds
Under this section in your WordPress.com Customizer, you can choose a background image for the top of your website, as well as a color palette for the entire site.

It’s a good idea to upload your background image first. That way, the color palette options will better reflect your brand colors. Or, you can select your own colors, as shown in the image above.
Now, things are really starting to take shape:

3. Fonts
Font choice is exactly what it sounds like: select new fonts to give your site the look and feel you want.

4. Header image
Header Image is the place where you can change the background of your header if you want to. You can use one of the free headers available, or upload your own.
Here’s what it looks like with one of the freebies:

Your website, your design
Now that you’ve done all of that, you can fill your new website with content. Of course, your perfect website design may look very different from this one. But that’s the beauty of the WordPress.com Customizer: you can tweak and make adjustments until it looks perfect to you.

