
While WordPress.com makes it easy to build a website, keeping content organized can be challenging. A site without a well-structured taxonomy is difficult for both human visitors and search engine crawlers to explore. By logically classifying content, you’ll have happier visitors who are more likely to take the actions you want, and a better chance at climbing search engine rankings.
In this article, you’ll learn:
- What the phrase “website taxonomy” refers to and why it’s important.
- How to specifically set up WordPress taxonomies to organize your site’s content.
- How to handle redirects and other issues that could impact your taxonomy.
- What is Website Taxonomy?
- How to Use WordPress Taxonomies (or Create a Custom Taxonomy)
- Organize Your Website More Effectively
- What are website redirects, and why do you need them?
- Types of website redirects
- Now You’re a Taxonomy Expert

What is Website Taxonomy?
The word taxonomy means a system of classification. As it relates to websites, taxonomy is how pages are organized under a domain.
Most content on a website is already organized to some extent. All blog posts are usually in one area, while all product pages are typically in another. In essence, that’s all website taxonomy is: organization of content.
Grouping similar content together, using logical pathways, and maintaining consistent URL syntax all play a role in making a site easy to navigate.
Consider this example of WordPress taxonomy for an online clothing store:

This is a pretty standard hierarchical structure with different pages under distinct umbrellas. The menus to navigate these pages should ideally follow the same pattern for consistency and ease of use.
Plus, with consistent URLs, visitors should be able to guess the address of one page based on the syntax of another. Take a look at this URL from WordPress.org:

Can you guess the URL for the Jetpack plugin? Swap “/mailpoet” with “/jetpack” and you’ll be taken right to it. Creating a simple hierarchy of subdomains and consistent syntax is key to good website taxonomy.
While hierarchical structures are common, they aren’t the only or best solutions. Other common taxonomy structures include:
- Flat: Most pages are accessible from a single menu or landing page. This structure is usually only viable for smaller websites.
- Network: Different landing pages provide access to several pages of related content. These are individual hubs surrounded by many pages.
- Facet: Some aspects of similar content can filter results. For example, a clothing store might group content by clothing type, color, and brand. This structure results in different options for accessing the same content.
The most important thing for website taxonomy is for the structure to make sense. You want visitors to easily find what they’re looking for, so none of your content gets lost in your growing site.
A good taxonomy isn’t just about the user experience, though that’s certainly important. It also helps search engines better understand your website content and how it’s structured. It gives you the opportunity to associate specific keywords with the content on your site by grouping it appropriately. For example, a category called “Rock Music” might aggregate all of the content around that topic in one place while telling search engines exactly where to find content around rock music.
How to Use WordPress Taxonomies (or Create a Custom Taxonomy)
WordPress has some built-in tools to help you organize content. You can also create custom taxonomies or take advantage of advanced options for distinct purposes — like organizing an eCommerce store built with WooCommerce. We’ll go over the basics to get you on the right path.
1. Use Categories and Tags
Categories and tags are two options to organize content within WordPress.
Categories are broad umbrellas you can use to group similar posts. For example, a food blog might put all recipe posts under a Recipe category to distinguish them from posts about restaurant recommendations.
Tags are more specific, identifying key components of individual posts. As an example, some posts under the Recipe category might have tags for Breakfast, Vegan, and Banana to more accurately describe the post’s content.
In other words, tags and categories help you create a taxonomy.

From the Jetpack blog
Most WordPress themes automatically create an archive page for all your posts, along with your categories and tags. So an archive page for the Recipe category will show all the posts that fall into that grouping. An archive page for the Vegan tag will show all the posts that are tagged as Vegan.
You can also create a navigation menu using categories and tags to help your visitors browse. Here’s an example from Jetpack:

This example is in the sidebar of a site. But you could add Tags and Categories to your main menu, your footer, or anywhere else that make sense for your specific site.
2. Use Custom Taxonomies
If you have a plugin-enabled WordPress.com plan, you can create unique taxonomies using a plugin or custom code. Since custom code can get tricky unless you’re an experienced developer, we’ll show you how to add taxonomies with a plugin.
The Pods plugin is one great tool you can use, allowing you to create custom taxonomies, post types, and content types.

For instance, a book review blog could create a new Genre taxonomy to help organize the specific content that they create. The resulting website taxonomy might look like this:
- Categories: Book reviews, writing tips, upcoming releases
- Genre: Fantasy, sci-fi, horror
- Tags: Review scores and author names
Making custom taxonomies saves you from having to fit all of your content into just categories and tags. All you have to do is fill out this form and let the plugin do the work:

If you are familiar with coding and want to create taxonomies with custom code instead, this method allows you to create taxonomy slugs that will be included in your URL. This approach can be more technical and time-intensive, but gives you greater control.
3. Use WooCommerce Taxonomies
Additionally, online stores can use WooCommerce taxonomies to better organize content. These are included with the plugin automatically, and most stores can take advantage of them.
Here are some of the taxonomies and post types included with WooCommerce:
- Products
- Product categories
- Product tags
- Product variations
These can be incredibly helpful to guide shoppers through your product catalog, especially if you have a lot of items. For example, if you sell kids’ clothing, you might group your pieces into categories like t-shirts, pants, and sweatshirts. You could use tags to help visitors sort clothing by features like gender and age range (baby, toddler, big kid). And each individual t-shirt might have variations for size and color.
So if a parent is looking for a pair of khaki shorts for their son, they could narrow down the product list to Toddler → Boy → Pants → 2T → Khaki. That would help them find the specific item they’re looking for almost immediately.
WooCommerce also includes custom taxonomies that are more for backend use, such as shop orders, product visibility, order status, and coupon. While these won’t necessarily help website visitors navigate your content, they can be very useful for internal operations.
If you want to take things one step further, you can create custom WooCommerce taxonomies that are specific to your store with a plugin like Custom Post Type UI. You might want to do this if you offer a wide range of items and want to get as granular as possible. For example, the kids’ clothing store might create a custom taxonomy for Season, with options for Spring, Summer, Fall, and Winter.

Once you’ve installed and activated the plugin, simply navigate to CPT UI → Add/Edit Taxonomies.

Here you’ll need to add a slug, plural label, and singular label for your custom taxonomy. You’ll also need to link it to the Products post type. Just remember to Save when you’re done.
4. Set Up Breadcrumbs
Breadcrumbs are a secondary type of navigation that help visitors know where they are on your site in relation to other pages and posts. They help people find their way back to previous content, just as breadcrumbs helped Hansel and Gretel make their way home in the classic fairytale.
Here’s an example of breadcrumbs in use on the Sequential theme’s demo:

A visitor can see that they’re currently on a page titled Full-Width Page. Then they can click the links to navigate back to Page Templates or Home.
In addition to improving your site navigation, breadcrumbs are great for your search engine rankings. Why? Well, first of all, Google loves anything that improves the user experience of your website. But they also provide additional information about your website structure, helping crawlers understand how content is related to each other.
Some WordPress themes include breadcrumbs by default. You can find this setting under Appearance → Customize → Breadcrumbs.
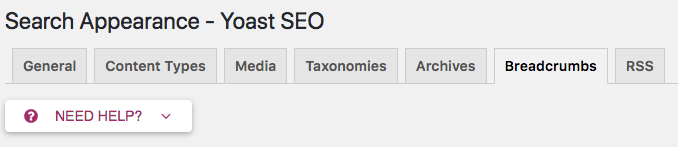
Alternatively, if you use an SEO plugin like Yoast SEO, you can turn on breadcrumbs regardless of the theme you’re using. Simply click on Search Appearance under the SEO tab on the left-hand side of your dashboard.
Now, select the Breadcrumbs tab.
Finally, scroll down to the bottom, toggle breadcrumbs on, and be sure to save your changes.

Organize Your Website More Effectively
Planning and organization can go a long way when building a website. Good taxonomy ensures visitors and search engines can quickly find the content they’re looking for and understand how it’s related across your site.
While it’s best to plan your taxonomy when first building your website, it’s never too late to go back and restructure. Improving how visitors and search engines navigate your site can significantly impact its usability.
Have you recently moved your content from one URL to another? If so, then one of the most important things you need to be using is website redirects. Here’s an introduction to what redirects are, why you need them, and the different types you’ll come across.
What are website redirects, and why do you need them?
Websites and URLs evolve over time for several reasons. This happens when you reorganize and update a site and when you change domains. If someone visits one of your old pages that have either been removed or brought over to a different location, then a website redirect keeps that visitor from getting lost by taking them to the new location of that page. In addition to getting your visitors to the correct page, according to SE Ranking website redirects also help you maintain your current search engine ranking even after you’ve made a change to your website.
If potential visitors search for your web page and come across old URLs that have been replaced, those visitors will receive a 404 error page and be told that the page no longer exists. Receiving a 404 error page isn’t a great user experience, and it’s likely that these visitors may not return to your website. This can also happen if any of your old URLs are referenced on other websites and printed materials and are bookmarked by users.
Types of website redirects
There are several types of redirects and each one has its own purpose. They generally fall under two main categories: temporary and permanent.
Temporary redirects
The various types of temporary website redirects include 302, 303, and 307. Anytime you want to move a website or URL for a short amount of time, then you should set up a temporary redirect. Temporary redirects are also used to let visitors know that the page they’re searching for was found but is currently not here. Temporary redirects can also be used to house sensitive information for a very short period of time, like any page that takes payment information. These types of redirects are typically created by web developers, computer programmers, and search engine optimization professionals.
Permanent redirects
Website redirects 301 and 308 are permanent and act the same way the postal service treats your mail when you move to a new home. These redirects tell search engines that the domain and URL have changed and to take all of the current page ranks and links from the old website to the new website. This ensures that you still receive all of the traffic you would’ve received before the domain and URL change. Typically, 308 redirects are only created by web developers, while the 301 redirect is the most popular one used by day-to-day website owners.
So, whether you’ve started with one domain name and decided you don’t like it anymore or you want to upgrade from an older site to a WordPress.com website, it’s critical to have proper redirects in place anytime you’re making a change that involves moving one URL to a different one. Having these in place ensures that you don’t lose any of the page rank you’ve worked hard for, that visitors who come across an old URL get to the right place, and that the content you’ve created is read — even after it’s been moved.
Now You’re a Taxonomy Expert
Understanding how website taxonomies work can be confusing. They also require careful consideration to make sure your site’s content is well organized and easy to find. Now that you’ve read this article, you know everything you need to know to avoid common problems and set up your site for success.

