
Ever wished that you could customize your WooCommerce store’s emails using a visual builder? You probably also hoped you could ensure your customers actually receive them.
If you have a WooCommerce store, your store needs to send a lot of emails for order confirmations, shipment notifications, password resets, and so on.
These are transactional emails and, while they’re not especially exciting, they’re essential to the functioning of your store.
It’s crucial that they make it to your shoppers’ inboxes, and it’s also important that they reflect your store’s branding to create a cohesive design.
In this post, you’ll learn how you can improve your WooCommerce store’s transactional emails to ensure an excellent experience for your shoppers.
More specifically, you’ll learn how to use one simple plugin to customize WooCommerce emails and fix any issues you might be experiencing with WooCommerce emails not sending.
And best of all, all the tactics in this post require zero code or technical knowledge to implement. You’ll be able to do everything from a simple, user-friendly dashboard.
Ready to get started? Let’s dig in…
Introducing MailPoet: The Easy Solution for WooCommerce Emails
To improve all aspects of your WooCommerce store’s emails, you can use MailPoet.
MailPoet is a total solution for WooCommerce emails (and WordPress emails in general).
Without leaving your WP Admin, it lets you build email lists, manage your email subscribers, and send your customers emails using a visual, drag-and-drop email builder.
In terms of improving your WooCommerce store’s transactional emails, MailPoet has two useful features.
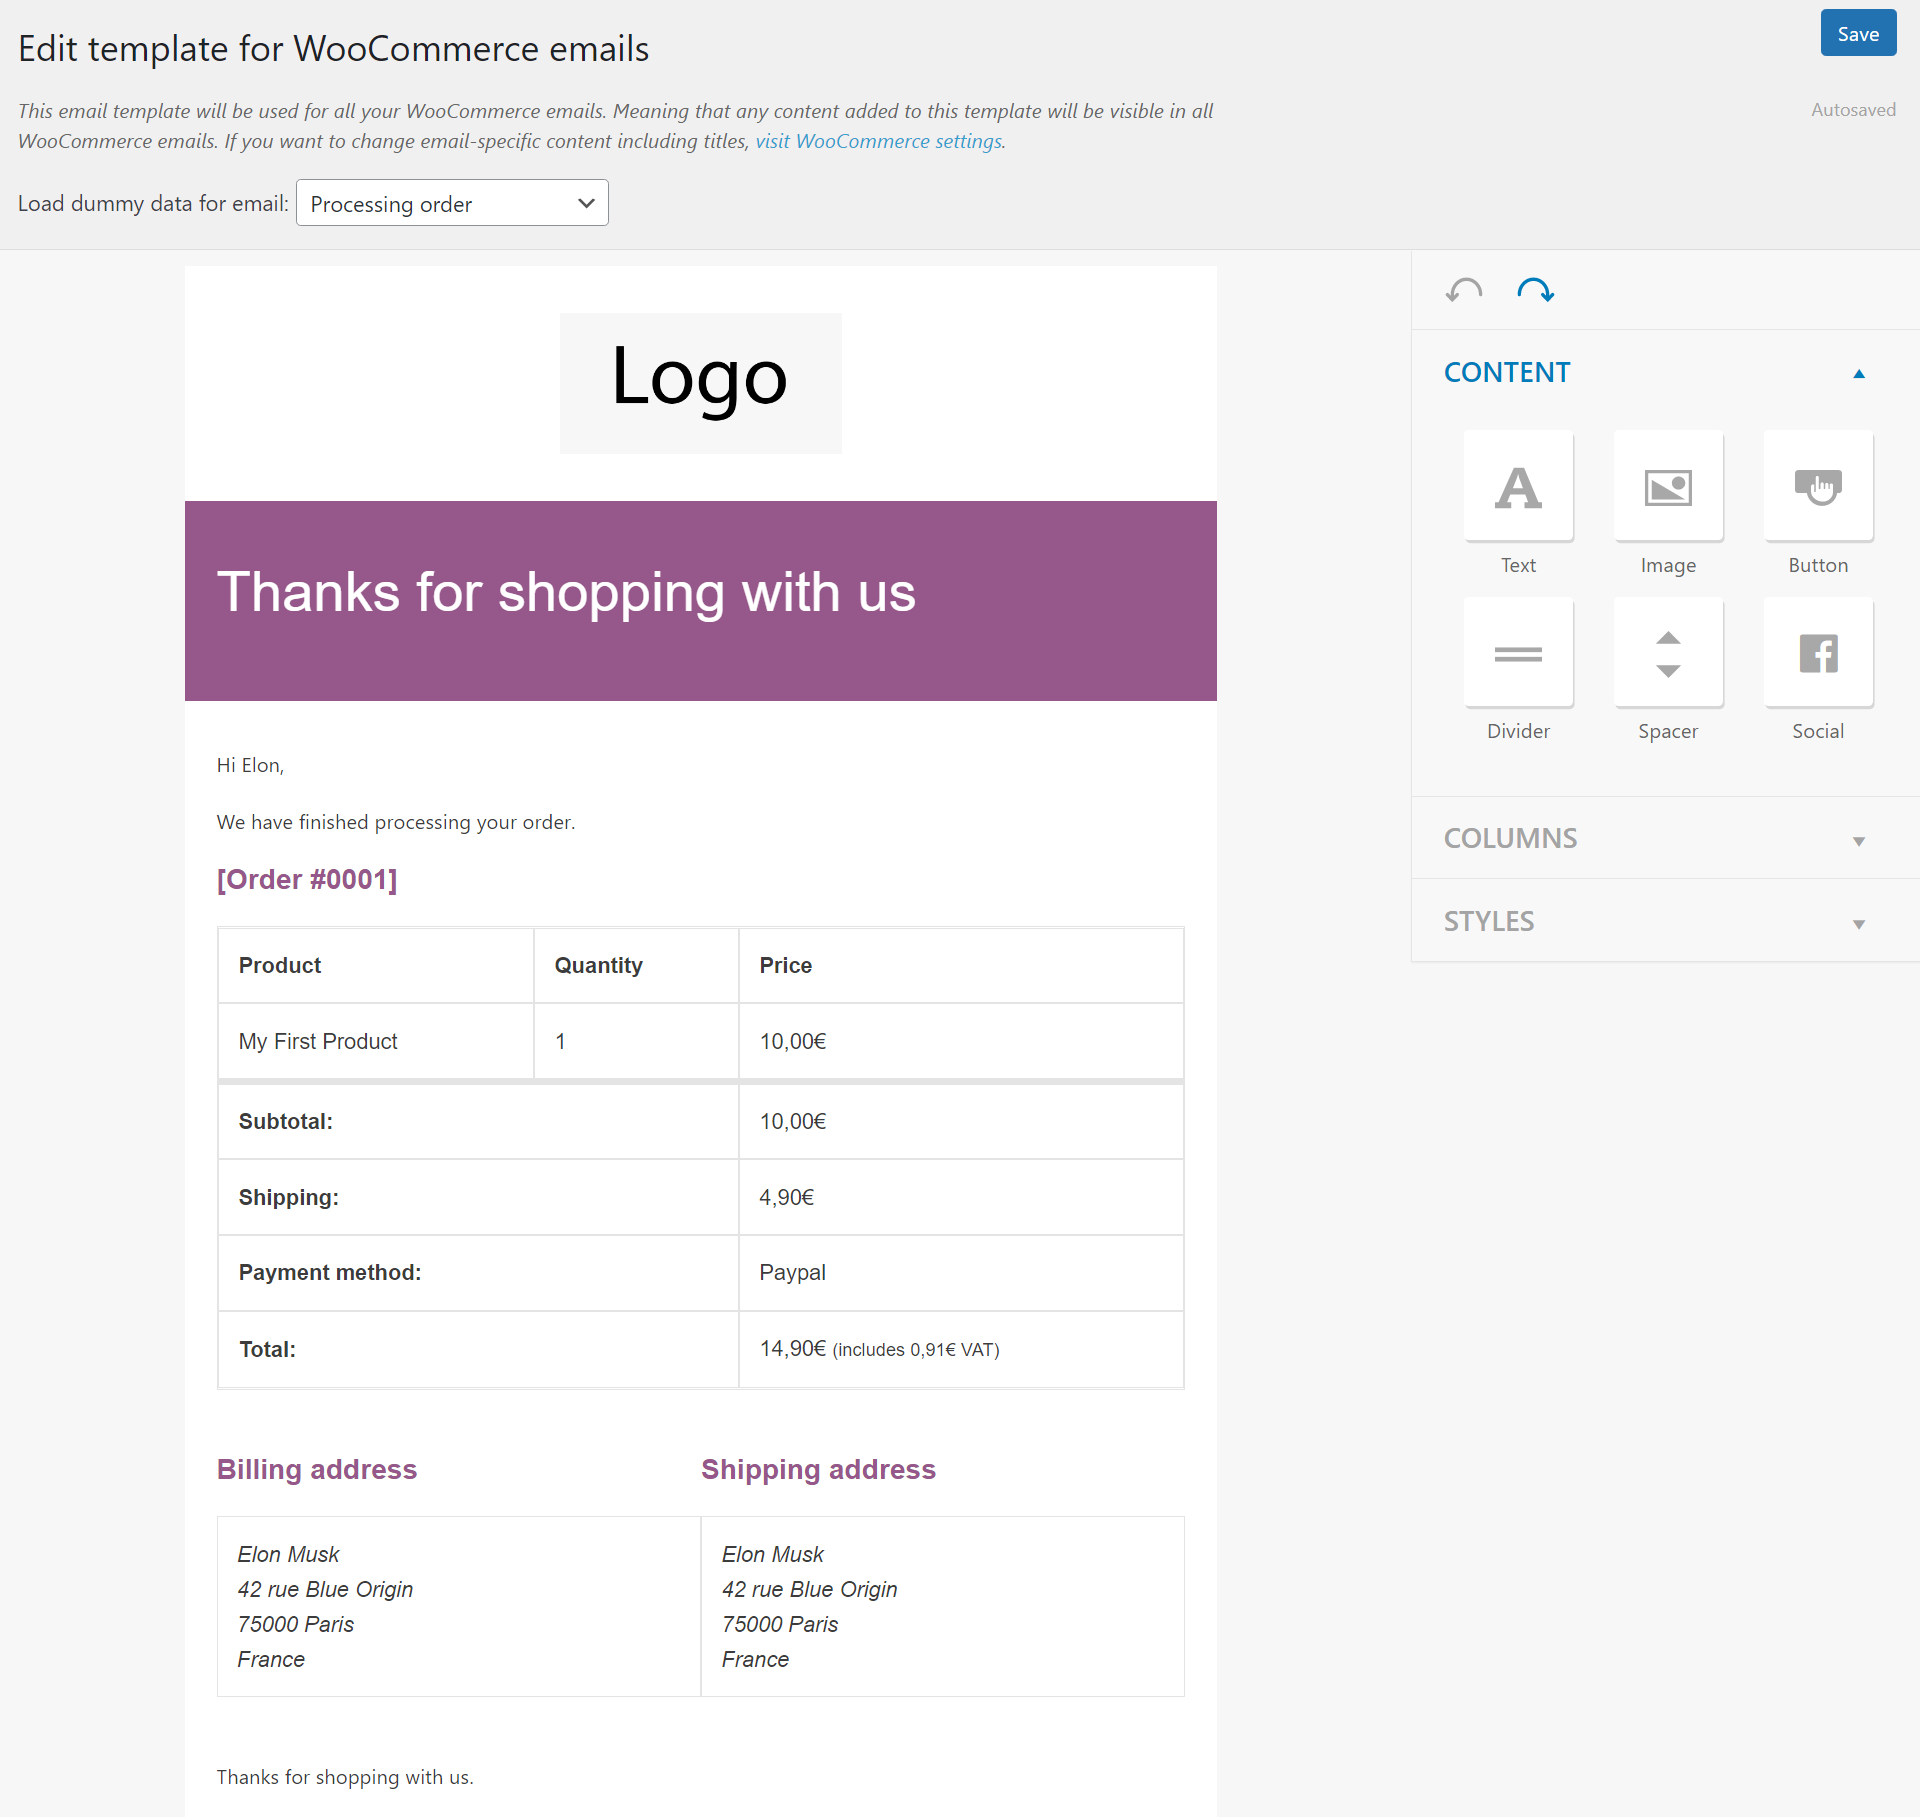
First, it offers an email customizer that lets you customize WooCommerce emails using a visual, drag-and-drop builder like this:
Second, MailPoet has its own built-in email sending service that you can use to deliver all of your store’s emails.
We’ll talk about why this is important later, but the basic idea here is that this service offers a simple way to fix any issues you’re having with WooCommerce emails not sending.
Beyond these two improvements to transactional emails, MailPoet also offers many features to improve your WooCommerce email marketing efforts, including the option to set up email automation for abandoned cart reminders, post-purchase follow-ups, and more.
Those types of marketing emails aren’t the focus of this post, but check out this post on using MailPoet for email marketing if you’re interested in learning more.
MailPoet has a plugin-enabled plan that lets you send unlimited emails to up to 1,000 customers, which might be all you need for many WooCommerce stores. If your store outgrows the plugin-enabled plan (that’s a great thing!), the paid plans start at €13 per month.
How to Set Up MailPoet on Your WooCommerce Store
In this first section, you’ll learn how to set up the MailPoet plugin on your store. Then, in the following two sections, you’ll learn how to customize WooCommerce emails and improve their deliverability.
To get started, install the free MailPoet plugin at your WooCommerce store. You can read this post to learn how to install WordPress plugins.
Once you activate the plugin, you can go to the new MailPoet tab in your WP Admin to follow the plugin’s short setup wizard.
First, you’ll need to enter the “From Name and “From Address” for your store. These are the details that your customers will see when they receive emails from your store:

You’ll also get a few optional steps, such as enrolling in a free course from MailPoet or enabling anonymous usage tracking.
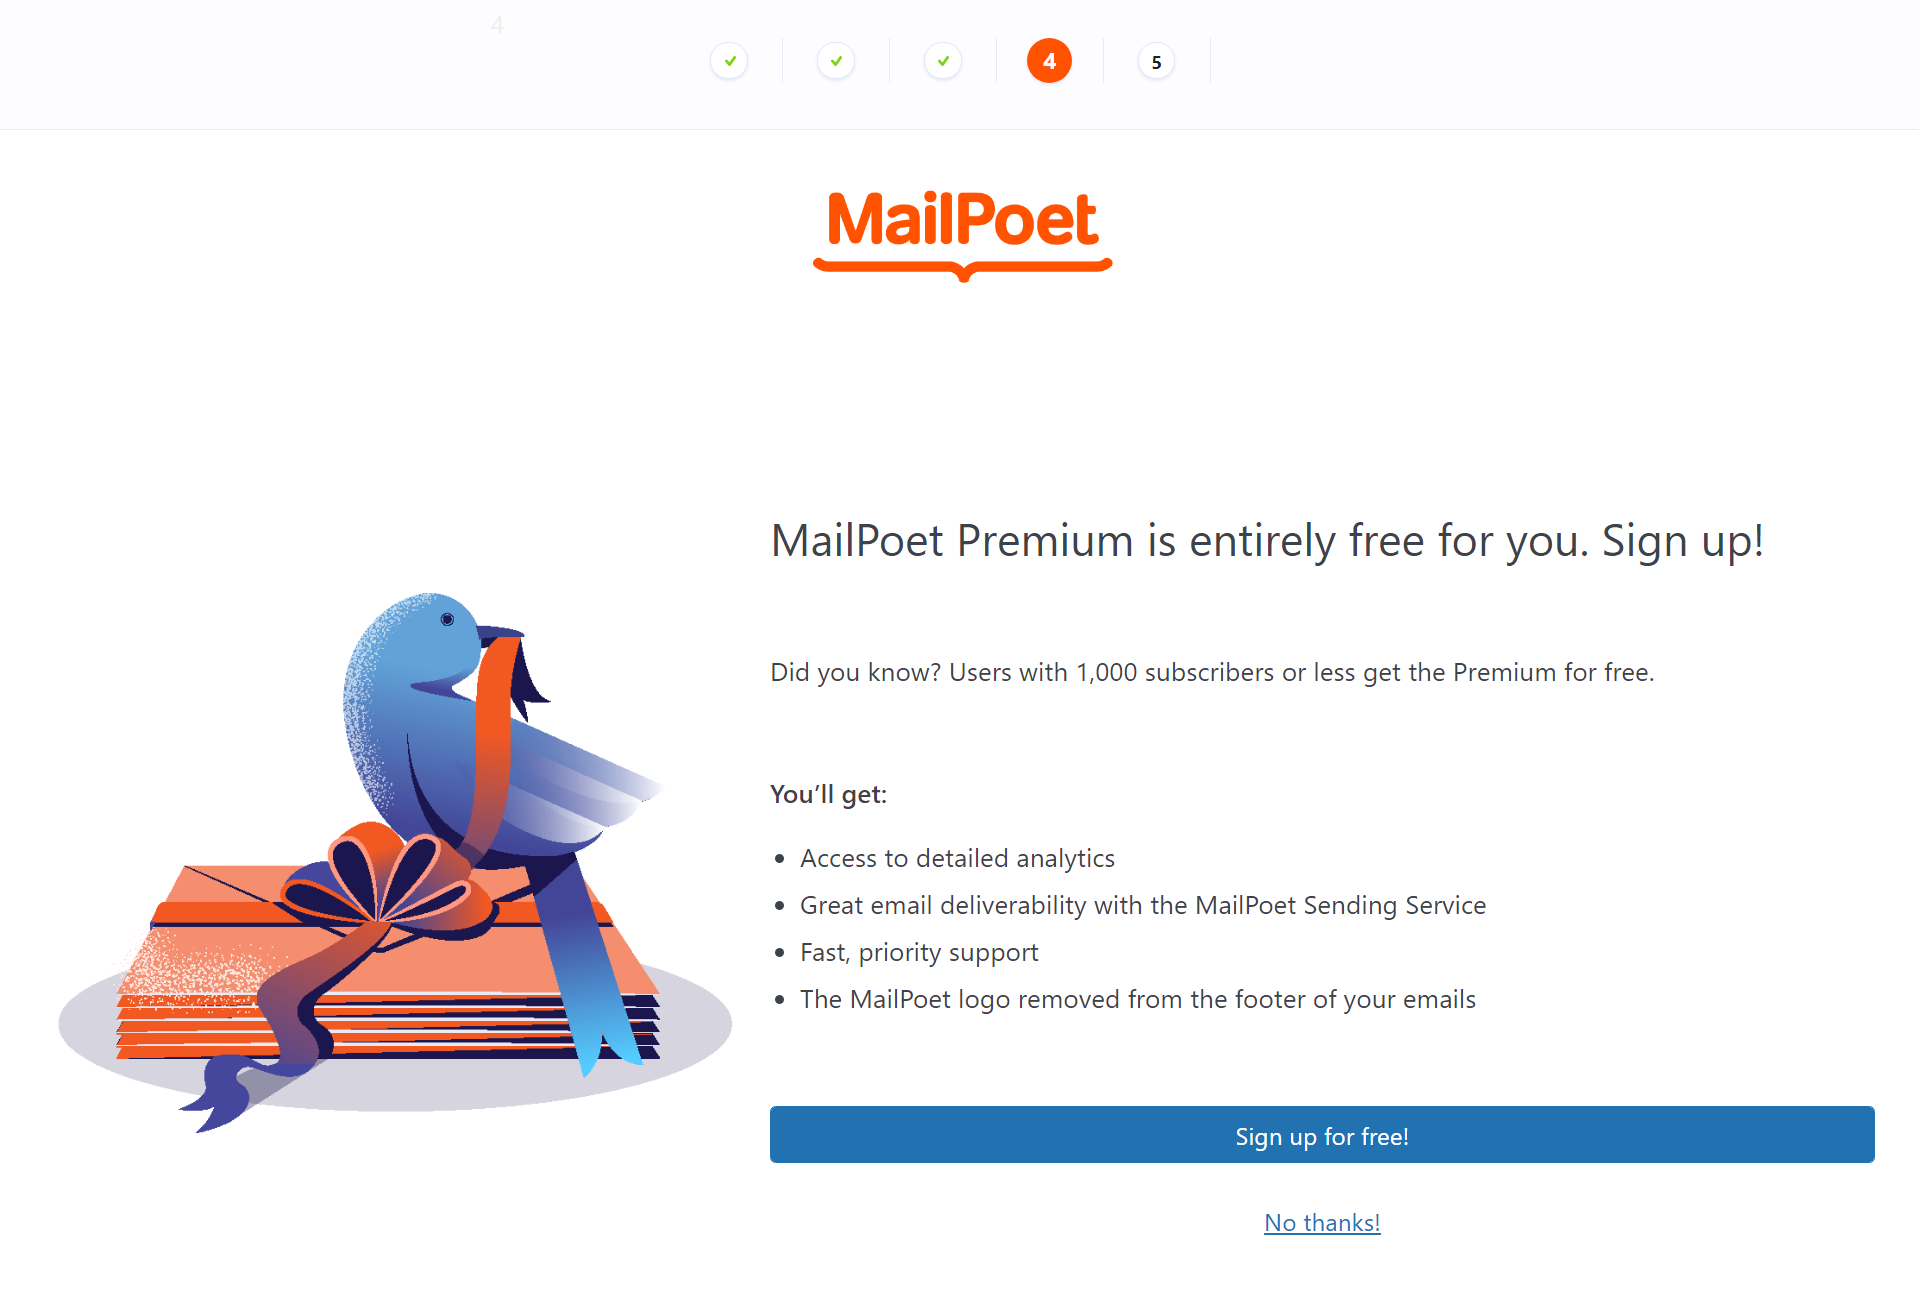
In the fourth step, make sure to sign up for MailPoet Premium. Despite the name, MailPoet Premium is 100% free if you have fewer than 1,000 customers/subscribers. Once your store grows past 1,000 subscribers, the paid plans start at €13 per month:
Once you sign up for a MailPoet Premium account, you’ll get a license key that you can add to MailPoet’s settings to connect your account.
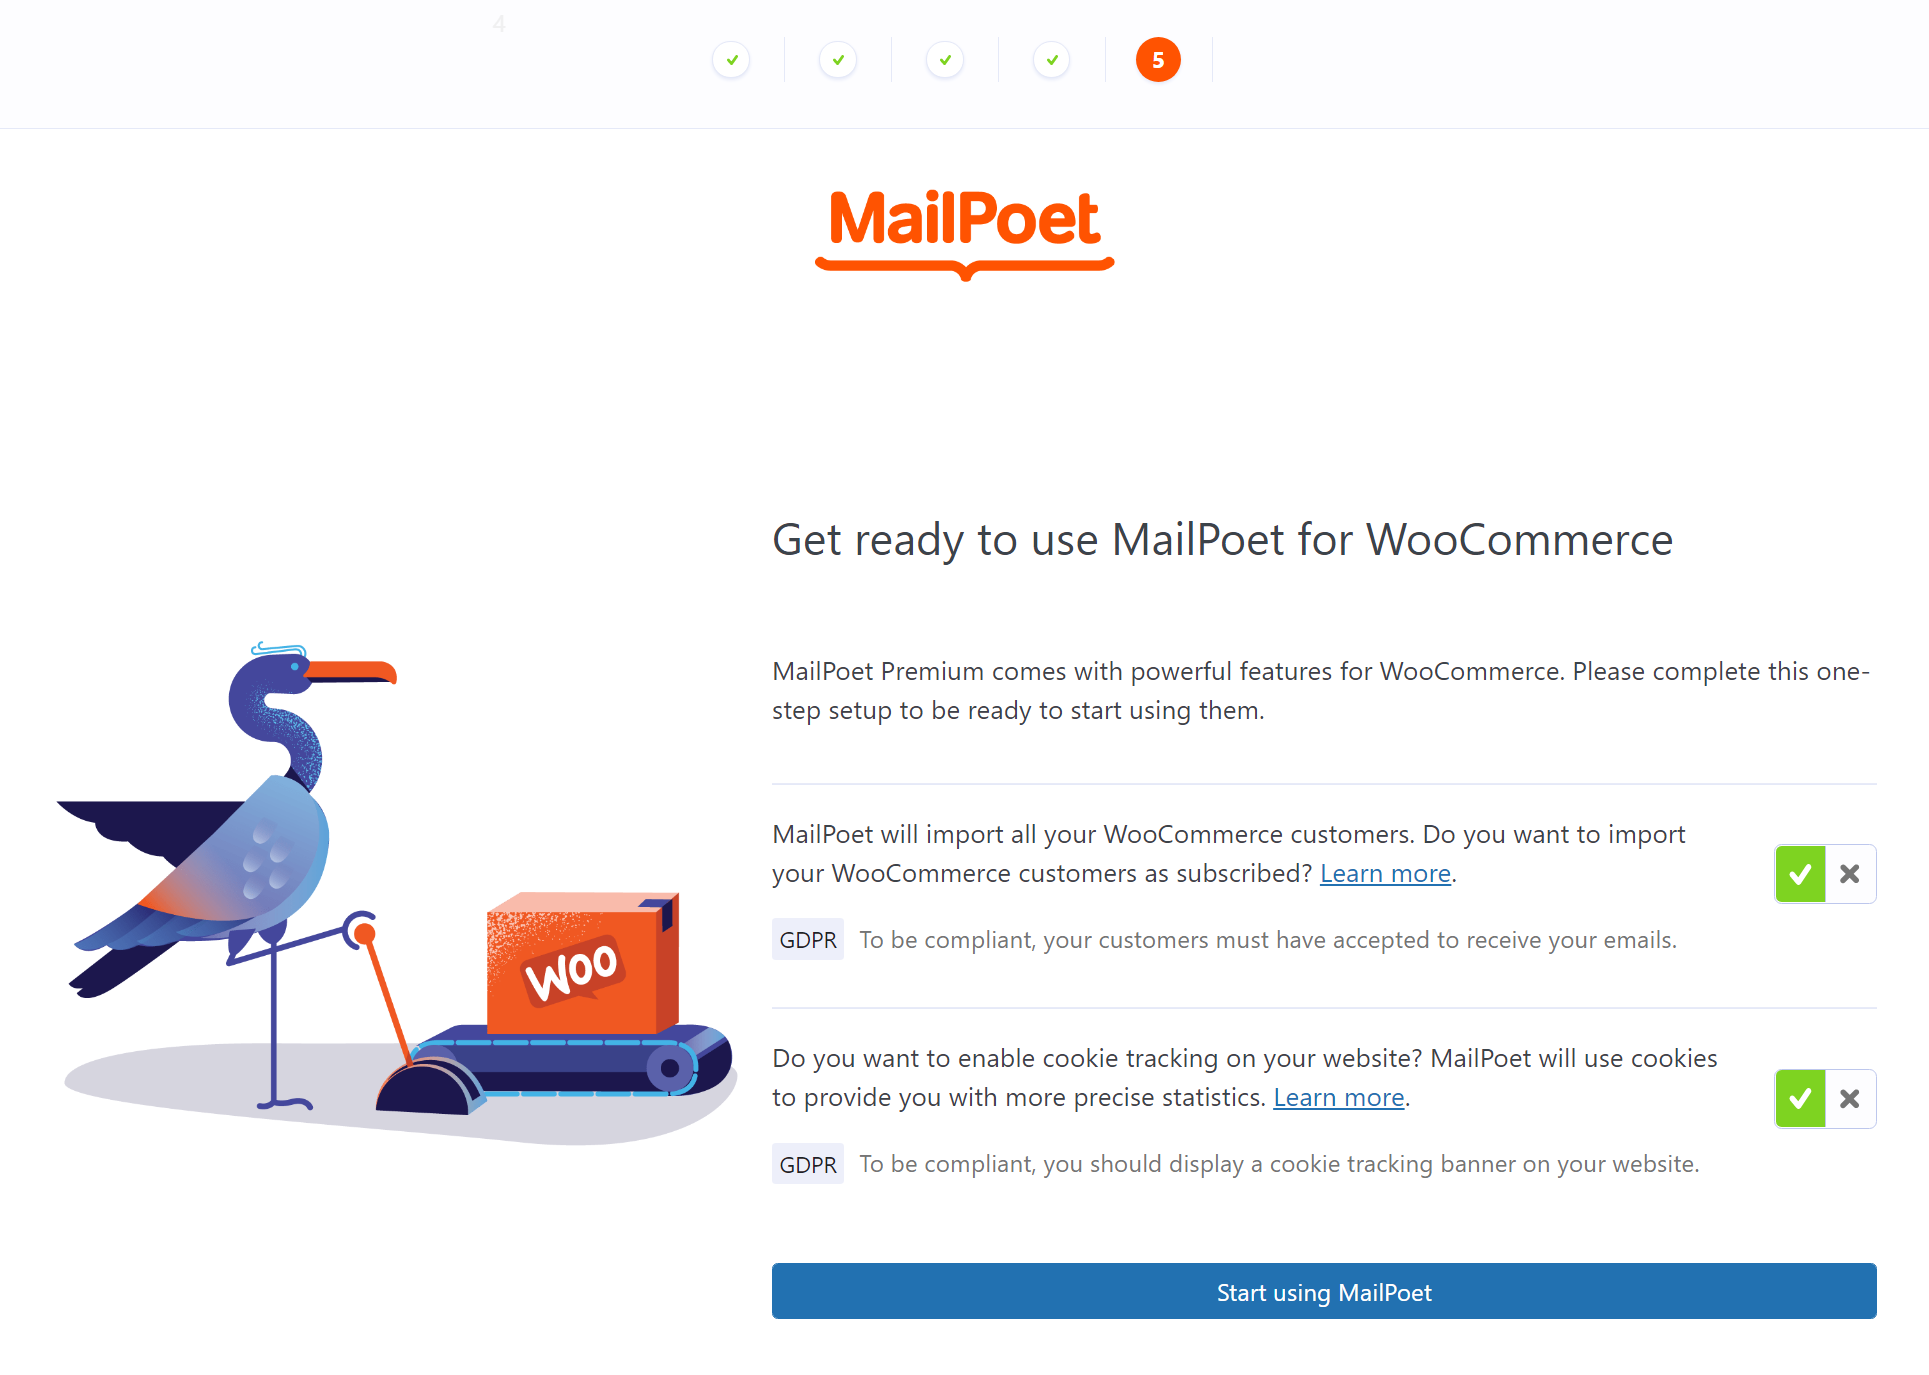
On the last step, you’ll see a prompt to connect MailPoet to your WooCommerce store. If you want to use MailPoet for email marketing, you’ll want to enable both options. Again, we will cover using MailPoet for email marketing in a separate post soon.
How to Customize WooCommerce Emails With MailPoet
Now, it’s time to get into the fun stuff – customizing your WooCommerce store’s emails!
Here’s how it works:
1. Launch the WooCommerce Email Template Editor
Here’s how to launch MailPoet’s WooCommerce email customizer:
- Go to MailPoet → Settings in your WP Admin.
- Click on the WooCommerce tab.
- Check the box to Use MailPoet to customize WooCommerce emails.
- Click Save Settings.
- Click the Open template editor button to launch the WooCommerce email customizer.

2. Customize Your WooCommerce Emails
Now, you’ll be in MailPoet’s visual, drag-and-drop editor.
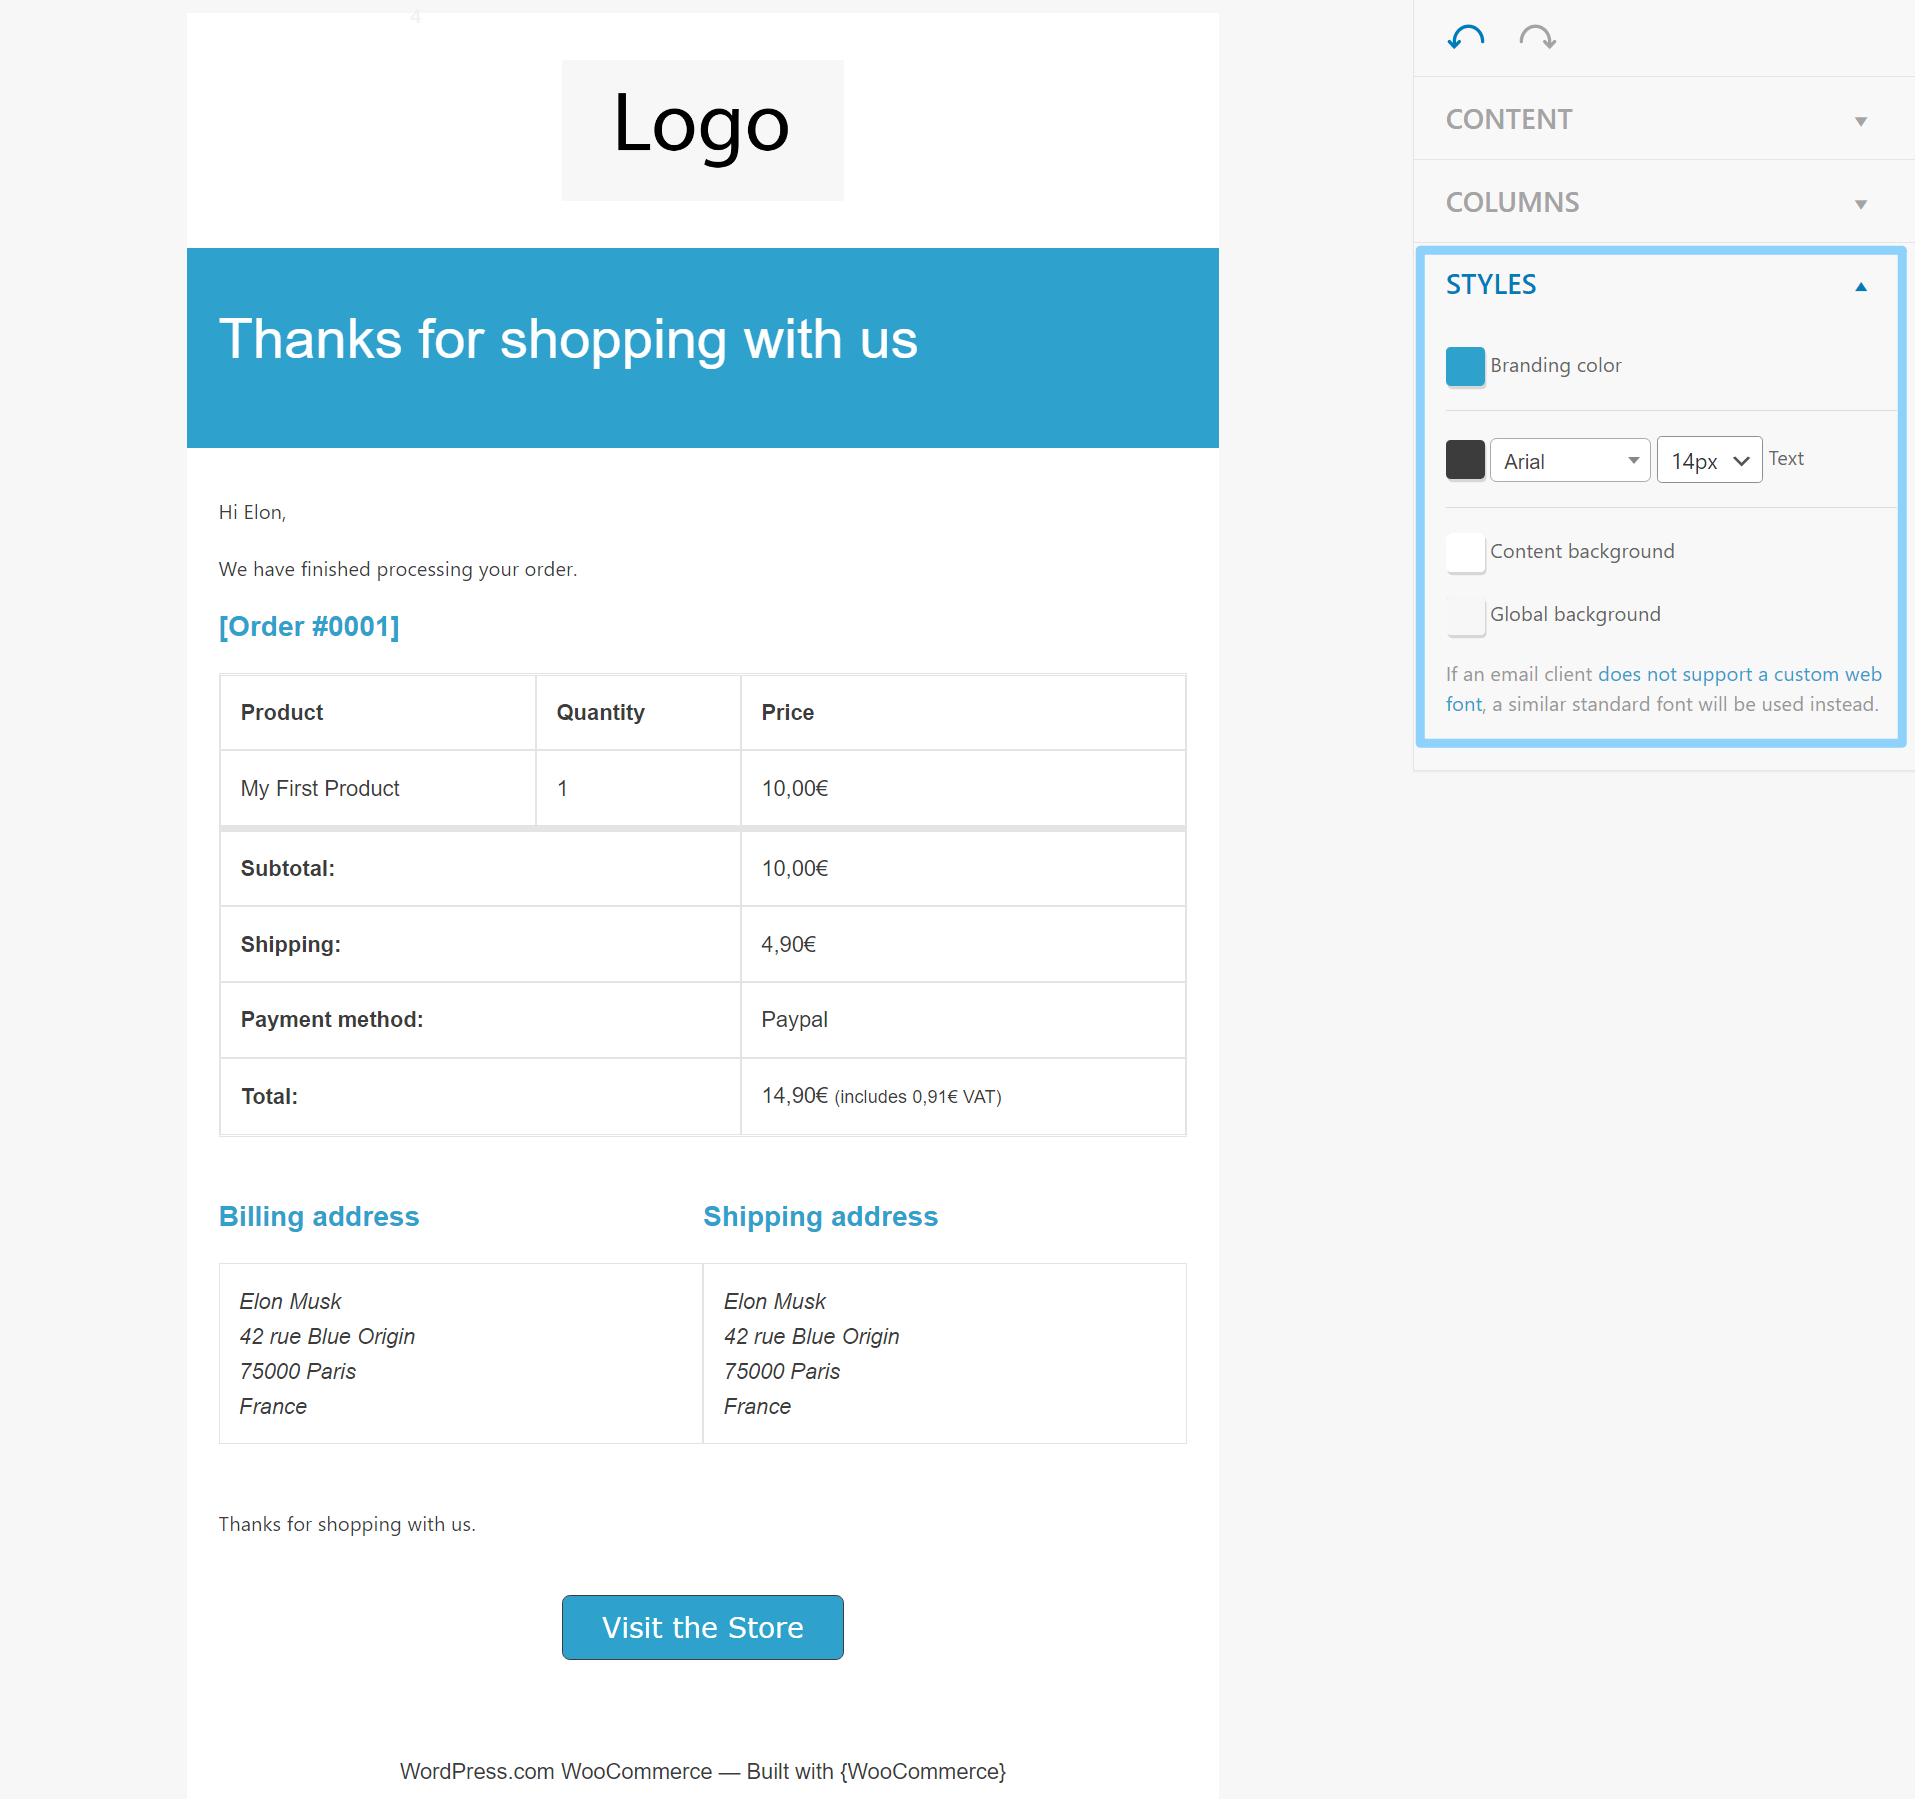
In this editor, you’ll see a live preview of what your actual email will look like. Then, you get a sidebar where you can add new content and customize the style of the content.
You can also use the drop-down at the top to load dummy data for different types of WooCommerce emails, such as processing orders, order completed, and so on.

There are three main ways that you can customize the WooCommerce emails:
- You can use the Content elements to add new content to the emails.
- You can use drag-and-drop and the Columns elements to change the layout of your email. For example, you could create a multi-column design.
- You can use the Styles tab to change the colors and typography of your emails.
Let’s go through each in detail…
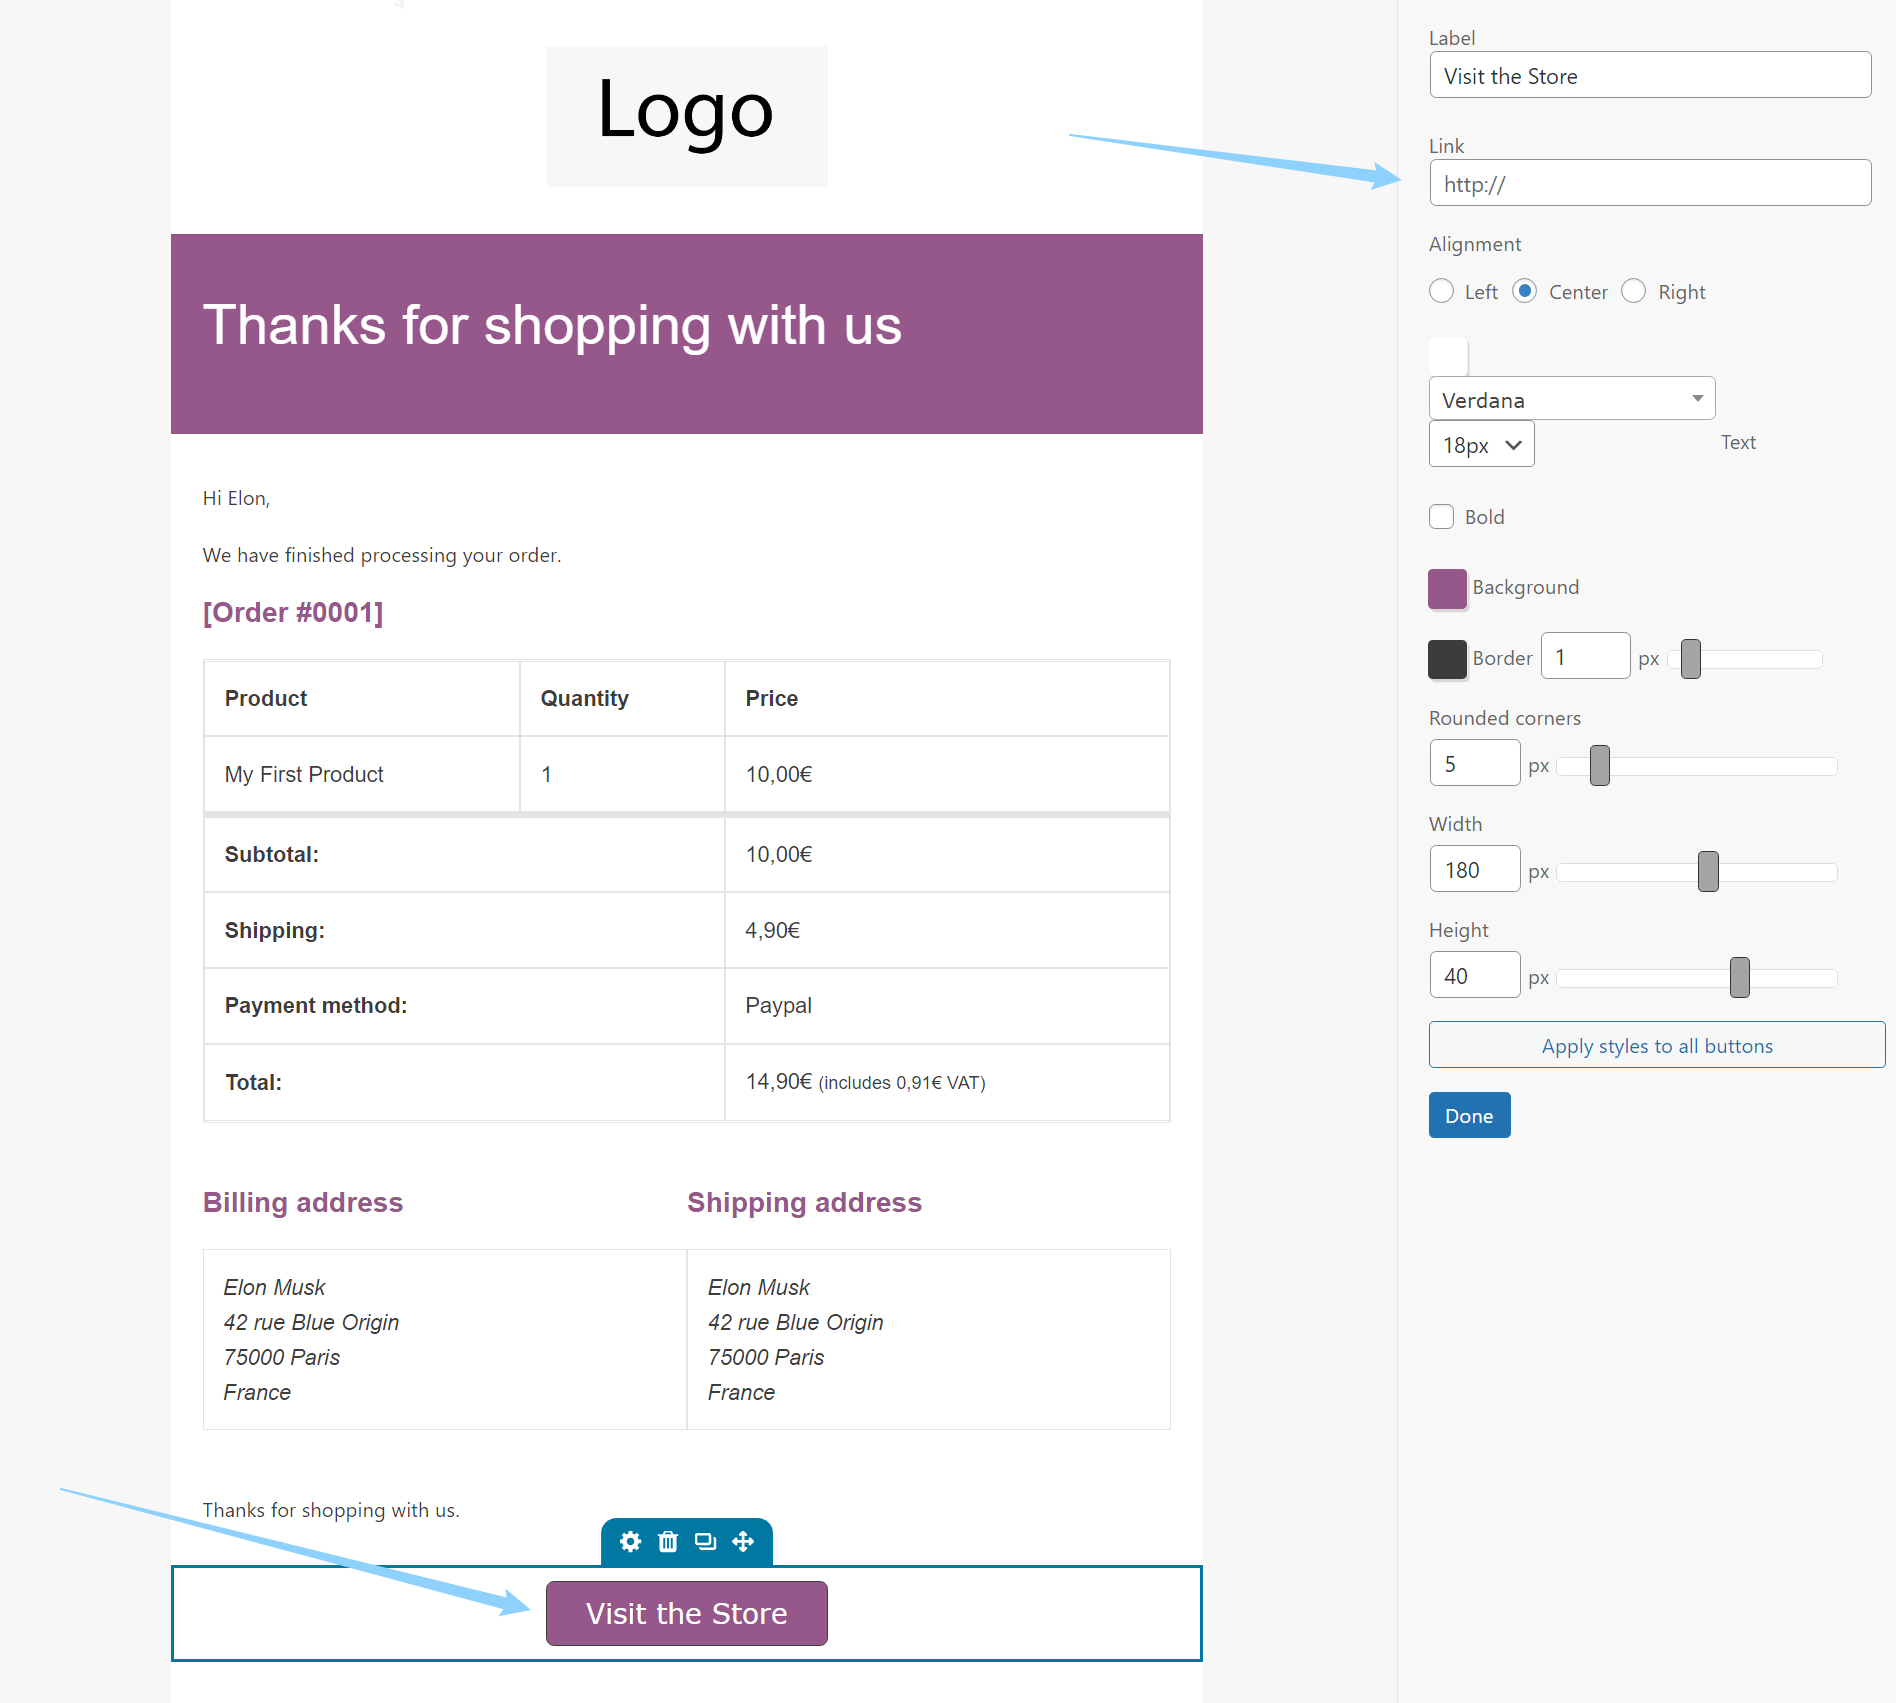
To add new content, all you need to do is drag a content element from the sidebar to the live preview of your email. For example, to add a button to the bottom of your email, you would just drag the Button element to that location.
You can then click on the Button element to open its settings in the sidebar, where you can control its content and design:
Other elements will have different settings. For example, if you add the Image element, you could upload your store’s logo image in the sidebar to include it in your emails.
To change the layout of your design, you can drag and drop the elements on the visual preview. To create a new multi-column layout, you can add one of the Columns elements from the sidebar and then drag elements into the columns:

Finally, to customize the high-level style of your emails, you can use the Styles tab. For example, you could change the primary branding color from purple to blue:
You’ll also get style options for any individual elements you might’ve added, as we showed you above.
3. Save Your Changes to Make Them Live
Once you’re happy with the new design of your WooCommerce emails, click the Save button in the bottom-right corner to make them live.
Now, your WooCommerce emails will automatically start using this new design. If you ever want to make changes in the future, you can always come back to this interface.
4. Optional: Customize WooCommerce Email Subjects/Headings
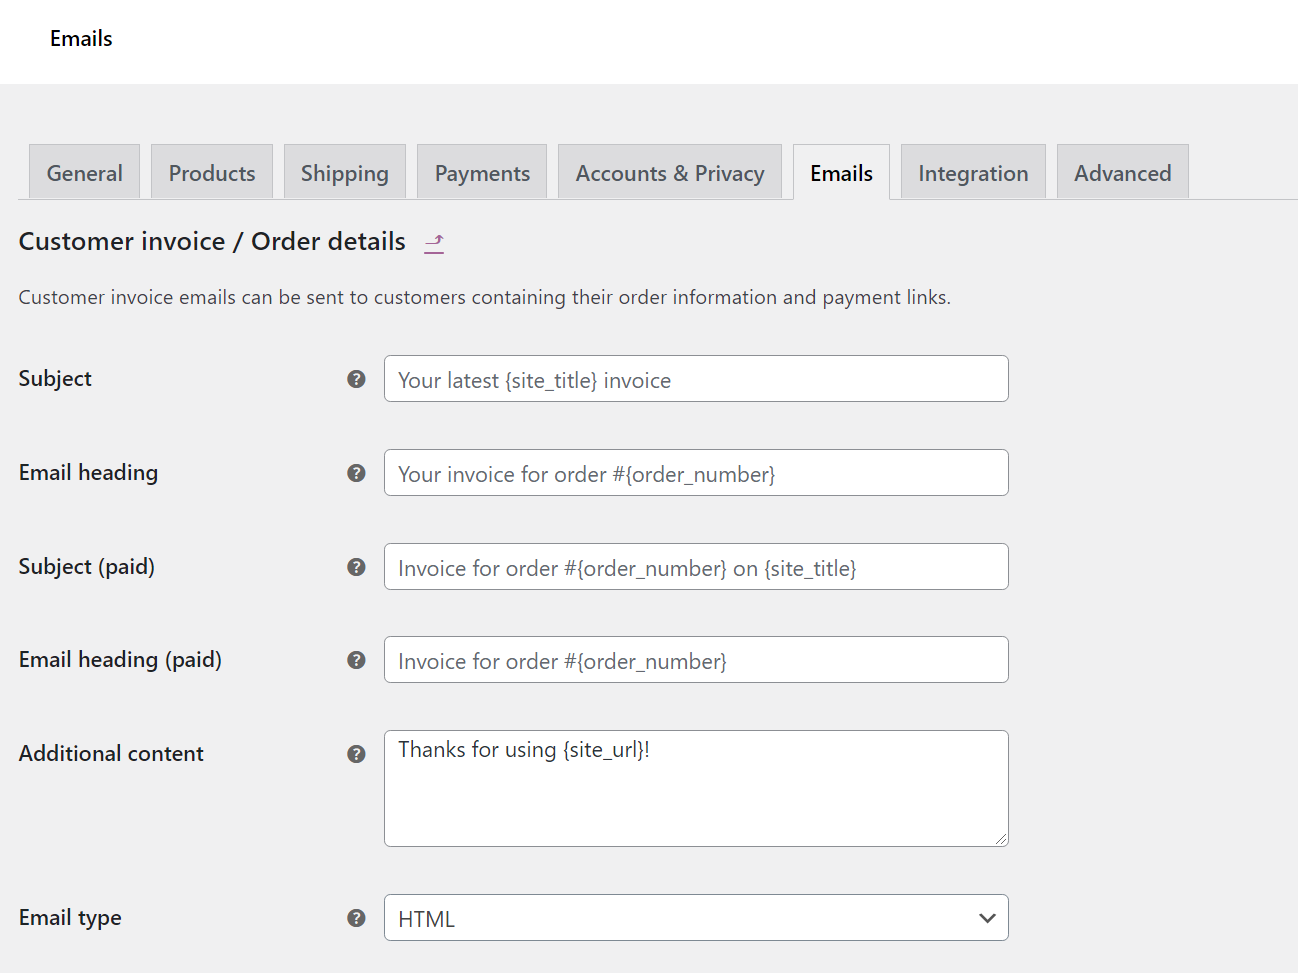
With MailPoet, you can easily customize the design of your WooCommerce emails. However, to customize more technical details such as the email subject and the “Thanks for using [store_name]” message, you can use WooCommerce’s settings.
To access these settings, go to WooCommerce → Settings → Emails in your WP Admin. Then, select the specific email that you want to customize by clicking the Manage button:

You’ll now be able to customize all of those details for your chosen email:
How to Fix WooCommerce Emails Not Sending With MailPoet
If you’re having issues with WooCommerce emails not sending, these issues almost certainly come from how your WordPress site and server are configured to send emails.
Such issues are unlikely on the WordPress.com plugin-enabled plans because these plans are configured to reliably send out WooCommerce transactional emails. However, you might encounter these problems on self-hosted WordPress sites.
So – what’s going wrong?
Well, by default, most WordPress sites send their transactional emails using a function called wp_mail. This function uses your WordPress site’s server to send emails.
However, there are a couple of potential issues with this approach that make it unreliable:
- Your site’s server is optimized to host your WordPress site, not to send emails.
- Your site’s server lacks more technical authentication methods, which means a lot of email clients will mark these messages as spam.
The solution is to use a dedicated email sending service.
Instead of trying to use your WordPress site’s server to send emails, you can configure WordPress and WooCommerce to use a service that’s 100% focused on reliably getting emails to your users’ inboxes.
There’s good news here:
MailPoet includes its own built-in sending service that you can enable with a tick of a box.
Once you enable this service, your site will send all of its WooCommerce emails (and other transactional emails) using MailPoet’s optimized sending service.
Here’s how to set it up and fix issues with WooCommerce emails not sending…
1. Make Sure You’re Using the MailPoet Sending Service
To begin, you’ll want to make sure that you’re using MailPoet’s built-in sending service to send your site’s emails. If you followed the MailPoet setup guide, your site should already be configured to use MailPoet, but it never hurts to double-check things.
To check, go to MailPoet → Settings in your WP Admin and then select the Send With tab. Make sure that the MailPoet Sending Service is active:

2. Configure MailPoet to Send Transactional Emails
Next, go to the Advanced tab in the MailPoet settings area.
Find the Send all site’s emails with… setting and select the option for “The current sending method – MailPoet sending service (recommended)”:

Make sure to save your settings.
And that’s it! MailPoet will now send all of your store’s transactional emails using the MailPoet sending service, which should automatically fix any issues your store has been experiencing with WooCommerce emails not sending.
Improve Your WooCommerce Transactional Emails Today
Your WooCommerce store’s transactional emails are important, so you’ll want to make sure they match your store’s branding and are reliably making it to your customers’ email inboxes.
With MailPoet, you can easily customize WooCommerce emails and also fix any issues your store is experiencing with WooCommerce emails not sending.
To customize your store’s emails, you can use MailPoet’s visual, drag-and-drop builder to:
- Add new content.
- Change the layout of your existing content.
- Customize the colors, typography, and other style details of your emails.
Then, you can also configure MailPoet to send your store’s transactional emails with just a few clicks, which will instantly make your emails more reliable and give you the confidence that essential emails will always make it to your shoppers’ inboxes.
Here’s the really cool thing, though:
MailPoet can handle a lot more than just customizing WooCommerce transactional emails and fixing sending issues – you can also use it to send marketing emails and set up automation strategies such as abandoned cart reminder emails and post-purchase follow-up emails.
If you want to learn more about improving your WooCommerce email marketing with MailPoet, you’ll want to read this article that’s 100% dedicated to eCommerce marketing emails.
If you’re ready to get started with MailPoet for WooCommerce, head to the MailPoet website to learn more and download the plugin.
Finally, if you’re still in the early stages of planning your store, click here to learn how the WordPress.com plugin-enabled plan can handle all of the technical details of running a WooCommerce store for you so that you can focus on growing your business.

