How to grab the HTML snippets you need for your Text Widgets.

Chrissie Pollock is a Happiness Engineer at Automattic, where she helps people succeed on their blogging or site-building adventure. This post is adapted from a tutorial she shared on her personal blog.
The Text Widget is a fairly straightforward tool, right? You write a bit of text, and it shows up in your sidebar (or footer, depending on the location of your widget areas). Some of you may have tried to replicate sleek-looking widgets that contain images or links, but when you added a link to your author blurb, or put in an affiliate code and image, all you ended up seeing was a plain web address, the bells and whistles nowhere to be found.
Don’t worry — that’s pretty common! The reason is that you have to use HTML if you want to make it look pretty. This can be daunting if you haven’t tried working with HTML before, but you shouldn’t let that deter you. There’s a sneaky way to get that code even without HTML knowledge. This is how you do it — just follow these step-by-step instructions.
- Create a draft post and insert the image that you want to see in your Text Widget. (Don’t worry — this post won’t be visible to your visitors as long as you don’t hit the Publish button.)

- If you want to add a link to the image, click on the image after it’s inserted and click on the paperclip icon to add your link. Type in or paste the link of the webpage, blog post, or other destination you want people to reach when they click on your image. It’s a good idea to also check the box next to Open link in a new window/tab so that when people click on the link, they don’t end up leaving your site.


- Click on the HTML option right above the toolbar, next to the Visual tab. This will open the HTML Editor.

- Copy the code you see there. Your code will look similar to what you see in the image below, but the words and links will be different — they’ll be specific to your site and the information you’d entered earlier.

- With your code safely copied, save your draft. Click on the Back option to go to your main menu. Open the Customizer and select the Widgets panel.

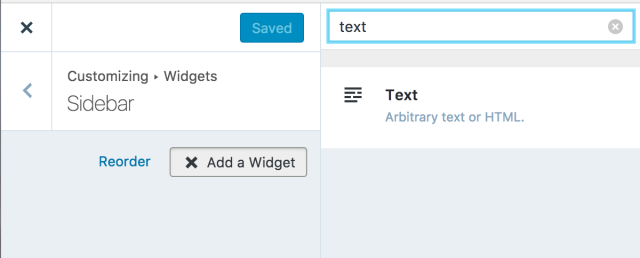
- Add your Text Widget. You can do this quickly by typing in “text” into the search box and clicking on the result that says Text.
- Paste your code — which you’ve just copied from your draft — into the content area, and click on Save & Publish.

- Exit the Customizer to view your site: you will see your image in your widget area — now it’s time to click on it to test your link!

Want to learn more about widgets and what they can do to enhance your site? Here’s a roundup of our other resources on widgets.
That’s all there is to it — pretty neat, no?
Do you use Text Widgets on your site? What have you used them for? Share your insights in the comments!
Currently blogless? You’re a click away from sharing your story.
Create your blog at WordPress.com


Smart! This tutorial reminds me of a colleague claiming that “for programming HTML, you basically need to know two things: copy and paste.”
LikeLiked by 2 people
Thank you for this great tip!!! 😉 Love it!
LikeLiked by 2 people
Thanks for the tip — I use my text widgets for quotes, snippets of song lyrics, and such. Now I know how to add an image — cool.
LikeLiked by 2 people
Thanks for sharing this great tip, I’ve now employed it on my blog! 🙂
LikeLiked by 2 people
Great tutorial. Do I understand you right that we are now allowed to put in an affiliate code and image in our sidebar?
LikeLiked by 2 people
You always could, as long as the code was html and javascript. You can check it out at https://wordpress.com/support/affiliate-links/ if you want 🙂
LikeLiked by 1 person
I love text widgets and have loads of them for text, images and have even tried video!
LikeLiked by 2 people
Since the very first day of my blog, when I inserted the text for the widget of City Daily Photo portal they provide, the HTML text was visible around the icon. Now I got to correct it following your tutorial. THANKS very much!
LikeLiked by 2 people
CHECK OUT MY BLOG
LikeLiked by 1 person
Thank you so much
LikeLiked by 2 people
Some great tips in here, thanks!
LikeLiked by 2 people
thanks alot..really helpful
LikeLiked by 2 people
Thanks so much- this is so useful 😊
LikeLiked by 2 people
Fantastic tip! You just solved a conundrum of mine!
LikeLiked by 2 people
Great to hear!
LikeLike