
So you’ve created a WordPress blog, chosen a theme you love, and installed the plugins you need, and you’re ready to start writing! You’re serious about creating content that serves your readers and ranks well, so you want to learn the best process to make the most from each post.
Here’s a step-by-step guide to show you how to research a blog post from start to finish. If you’ve already done the first four steps, skip to step five to get started with the specific post you want to write.
- 1. Know Your Audience and the Purpose of Your Blog
- 2. Understand Your Topic
- Competitor Research
- Determine the Style of Your Post
- Outline Your Blog Post
- Make Headline Tweaks
- Add Quotes, Stats, and Data from Reputable Sources
- You’re Further Along than You Think — Time to Start Writing!
1. Know Your Audience and the Purpose of Your Blog
Audience
Before you can do anything, you need to fully grasp your why. What’s the reason for creating a blog post?
Initially, you may think your purpose is to increase sales or grow traffic. That’s a fine goal, but these are the end-results of your efforts. If you think of your blog posts too scientifically, you may end up with a lot of traffic, but few interested readers (or customers).
Instead, work to identify your audience and find ways to serve them.
What kinds of sites do they browse? What kinds of questions do they ask? Where do they spend time and how can you show up in a meaningful way or answer common questions?
Whether you sell products through an eCommerce store, want to demonstrate expertise and nurture leads for a B2B business, are interested in growing a loyal following of fans around a specific hobby, or want to simply express your creative ideas, it’s all about serving your audience.
What’s interesting to you may not always be what’s helpful to your audience. On a practical level, you need to understand what aspects of your topic require you to go into detail and which you can assume your audience already understands.
Not quite sure who you’re writing for? That’s okay. WooCommerce has a great post on how to find and identify your target audience.
Purpose
With your audience identified, you can more strategically consider the purpose of your blog and this post, in particular. Here are some common ones:
- To increase traffic (rank for specific keywords). In this case, you’ll want to spend additional time on SEO best-practices and make some of your editorial decisions based on what meets those requirements.
- To improve your reputation or demonstrate expertise. While you won’t want to neglect SEO best practices, more of your focus should be on unique perspectives, fresh information, and the quality of the writing and narrative.
- To educate or answer questions. Maybe you need to document a process so existing clients can follow along, or perhaps your customer service team would like to alleviate some pressure by creating a document that can answer questions on their behalf. Either way, you’ll want to provide illustrations or images and reduce word count so that readers don’t have to sift through fluff to find what they’re looking for.
What’s the purpose of your blog post? How can you balance that with properly serving your audience? Consider these things as you begin to form your article.
2. Understand Your Topic
Once you’re clear on your blog’s audience and the purpose of the post, it’s time to dig into your topic a bit further. There are two types of research — primary and secondary. You’ll probably want to do a bit of both.
Primary vs. Secondary Research
What is primary research?
Primary research is any information you collect yourself. This may be done through conducting interviews, sending out an online survey, or even by using a Twitter poll. While more work, this gives you the advantage of answering hyper-specific questions directly related to your subject. Plus, you’ll be providing the world with brand-new insights which could lead to others linking to your post — boosting your traffic and reputation.
What is secondary research?
Secondary research is the kind you used to do in school. This involves looking at existing data and resources to compile information that others have collected previously. For most posts, it’s a more practical way to gather things like national-level statistics. Instead of creating your own survey, you’d rely on the results of existing studies.
Start with your secondary research. Once you’ve collected already-existing information, you’ll be able to direct your primary research based on any gaps in the data you may need. You’ll be able to ask more informed and specific questions in any surveys or interviews with subject matter experts.
Topic and Keyword Research
Keywords (or key phrases) are what people type into search engines when looking for information. Though you may have a topic already chosen, you can research the best keywords to use based on search volume and competition. Perhaps most people refer to your topic in a slightly different way than you imagined. Knowing this, and adapting your article to fit, can result in substantially more traffic.
In general, you’ll want to choose keywords that have both good search volume (number of potential visitors) and low competition (what existing sites do you have to “beat” to achieve rankings?).

Here are some free and paid tools to help you with keyword research:
- Answer the Public. With this tool, you simply type in your topic, and you’ll see almost endless questions around the topic that people search for across the internet.
- Ubersuggest, like Answer the Public, is an online tool where you can type in a keyword and get related terms people are searching for on Google. It’s a free tool, but also has a paid option.
- Keyword Surfer is available through the Chrome Web Store and helps you do your research in the Chrome browser. Once you’ve installed the extension, simply do a Google search, and you’ll see “Keyword Ideas” to the right. You’ll also see search volumes, estimated cost per click (CPC), related terms, visibility metrics, and more.
- SEMRush is a comprehensive tool used by SEO professionals and blog owners who are serious about improving rankings. It requires a paid subscription and includes features to help research keyword ideas, and see estimated search volume and competition levels. Plus, it lets you track your results over time, evaluate competitors’ efforts to identify new opportunities, and offers suggestions for improvements to your site.
- Ahrefs is another all-in-one suite for advanced SEO work. It’s paid, and has tools for keyword research, site audits, competitor analysis, project tracking, and more.
Choose Pillar Topics
While you’re doing blog research, determine an overall pillar topic. Pillar topics are more broad, and typically have a high search volume. Then, you can put together more specific ideas (topic clusters) into one broad post with a lengthy word count.
Define Topic Clusters
Topic clusters are narrower topics that relate to the main pillar topic.
In the post you’re reading now, “how to research a blog post” is the pillar topic. “Keyword research” is a topic cluster within this post.
It can help to think of the pillar topic as a tree, with the topic clusters each being a branch attached to the larger tree. You may even choose to write an initial outline in this shape to help you fully grasp how everything fits together.
Make a Note of Related and Trending Topics
As you do your research, make notes of any related topics that appear. These could spark ideas for entirely new posts, or provide you with topic clusters to help you form a more complete, robust article.
Content Gaps
Go through the information you’ve compiled so far. What’s missing? Fill in any obvious gaps and conduct further research on related topics to see if you’ve forgotten something important.
As you research the rest of your post and start writing, it’s important to continually refer back to the question of content gaps. When your primary research sparks an idea that you missed, write it down and see if it fits within this post or if it could even be its own unique post in the future.
And when you start to review, edit, and proof your article, you’ll again want to be mindful to spot gaps. Have you used the keywords you intended? Did you cover every topic in your outline?
Competitor Research
You’ll want to outshine your competitors in a few different ways. For one, you want to prove to the search engines that your post provides more value to potential searchers than those that already rank for your target keyword terms. It’s hard to do this if you don’t know what search engines already like about the competing posts.
Additionally, and going back to serving your audience, you want to find new and better ways to explain key information or capture the hearts of visitors. Are there gaps left by your competitor? Do they lack interesting visuals? Real-world examples? Quotes from thought leaders or stats from trusted sources?
You may also want to look at the length of the existing posts that rank for your target terms. While it’s not the only thing that matters, if your competitor posts are short, you may be able to provide additional information and create a longer, more exhaustive article. This can help you stand out to search engines.
Finally, look through the post to see what keywords they appear to be using. This can help you find good keyword targets you may have missed or spark inspiration for new variations you can use.
Determine the Style of Your Post
There are several styles of post you can pursue. Your choice should be made based on what serves your audience, the kinds of posts the search engines currently rank for your target keywords, and how you can improve upon what your competitors are doing.
Will this be a tutorial? Be prepared to include lots of screenshots or make new visuals to aid in explaining key concepts.
Is a review style post the best? Be consistent in how you structure each section so that every subject of the review is judged on the same criteria.
List posts are popular options as well. With the proper heading structure, posts like these might even snag the “featured snippet” result on Google. For example, “What are the top vegan restaurants in London?” might merit a list post.
Whatever your choice, make it ahead of time so that your outline and research can be structured accordingly. One of the best ways to waste time is to restructure your entire post halfway through writing it.
Outline Your Blog Post
Drawing a tree-shaped diagram can help you with initial organization and planning. However, when it comes to creating an outline, you should generally follow a hierarchical structure. You’re familiar with a title — it sets the subject for the entire post. Online, these are also known as H1 tags.
Below the title, H2 tags represent broad topic areas within the post. You can have as many of these as needed. Below those, content can be sorted into tiers that make sense based on how it relates to each H2.
The goal is to provide an easily-understood organizational structure so that you, your readers, and search engines can all understand how to navigate posts. Someone who lands on the post looking for a specific sub-topic should be able to quickly identify where to find that information.
Here’s an example:
Title (also known as H1): Best Restaurants in London
H2: Best Chain Restaurants
H3: How we based our decision
H3: The results: Top Three Chain Restaurants in London
H4: Restaurant 1
H4: Restaurant 2
H4: Restaurant 3
H3: Final thoughts
H2: Best Locally-owned Restaurants in London
H3: How we based our decision
H3: The results: Top Three Locally-owned Restaurants in London
H4: Restaurant 1
H4: Restaurant 2
H4: Restaurant 3
H3: Final thoughts
H2: Conclusion: Which is best? Chain or locally-owned?
When you create your outline, you’re essentially pre-planning the placement of headings and subheadings.
Struggling to get started? If you downloaded Keyword Surfer when doing your keyword research, you can click on the “Generate article outline” button above the keyword ideas revealed in the Google search.

It will direct you to a new page with heading suggestions. You can also visit the tool directly here. What a great shortcut!
Make Headline Tweaks
Even if you rank well for a keyword term, an uninspiring title can result in very few people actually clicking to visit your site. You can spend thousands promoting a post on social media, but if the title is boring? People will keep scrolling past.
Plus, Google uses both its own analysis of your title quality, along with data on how real-world users react to it, in order to help determine where it places you in the rankings. Fewer people clicking on your link equals lower rankings.
In other words, your title is important!
So, once you have your blog post outline, it’s time to do some more work on your headline (or title). Luckily there are headline analyzer tools that can help you make tweaks.
The Capitalize My Title headline analyzer tool is perhaps the most comprehensive one available. Type in your title idea and get an overall score out of 100, which is further broken down by Readability, SEO, and Sentiment (positive or negative).

Readability Score is based on Flesch-Kincaid Reading Ease, and you want to aim for a score between 60 and 100. Common words should take up 20 to 30 percent of your headline, and you should limit your use of weasel words (vague, authority-killing terms like “may, might, could”) in your title.
SEO Score shows how your title will rank in Google search. According to Capitalize My Title, your word count should be five to seven words. A character count of 55 is ideal. Include power words like “your” in the title. And be sure to use the keywords you’ve already chosen.
Sentiment Score advises that titles with an emotional connection are more likely to get click-throughs. It gives a positive word count and a negative word count.
Once you’ve tweaked your title to achieve a good score, click on the green Capitalize title beside your entry, and you can see how to properly capitalize your title by the style you’d like to use — including Chicago, AP, MLA, BB, AMA, NYT — or by case, including title, sentence, and uppercase.
If you’d like to run your title through a few of these, other headline analyzers to choose from include Sumo’s Kickass Headline Generator and Funnel Scripts’ Amazing Headline Script Generator. And if you’d prefer to analyze your title directly within WordPress, give Coschedule’s Headline Analyzer plugin a try.
Add Quotes, Stats, and Data from Reputable Sources
With your audience in mind, keywords set, competitors analyzed, and outline written, it’s time to get into the discovery process directly related to your post topic.
This is where you’ll employ both primary and secondary research methods to find meaningful information about each heading.
For primary research, you may interview subject matter experts and use your headings as a guide for the interview and inspiration for questions. As you learn new information or write down great quotes from your interview subject, you can place those within the relevant sections in your outline.
The same thing goes for secondary research. Find a great stat? Include the information and details about the source under the appropriate heading.
Images are a great way to break up long blocks of text and help hold your audience’s attention.
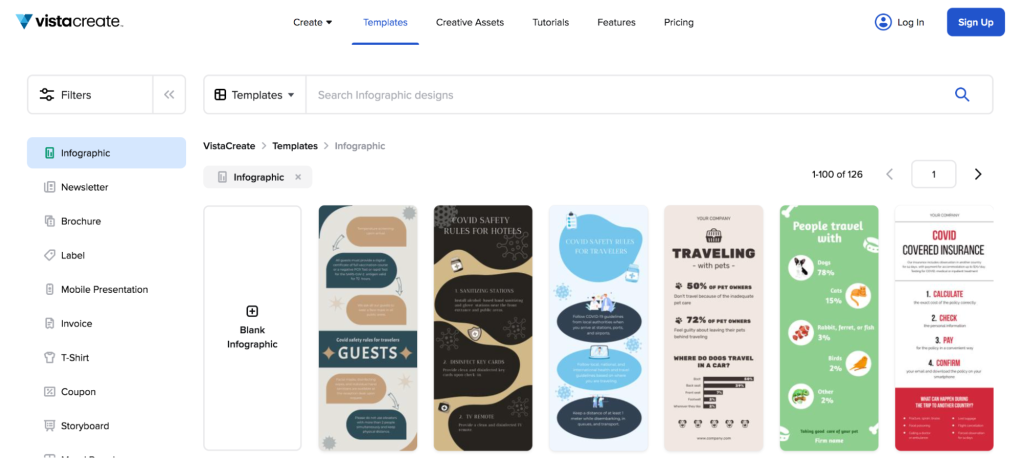
If you’re trying to figure out how to include charts and graphs of your blog research data, a tool like Canva or VistaCreate can make it easy. Do a search for “infographics,” choose the one you like, plug in the information you’ve collected, and download the graphic file to include in your blog post.
How to Vet the Quality of Your Sources
Here’s an important note: When you include information from third parties, you are, in a sense, placing some of your credibility in their hands. You should take the time to verify and affirm the quality of the sources you link to. If you don’t, you can be penalized by search engines for excessive, repeated links to low-quality sites.
So how do you decide which sources are credible? You can look at their domain authority. Tools like the free MozBar Chrome extension or the Ahrefs toolbar can quickly give you an authority score for any website you input.
You’re Further Along than You Think — Time to Start Writing!
Now’s where you can fill in the gap to create a compelling narrative around your thoughtfully-researched article topic. If you’re doing a list-style post, most of your work may be done. You’ll simply need to write an intro and conclusion and fill in a few gaps. If you’re doing a longform post, you have some more work ahead to tie everything together.
The good news is that you should be able to work efficiently because you have a road map and plenty of details already in place!
Now that you know how to research a blog post, be sure to bookmark this article so you can return to it and repeat the steps when you’re working on research for your next post.
Remember, be helpful to your audience and have fun!
This post was updated on Sept. 8th, 2022.

