If you were starting your site from scratch, what would you do differently? Read on for a few a few tips and tricks you have up your sleeve when revamping your site structure.

If you were starting your site from scratch, what would you do differently? In the beginning, it’s impossible to predict what our sites’ needs will be in one, two, or five years’ time. Is this the best category to use? Will I still like this title? Is it time for a logo refresh? All of these possibilities can seem even more daunting when you realize that you have to actually put your changes into practice.
If you’re getting ready for a complete revamp of your categories and tags, or thinking of an overhaul of your site’s navigation, check out these handy tips and tricks when considering a refresh.
Edit one, edit them all: bulk editing
In your Dashboard → Posts page, there’s a tool that allows you to change the settings on multiple posts all at once. Nifty, right? This can be particularly helpful when marking a handful of posts as private as you change what content is available on your site, or if you need to bulk assign categories or tags to older posts. The Bulk Actions tool saves time by allowing you to make all of these changes at once, rather than going through each post by hand.
To use it, select all of the posts you’d like to change by clicking on the checkboxes on the left side of the page. To change all of the posts, just click on the checkbox at the top of your list of posts, next to Title, to select all.

Select the posts you want to edit in bulk and then use the Bulk Actions menu to make changes to all at one.
Then, use the Bulk Actions menu to select Edit and then Apply. Once you’ve done that, you’ll see the option to make bulk changes to your comment settings, privacy settings, tags, categories, and even post authors. At the click of the Update button, all of your changes will be saved in half the time it would take to make these adjustments individually.
Pro-tip: Using the Screen Options button at the top of the page, you can adjust the number of posts that appear on your Posts page all at once. While this can help you get through more posts more quickly, beware. Too many posts on a single page can be too much of a load on your browser and cause your changes to time out, leading to an error message. For the most part, sticking between 50 and 150 posts will do the trick.

Use the Screen Options button to adjust how many posts are displayed in your admin pages.
Getting around: creating custom menus
Starting your first custom menu can be a bit tricky. How to know how many items to add? How can you get them in the order you desire?
Our own Andrea Bishop went into great detail on how to create and use custom menus on your site. While it can be easy to get used to the way your menu is set up, it’s useful to take a step back to make sure your menu is as helpful to your readers as it can be. Ultimately, a site menu is like a table of contents: you want it to be as easy to navigate as possible so it’s easy for readers to get drawn in to the rest of your site, beyond just the front page.
Through your Appearance → Menus page, you can create more than one custom menu. While the primary purpose of this is to allow site owners to create more than one menu for different menu areas, or to use with a Custom Menu widget, this also means it’s possible to revert back to an earlier version at any time.

You can use the Links and Categories tag to link to content on, and off, your site.
How do you choose what’s most important when revamping your site’s navigation? Consider the primary purpose of your blog. What do you want visitors to know about you when visiting your site? Is there an about page or mission? What different types of content do you have? Are there any other sites on the web that you want visitors to be able to access, whether it’s your portfolio or online store?
On your Appearance → Menus page, you have multiple options for what to add to your menu. Under the Links tab, you can add links to any site online, not just the pages and posts within your WordPress.com site.
Adding category pages, on the other hand, allows you to group different posts together according to topic. This gives your site the appearance of having different types of pages with different types ofSr posts.
Pro-tip: using the Screen Options button on the Menus page, you can also tap into the advanced featured of your menu to explore things like opening links in new tabs and customizing the CSS for your menu items if you have a WordPress.com Business or Premium plan.

Clicking on the Screen Options button on your Appearance > Menus pages opens up advanced possibilities.
Like begets like: updating tags and categories
Last year, I combined my travel writing with my blog about arts and literature. It was difficult to find a way to accurately organize my posts in a way that would allow visitors to find other articles they might be interested in and a structure that would grow as my site did. I decided to keep it simple with four, broad categories.
It’s easy for categories and tags to proliferate. Some posts fall into a gray area and it’s tempting to create a new category for every special case, and in some instances, that may well be the best option. Overall, it’s up to you to decide what’s most important to your readers when structuring your site.
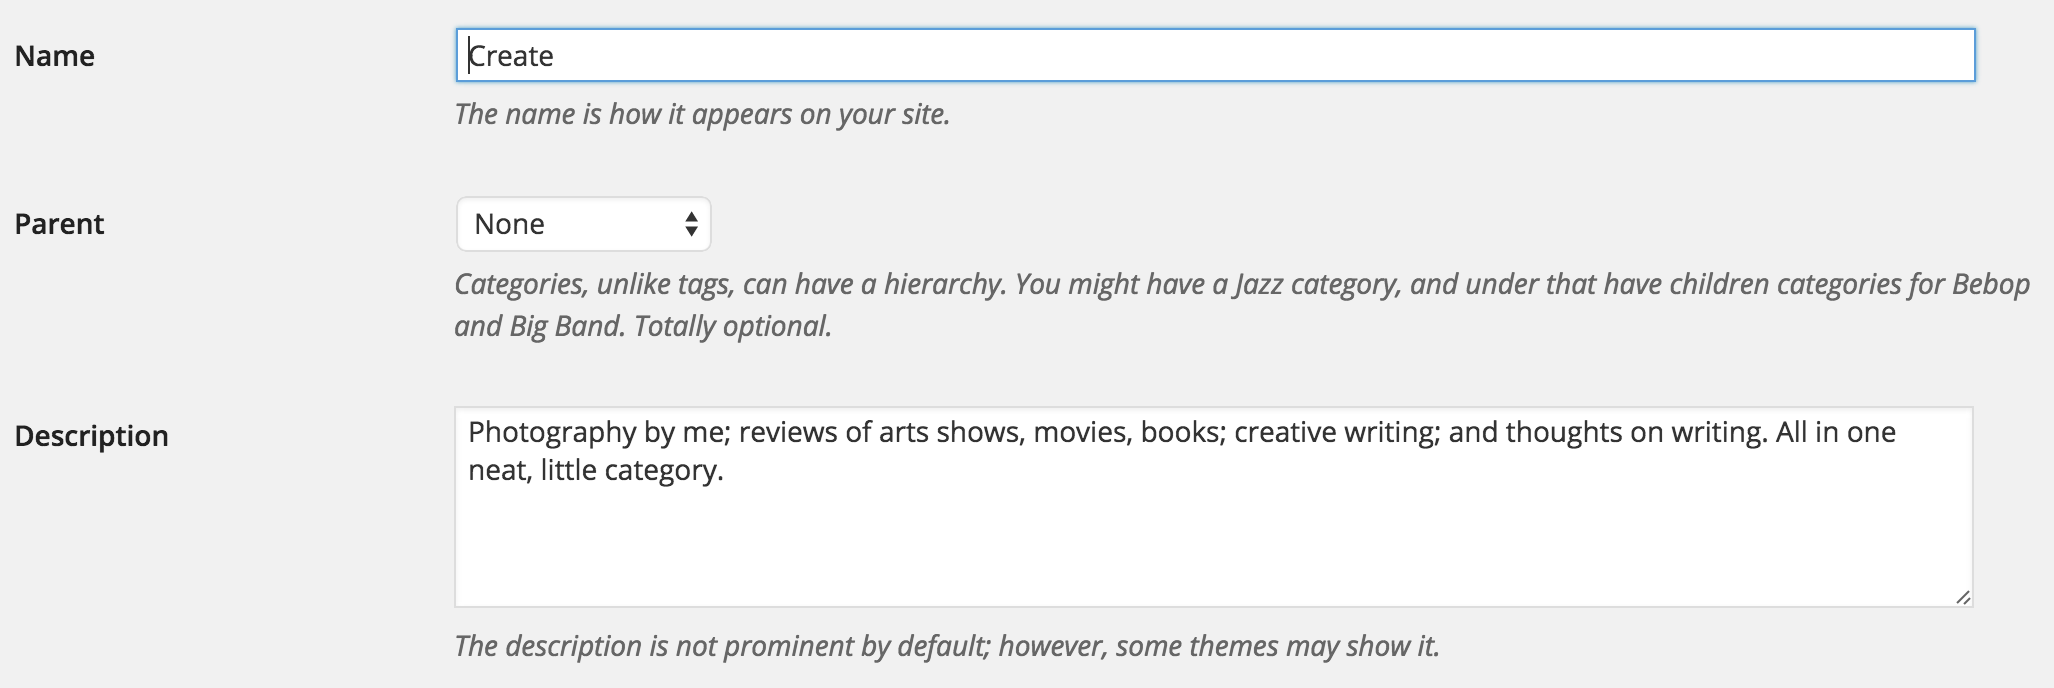
Use you Edit Category page to adjust your categories, their descriptions, and their relationship to one another.
When adjusting the categories on your site, you can edit each category directly through your Posts → Categories page. If there’s an entire category that you’d like to change, click on the Edit button directly below it to change the title, as well as the description, of the category. This will automatically update all of the posts within that category.
Similarly, you may find that some of your tags and categories overlap. If you’re interested in condensing the two, you can use the Convert to Categories tool to change tags into categories. Run the tool, and your tags will be automatically converted to categories, giving you a fresh start.

Convert your tags into categories or your categories into tags to further refine your site’s organization.
With these tricks up your sleeve, your site is all set for a makeover. Go forth and get your spring cleaning on!
Currently blogless? You’re a click away from sharing your story.
Create your blog at WordPress.com


Your post reminded me—I always wonder how to better use tags and categories. I just found this: https://managewp.com/wordpress-categories-tags-seo
LikeLiked by 1 person
Welcome to WordPress.com! If you’re just getting started, we have an excellent guide here: http://support.wordpress.com/start/
LikeLiked by 1 person
I actually just started a blog, so I’ll be bookmarking this page so I won’t let it get out of hand!
LikeLiked by 1 person
Just seeing this post reminded me to revisit my aesthetic. I have now freshened up my blog with a new look after over 18 months with the same visuals. I really like it! Hope my readers do too. Thank you for the inspiration. mattsden101.
LikeLiked by 1 person
How can I bulk unsticky several blog posts? Or make several posts “sticky” as featured posts in bulk? I have a post-slider header which I like in my blog in order to highlight different posts every few weeks.
LikeLiked by 1 person
Hi Jean,
There is a way to bulk “unstick” your posts. Here’s how:
Go to Posts → All Posts, then choose “Sticky” to get a list of only your sticky posts.
Then, click on the checkbox next to title to select all nine sticky posts.
Under the Bulk Actions dropdown, select Edit, then click on the Apply button.
Next to Sticky on the far right side, click on the dropdown and select Not Sticky and then click on Update.
It may take a few moments for the changes to take effect. If you run into trouble, please do give us a shout in Support.
LikeLiked by 1 person
Thx so much Krista. I will be trying this later!
LikeLiked by 2 people
I forgot about my other spring cleaning project! I need to make one of my posts available as a downloadable PDF. It’s this one here: http://unpodipepe.ca/2014/06/20/italiano-per-ristorantihow-to-pronounce-your-restaurant-menu/ . I’ve done some research- and a lot of procrastinating, and it sounds like I need to make the PDF, then treat it like a photo and add it to my media library, then link to it. If anyone has any helpful hints or words of wisdom I’d appreciate it! Ciao, Cristina
LikeLiked by 1 person
LikeLiked by 2 people
This is great information…thank you for sharing!
LikeLiked by 1 person
The most brilliantly useful post I’ve read in ages… Thank you!
LikeLiked by 2 people
Thank you…this is cool
LikeLiked by 2 people
Thanks for this info..
LikeLiked by 1 person
I never knew about ‘Bulk Actions’ & ‘Converting Tags to Categories’,
Thank you very much for the useful information !
LikeLiked by 1 person