With the Poll block, you can add and customize a Crowdsignal-powered poll to your website and then collect and analyze the results. This guide will show you how to add polls to your site’s content.
In this guide
Crowdsignal is built by the same people behind WordPress.com. Our service allows you to create polls as well as surveys, ratings, and quizzes.
When you add your first Poll block on WordPress.com, we will automatically create an account for you on Crowdsignal. You can also go to the Crowdsignal website and sign up for a free account using your WordPress.com login information.
The Poll block is available to all WordPress.com sites. If you have a plugin-enabled site, activate the Crowdsignal plugin first to use the Poll block. If your site does not support plugins, the Poll block is already available to you.
To add the Poll block, click the + Block Inserter icon and search for “poll”. Click to add the block to a page, post, or template.
💡
Using your keyboard, you can also type /poll on a new line and press enter to quickly add a new Poll block.

After adding the Poll block, type your poll question, an optional description, and possible answers in the spaces provided:
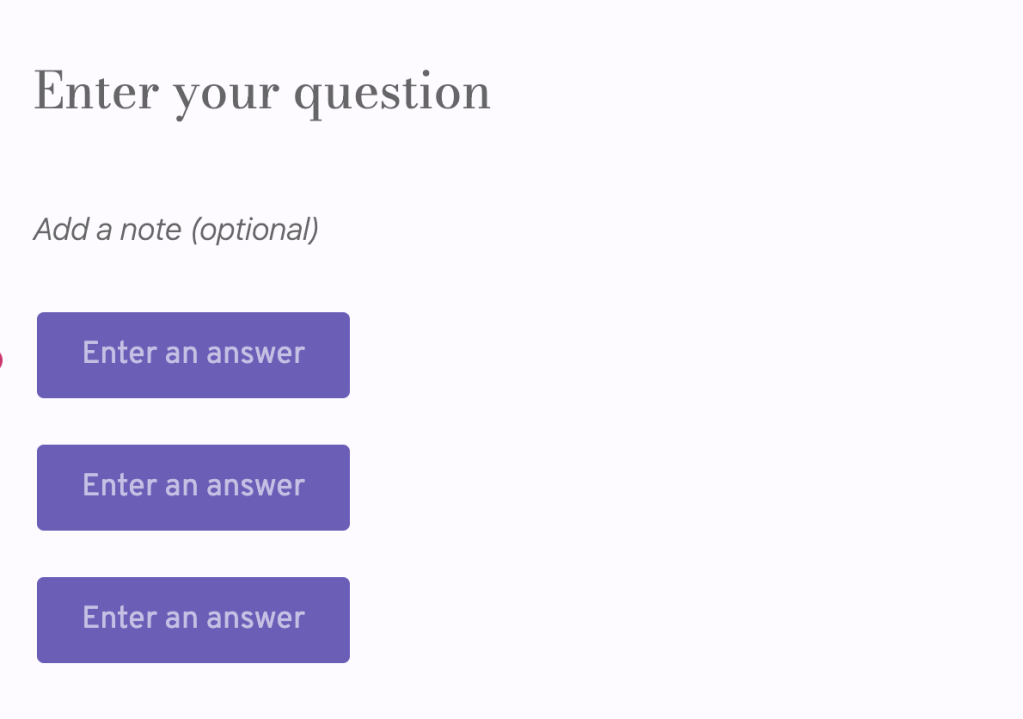
Here is an example of a created poll:
Each poll can only be displayed once on a post. So, if you have a poll in a post and in the sidebar, only the first instance of the poll will show. You can show two or more different polls on one post, however.
When you select a block, you will find additional block settings in the right sidebar. If you do not see the sidebar, you may need to click the Settings icon in the top-right corner to bring up the settings. This icon looks like a square with two uneven columns:
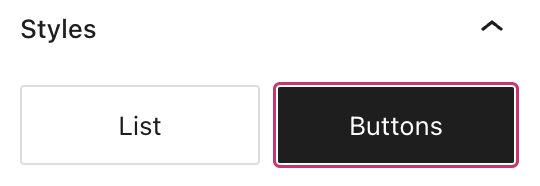
Choose a display style for your Poll block:
- List: Display the poll answers in a list style, showing radio dials that your audience can click on to choose an option.
- Buttons: Use buttons for your poll answers.
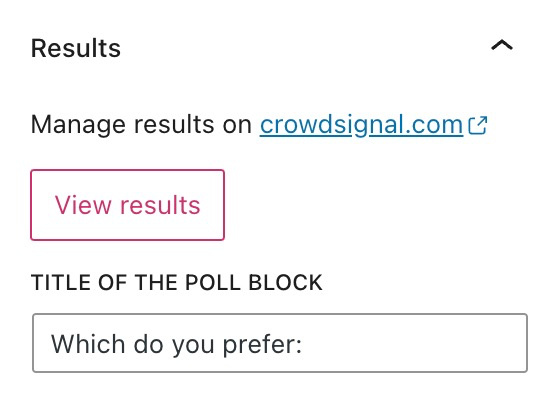
- View results: View and manage the results of your poll in the Results section. Click the “View results” button to access the results and analysis in your Crowdsignal account.
- Title of the poll block: Update the question/title of your Poll block.
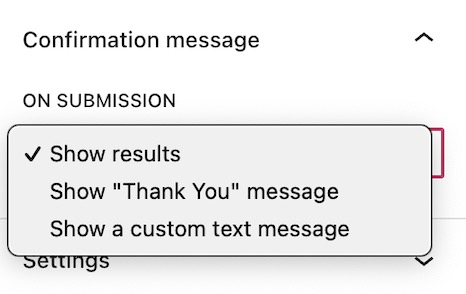
Customize the confirmation message that users see upon completion of the poll.
- Show results: Display how many votes have been submitted for the available options.
- Show “Thank You” message: Show the default “Thank You” message built within the Poll block.
- Show a custom text message: Type your message to display after submitting the poll.
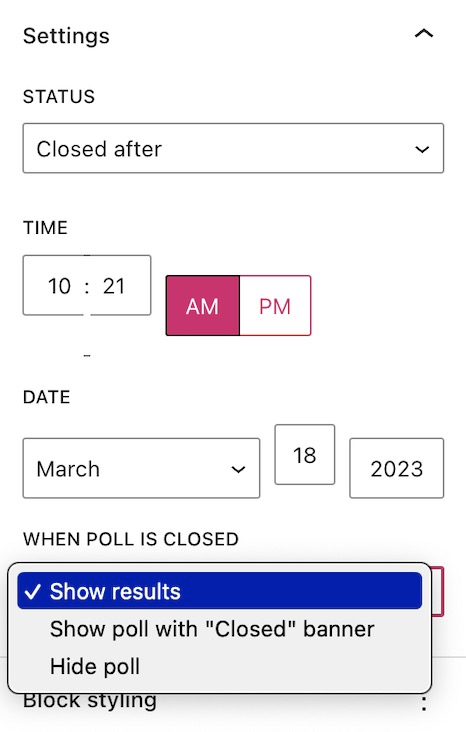
Choose the status of your poll:
- Open: The poll is open and your audience can submit their votes.
- Closed after: Choose a time and date in the future to set as a deadline for this poll. After this date, the poll will automatically close, and people won’t have the option to vote anymore.
- Closed: Immediately close the poll so that no more votes can be submitted.
When a poll is closed, you can choose what happens next:
- Show results: Publicize the options available in the poll along with the results of how people voted.
- Show poll with “Closed” banner: Show the poll with a banner at the bottom that says the poll is closed.
- Hide poll: Remove the poll from the page completely.
Under Answer Settings, specify if a user can only participate once in the poll as well as if you want to randomize the order of the answers any time a user refreshes or sees the poll.

Here, you can customize the colors of the poll using the color settings.
You can also customize the following aspects of the poll’s appearance:
- Choose Font: Click on the dropdown to select a font to use for the poll.
- Width: Set a percentage for the width of your Poll block.
- Reset: Click this button to undo any custom settings you added to the Poll block.
- Border Thickness: Set a custom value for the thickness of your Poll block border.
- Corner Radius: Give your Poll block borders a rounded appearance. Setting the radius to 0 means the block has sharp edges.
- Drop shadow: Toggle this option to give your block more depth with the appearance of shadows and highlights.

Here, you can customize the colors of the poll buttons using the color settings.

For more, visit our detailed instructions on Advanced settings.

