The Markdown Block lets you compose posts and comments with links, lists, and other styles using regular characters and punctuation marks.
Markdown is used by writers and bloggers who want a quick and easy way to write rich text without having to take their hands off the keyboard and without learning a lot of complicated codes and shortcuts.
You can use Markdown for posts, pages, and comments. This guide will detail how to enable Markdown on your blog and write with it.
In this guide
If you are already familiar with Markdown, enable it on your blog and start writing. You can refer to this Markdown Reference page for help. The Markdown Block follows the CommonMark spec (click the latest version link to see what features are currently enabled.)
Before you can use the Markdown Block, you must enable Markdown for your site.
- Go to Settings → Writing.
- Toggle on the option that says ‘Write posts or pages in plain text Markdown syntax.’
- Click Save Settings.
- Visit your dashboard.
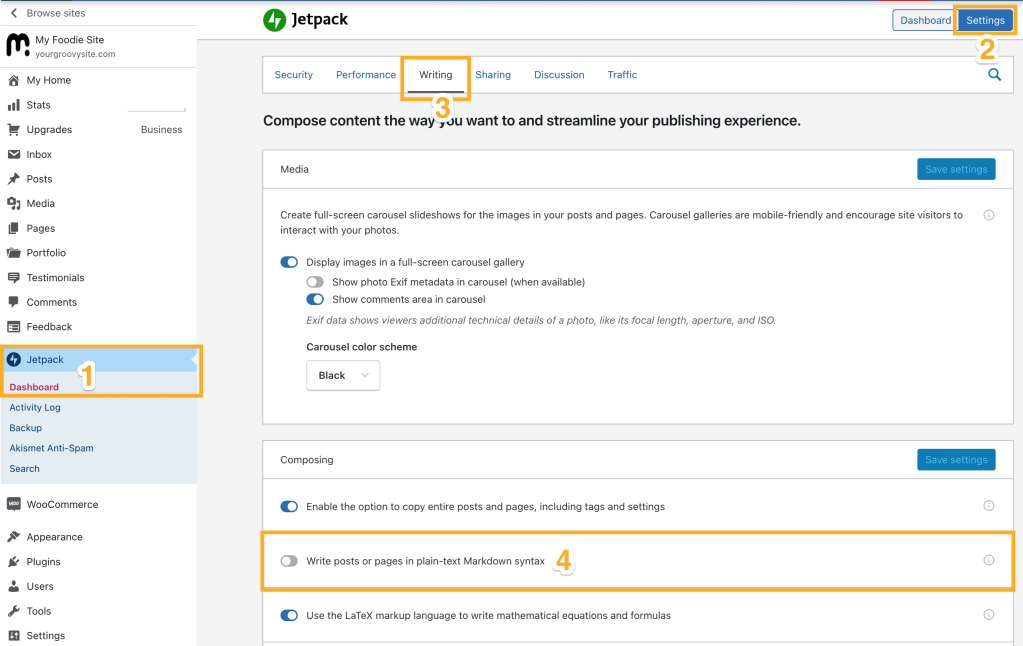
- Go to Jetpack → Settings → Writing.
- Under Composing click the button next to “Write posts or pages in plain-text Markdown syntax.”
- If the Save Settings button is not grayed out, click it to save the changes.
- Visit your dashboard.
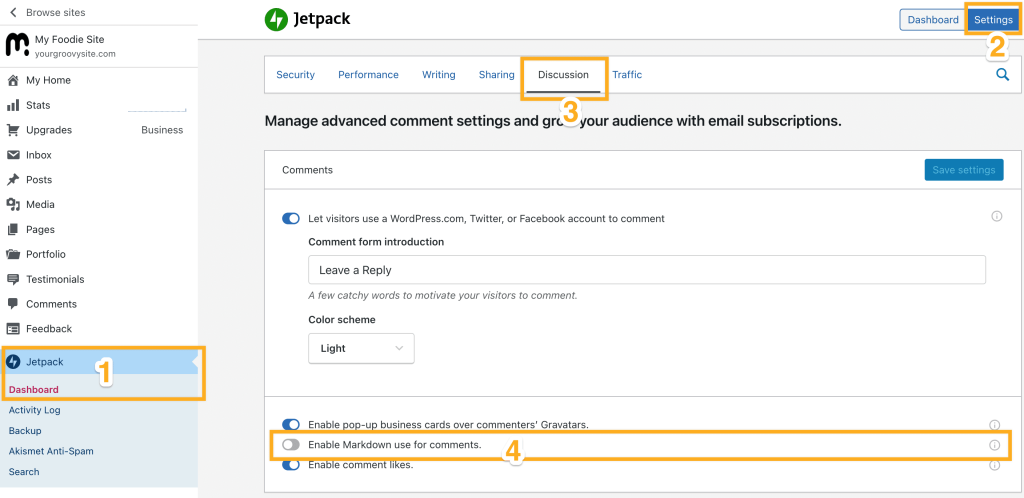
- Go to Jetpack → Settings → Discussion.
- Under Comments click the button next to “Enable Markdown use for comments.”
- If the Save Settings button is not grayed out, click it to save the changes.
To add a Markdown Block, click on the + Block Inserter icon.
You can also type /markdown and hit enter in a new Paragraph Block to add one quickly.

For more information, visit our detailed instructions on adding blocks.
Each block has its own block-specific controls that allow you to manipulate the block right in the editor. The Markdown Block offers the Markdown and Preview tabs, and more option control.

When writing in a Markdown block, you will see the Markdown tab selected, indicating that you should write your Markdown code here (more information on Markdown formatting below).
You can click the Preview tab to see an approximation of more information. Markdown content will appear when published. (Note that the actual appearance will vary depending on the styles added by your theme.)

💡
If you click Preview and still see Markdown code, there’s one of two reasons for this.
- Markdown has not yet been enabled. Enable Markdown with these steps.
- The Markdown is incorrect. Check here for a reference guide.
If you navigate away from the Markdown block, the block will show the Preview of the Markdown. When you click on the Markdown block again, it will switch back to the Markdown tab so you can continue writing.
Markdown uses special characters and punctuation marks to indicate styles and links. The specific characters you use and how you place them in the document are key to formatting your document. Markdown converts these special characters to the appropriate formatting when the document is published.
For example, in Markdown, to emphasize a word, you wrap it with an asterisk on both ends, like this: *emphasized*. When your writing is published, it will look like this: emphasized. Similarly, two asterisks denote strong text: **strong** will be published as strong.
To indicate links, use regular and square parentheses. Wrap the text you want to link in square parentheses, and immediately after it, insert the link target wrapped in regular parentheses. The actual Markdown could look like this: [WordPress.com](https://wordpress.com/). When published, it will be a standard link: WordPress.com.

The original Markdown text you write will always remain in Markdown so you can go back and edit it using Markdown. Only the published document – the post or the page – will be converted. If you write a post in Markdown, it will be published as a fully formatted post on your blog, but when you go back and edit it, it’ll still be in Markdown.
The best way to get started with Markdown is to experiment. Open the Markdown Reference guide, start a draft post on your blog, and try to use the different features.
The Markdown Block follows the CommonMark spec. It does not support Markdown Extra. However, Markdown Extra is supported in the Classic Editor.
What is Markdown Extra?
Markdown Extra by Michel Fortin includes some features not originally available in Markdown, including improved support for inline HTML, code blocks, tables, and more. Code blocks can use three or more back ticks (“`), as well as tildes (~~~).
For more detailed information on this, see the original reference guide for Markdown, and the Markdown Extra page.
When you select a block, you will find additional block settings in the right sidebar. If you do not see the sidebar, you may need to click the Settings icon in the top-right corner to bring up the settings. This icon looks like a square with two uneven columns:
The Markdown block will include a setting for Dimensions, with options for padding or margin. More details for this option can be found in the following guide for Dimensions Settings.
For more information, visit our detailed instructions on Advanced Settings.
If you are using the Classic Editor, you must enable Markdown and insert markdown using the HTML tab. Here’s our markdown reference guide for the classic editor. The Classic Editor uses Markdown Extra, which has a handful of options different from the CommonMark Spec used in the Markdown block.
One important item to note with the Classic Editor is that once you save your changes, you cannot edit the content as Markdown. It will show as formatted content or HTML. Instead, switch to the WordPress Editor and use the Markdown Block.

