Use the Image block to insert an image onto your page or post. This guide describes how to insert an image and use all the available settings to control how the image appears.
In this guide
Video Transcript
In WordPress, you can insert images into your pages and posts using the Image Block.
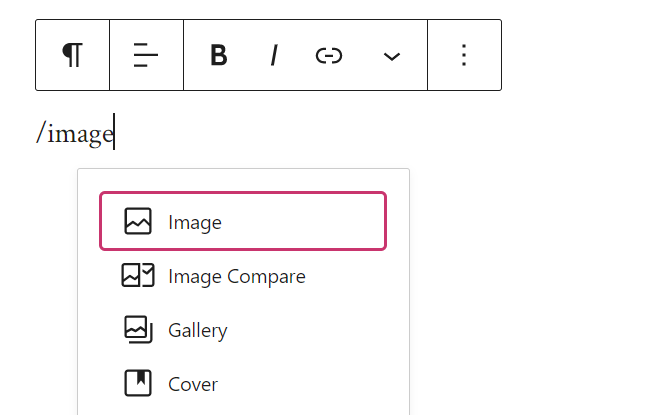
To add an image block, click the Block Insert button and then search for the Image Block. Or, type a forward slash on a new line followed by the word Image. Then, press Enter to add the Image Block.
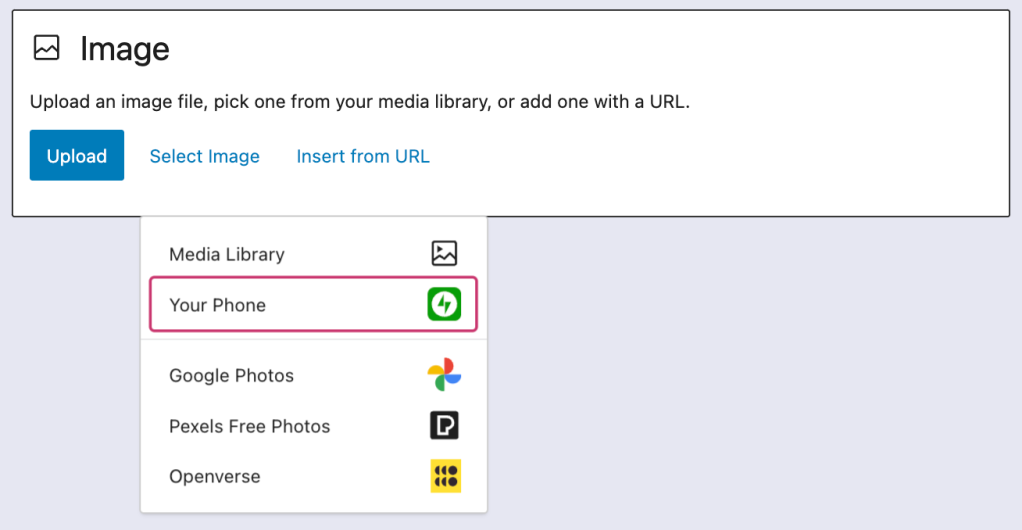
Next, you can upload an image from your computer to your site, or select an image from your media library, your Google Photos account, or the Pexels Free Photo Library. You can also insert an image from a URL if the image is hosted somewhere else. But you can also simply drag an image from your desktop directly into the image block to upload it to your site and embed it in one step.
In the toolbar, there are options to drag the image into a different location on the page or move the image up or down the page using the arrow buttons.
If you’d like to get a little creative, you can also apply a duotone filter to create a two-tone color effect. You can select one of the preset color combinations or choose the colors you’d like to use for the shadows and the highlights. To remove the effect, click the Clear button.
You can change the width of the image and align the image on the left, center, or right.
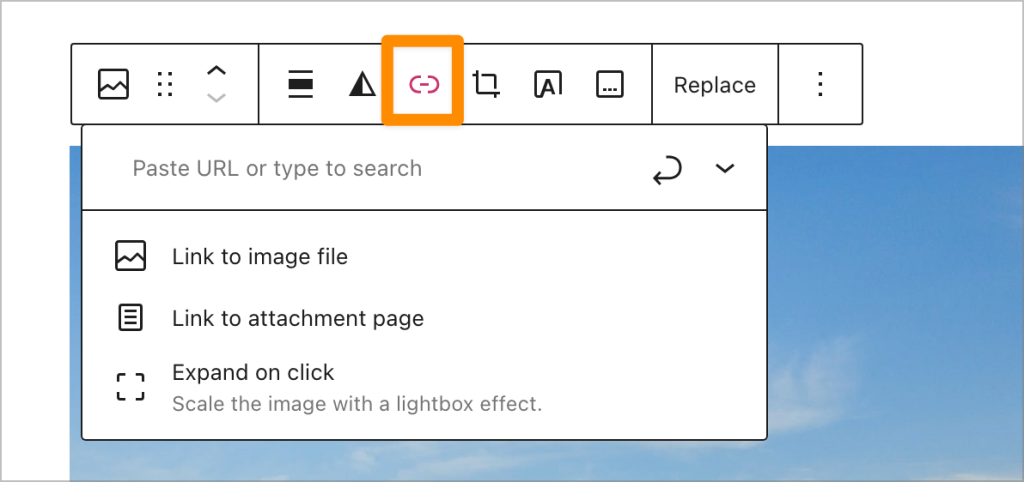
The link settings allow you to choose what happens when a visitor clicks on this image. You can link to a specific web address by pasting a URL into this field. Click the Apply button to create the link. Or you can link the image to an existing page or post on your own site. Start typing the title of the page or post and then select it from the results to create the link. If you prefer, you can link the image to its own dedicated attachment page or the full-sized version of the image file.
Click the Crop icon, and several additional editing tools will appear. You can zoom in on your image up to 300%, then click and drag to control which part of the image is visible.
You can also change the aspect ratio from the original width and height to square, or Landscape Mode, or Portrait Mode. And again, you can click and drag the image to change the portion that’s visible.
You can rotate the image by 90 degrees, 180, 270, or 360. When you’re happy with your changes, click the Apply button to commit your changes to the image or click the Cancel button to exit without making any changes.
If you like, you can add text over the image. Clicking this button will change the image block into a cover block, with the image now being used as the background. Then, you can add any text you like or another block.
To convert the cover block back into an image block, first, select the parent cover block. Then, click the Transform button and select the image block. Of course, you can always replace this image with another one any time you like.
To resize an image, click one of the handles and then drag the image until it’s the size you want.
With the image resized, you may choose to align the image to the left, or right of your page, which will allow your text and other content to wrap around the image.
To add a caption to your image, click in the caption space below the image and add any text you like. Then, you can format the text or add a link.
There are a few additional settings for the image block.
First, you can choose a style for the image. Choose between a rounded frame or the default style.
It’s always a good idea to add an alternative text description, which not only gives search engines an idea of what this image is but also helps your visually impaired visitors to know what the image represents.
By default, WordPress displays a thumbnail version of the image when it’s added to your page, which helps the page to load faster. But you can select a larger version with higher resolution if you like.
And you can adjust the dimensions of the image by entering a value in the Width or Height fields or select a percentage from the Preset options below.
And finally, you can round the corners of an image by entering a value for the border-radius.
With all these options, the image block provides a lot of flexibility for adding images to your pages and posts.
For more help adding images to your website, please visit WordPress.com/support.
To add the Image block, click the + Block Inserter icon and search for “image”. Click it to add the block to the post or page.
💡
Using your keyboard, you can also type
/imageon a new line and press Enter or click on the Image option in the menu to quickly add a new Image block.
/image on a new line.For more information, visit our detailed instructions on adding blocks.
Once you add the Image block as described in the previous section, you will be presented with three methods to select your image:
- Upload: Choose an image from your computer or device to add to your site. See supported file types.
- Select image: Choose an image from:
- Existing images in your site’s Media.
- Your phone, via the Jetpack Mobile App.
- Your Google Photos account.
- The Pexels Free Photo library.
- The Openverse library of free photos.
- Insert from URL: Paste a link to an image from the web.

To add an image directly from your iPhone or Android phone, take the following steps:
- Add any image-type block to your page or post.
- Click “Select Image” and then click “Your Phone” as shown below:
- Use your phone’s camera to scan the QR code on the popup window reading “Upload from your phone.”
- If you don’t yet have the Jetpack app installed on your phone, you’ll be prompted to download the app and log in.
- Select the image to upload from your phone’s library and tap the “Add” button.
After you have added an image to the Image block, you can change the size. Click the image to reveal the resize handles that look like dots around the image. Then, click on a resize handle and drag the image to your desired size:
To fine-tune the size and aspect ratio of an image, jump to this section.
When you click on the block, a toolbar of options will appear:

The icons on the Image block toolbar, starting from the left, are:
- Change block type.
- Drag the block.
- Move it up or down.
- Add a duotone filter to the image.
- Change alignment
- Toggle the caption box.
- Add a link to the image.
- Crop and other image editing tools.
- Add text over the image (clicking this will change the Image block to a Cover block.)
- Replace the image with a different image.
- Additional options.
Use the alignment options to make the image appear on the left, the right, or in the center. Additionally, you may see options for wide width and full width, if those are supported by your theme.
Further reading: Align Images With Text
To add a caption, click on the Caption icon in the block’s toolbar to enable a caption for that image. Then, type the caption in the Add caption box below the image:

If you want to modify a caption that has already been added to an Image block, you can do that by clicking on the caption and either replacing or adding text.
If you have written a caption for an image in the Media library and then added the Image block, the Image block will show the caption you wrote. However, if you add a caption to the image in the Media library after adding the Image block, that caption will not appear in the Image block. In that case, you can either type the caption manually on the Image block or remove and re-add the block so that it will use the caption from the Media library.
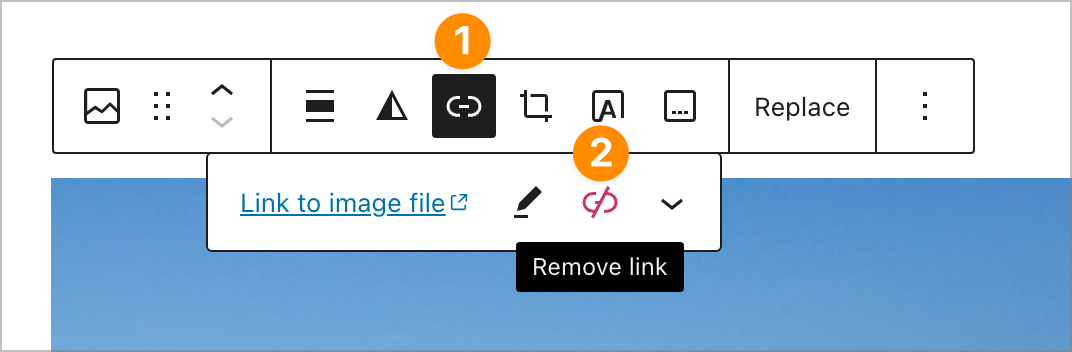
To add a link to an image, click the link icon in the toolbar — it looks like the link of a chain:
You will then be presented with link options, explained below:
A text box appears where you can:
- Search for content on your site. Only published content will appear here, not drafts or scheduled content.
- Type the URL of your link. This can be a URL on your website or any external website.
- Paste the URL of your link. This can be a URL on your website or any other website.
Press the arrow icon, or the return or enter key on your keyboard, to save the link. If you click the downward arrow next to that box, you can choose whether or not to have the link open in a new tab.
You may also choose to link the image to:
- The original image file.
- An attachment page – an informational page about your image, which includes the image, the caption, the image description, and a comment field.
- An enlarged version of the image, known as lightbox, by selecting the “Expand on click” option.
- When this link option is selected and visitors hover over images, their mouse pointer will change into a magnifying glass. Clicking on the image will open it on the lightbox.
- Your visitors can revert the image to its normal size and the page by clicking anywhere on the enlarged image or its surrounding area or pressing the Escape key. You can see it in action by clicking the link settings screenshot above.
To remove an existing image link, click on the link icon on the toolbar and then on the “Remove link” icon:
Click on the Crop icon in the toolbar, and a selection of editing tools will appear:
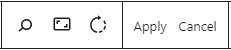
From left to right, these are:
- Zoom: Zoom in on your image up to 300% and click and drag to control which part of the image is zoomed in.
- Aspect Ratio: Crop the image to specific ratios of an image’s width and height. Available options are:
- Original
- Square
- Landscape: 16:10, 16:9, 4:3, 3:2
- Portrait: 10:16, 9:16, 3:4, 2:3
- Rotate: Rotate your image by 90°, 180°, 270°, or 360°.
- Apply: Commit your changes to the image.
- Cancel: Exit the image editing tools, abandoning your changes.
Edits you make to your image will create a new copy of the image in the Media Library. This ensures that if the image is used elsewhere on your site, it won’t be affected. It also means you still have the original image if you need it.
You can replace the image on the Image block via the Replace → Select Image option on the block toolbar:
When you select a block, you will find additional block settings in the right sidebar. If you do not see the sidebar, you may need to click the Settings icon in the top-right corner to bring up the settings. This icon looks like a square with two uneven columns:
The Image block settings contain a Settings menu and a Styles menu. Select the corresponding button under the Image block information to open those options.

Use the Alternative Text field to describe the purpose of the image. This text is used by search engines and screen readers.

The aspect ratio is the relative size of the width and height of an image. For example, an aspect ratio of 1:2 would mean the image’s width is half the size of the image’s height.

You can choose from the following common image dimensions:
- Original – The same aspect ratio as when you uploaded the image.
- Square – 1:1
- Standard – 4:3
- Portrait – 3:4
- Classic – 3:2
- Classic Portrait – 2:3
- Wide – 16:9
- Tall – 9:16
When an aspect ratio other than the original is selected, the Scale option will be available. Scale refers to how your image fits within your selected aspect ratio with the following options:
- Cover: Your image will scale larger within the space to fill it completely. You will lose content from the image.
- Contain: Your image will scale to ensure the entire content of the image is displayed within the space. The image will resize smaller in order to fit.
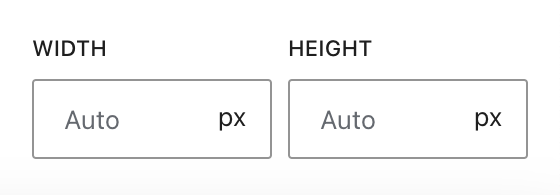
Set a custom width and height by typing pixel values in the Width and Height boxes. If you resize the image using the drag handles, these boxes will automatically update with the image’s new width and height. Erase the numbers from these boxes to return the image to the automatic size.
In the Resolution box, you can select the size of the image, among Thumbnail, Medium, Large and Full Size.

For more, visit our detailed instructions on Advanced settings.
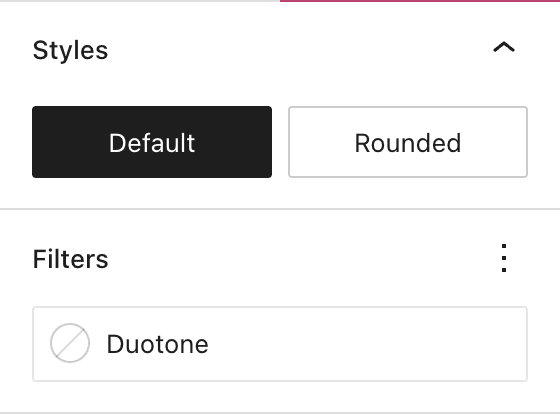
In the block settings sidebar, click on the Styles icon to access the design settings for the block. The Styles icon is in the shape of a circle with half of the circle filled in:
Choose the style of the image, which can be set to:
- Default: the image appears as you inserted it.
- Rounded: the image appears as a circle (if your image was originally square) or a capsule/oblong shape (if your image was originally a rectangle).
Add a two-tone color effect using the duotone filter setting.
You can set a border, radius, and shadow for your images. For more, visit the Border Settings support guide.

