Use the Donations Form block to accept credit and debit card payments for donations, contributions, and tips. This guide will show you how to set up donations on your website.
In this guide
The Donations Form block uses Stripe to process credit and debit card payments from your website’s visitors to ensure safe and secure payments through encryption.
Using the Donations Form block, you can accept one-time donations or set up monthly and yearly recurring subscriptions. Ask your visitors to support a good cause, tip you, buy you a coffee, or whatever you’d like to raise money for. Here are some examples of things people support through donations:
- Creative pursuits for musicians, artists, designers, writers, and more.
- Concrete creations like podcasts, video games, music clips, and photography.
- Bloggers and content creators of all kinds of topics.
- Everyday passions like news summaries and mindfulness exercises.
- Professional endeavors, including civic engagement and professional development.
- Nonprofits and community, religious, and political organizations.


Your donors will automatically receive a receipt upon making a donation. For recurring donations, your supporters are automatically billed at the end of their renewal period. Donors can cancel their support anytime through their WordPress.com account. A WordPress.com account is required to make a donation. If a visitor doesn’t have an account yet, they will be prompted to create one.
To accept donations on your website, insert the Donations Form block onto any post or page by following these steps:
- Visit your site’s dashboard.
- Navigate to Pages or Posts and click the title of any existing page or post to open it in the WordPress editor.
- Alternatively, click “Add New” to create a new page or post for your donations.
- Click the + block inserter button.
- Search for “donations” and click it to add it:

💡
Using your keyboard, you can also type /donations on a new line and press enter to quickly add a new Donations Form block.

If this is your first time using any WordPress.com payments features, we’ll prompt you to connect your WordPress.com account to Stripe — the payment processor used to collect your funds. Click the Connect button, and you’ll be directed to Stripe to continue:

With Stripe, you can create an account or sign in to an existing one. Any money you earn using WordPress.com Payments will go into your Stripe account. WordPress.com never has any access to the money you earn. From your Stripe account, you can move your earnings to the personal bank account of your choice.
Supported Countries and Currencies (click to reveal)
To start accepting payments using a Stripe account, you must be a citizen or own a company in one of the countries where Stripe is available for business. We officially support the countries listed below.
Your customers can pay using a credit card issued anywhere in the world.
- Australia
- Austria
- Belgium
- Brazil
- Bulgaria
- Canada
- Cyprus
- Czech Republic
- Denmark
- Estonia
- Finland
- France
- Germany
- Greece
- Hong Kong
- Ireland
- Italy
- Japan
- Latvia
- Lithuania
- Luxembourg
- Malaysia
- Malta
- Mexico
- Netherlands
- New Zealand
- Norway
- Poland
- Portugal
- Romania
- Singapore
- Slovakia
- Slovenia
- Spain
- Sweden
- Switzerland
- United Kingdom
- United States
When you first add the Donations Form block, it will include one-time, monthly, and yearly payments for you to customize in the block settings.
When you select a block, you will find additional block settings in the right sidebar. If you do not see the sidebar, you may need to click the Settings icon in the top-right corner to bring up the settings. This icon looks like a square with two uneven columns:
Toggle on the “Show monthly donations” option to allow your donors to set up recurring donations each month.
Toggle on the “Show annual donations” option to allow your donors to set up recurring donations each year.
Toggle both these options off to provide single, one-time payments only.
Toggle on the “Show custom amount option” to allow your donors to choose how much they would like to donate. Toggle off to offer only donation amounts set by you.

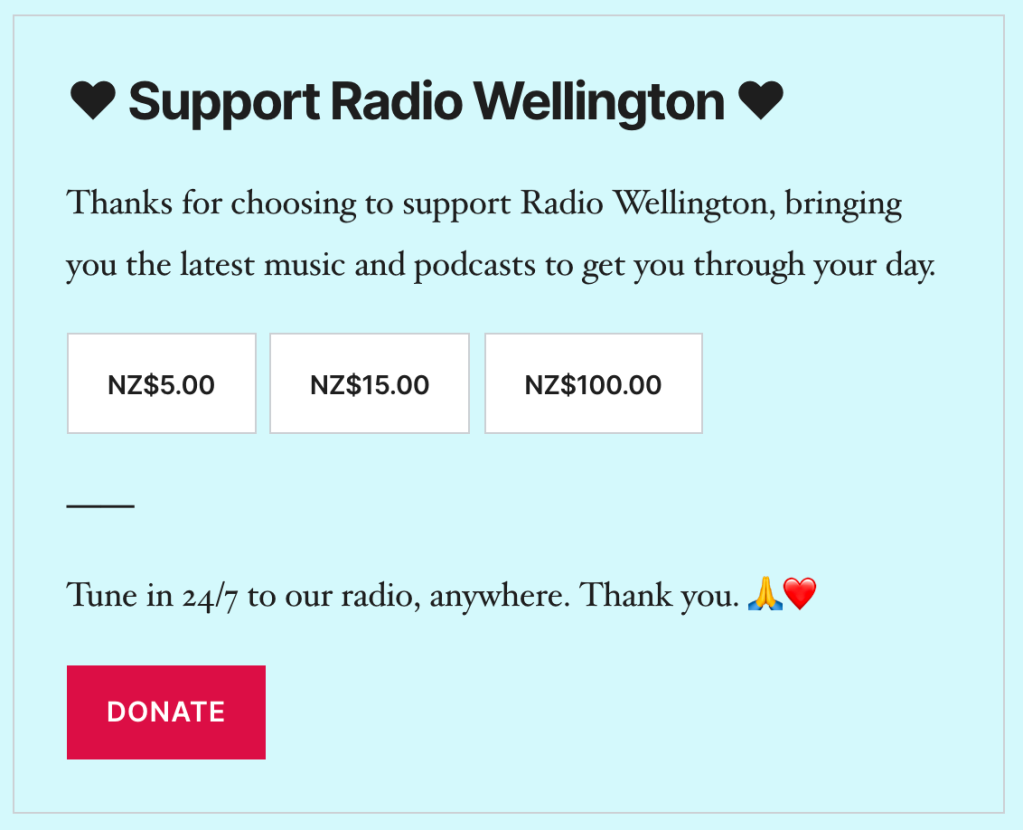
The donations form will offer three preset amounts ($5.00, $15.00, and $100.00) for your donors to choose from. To change the default amounts shown, click directly on the prices and type the new amounts with your keyboard:

If you will offer one-time, monthly, and yearly donation options, make sure to set the price on each tab.
💡
Transactions using this block do not account for taxes or shipping and will only charge the amount specified. If you wish to capture taxes or shipping in addition to the price, you can include this in the transaction amount when setting up the block.
In the block toolbar, select the currency the payment will be collected in:

You can fully edit the text within the Donations Form block and use the space around it to add additional text, images, video, and other content. Giving your website visitors more context and background about what they’re donating to and why it’s important will help encourage more people to donate.
To edit the text, highlight it with your mouse and type the new text with your keyboard. Choose the button colors in your site’s Styles settings.

Once you’re happy with the appearance of your donations form, Publish the page to start accepting donations on your website. You can add additional Donations Form blocks throughout your site as needed.
Once your Donations Form block is live on your post or page, share the URL with your social media followers, email lists, friends, and family. This is a great way to get more visibility and traffic for people to find and support you.
Once someone donates on your site, you might consider sending them a personal email thank you, a video, or putting them on a special mailing list for supporters. Keeping in touch with your supporters is a great way to build community, your brand, and keep those donations coming in.
Fees for payments are based on the WordPress.com or Jetpack plan you have and are calculated as a percentage of your revenue:
| WordPress.com Plan | Related Fees |
|---|---|
| WordPress.com Entrepreneur | 0 |
| WordPress.com Creator | 2% |
| WordPress.com Explorer | 4% |
| WordPress.com Starter | 8% |
| WordPress.com Pro (Legacy) | 2% |
| WordPress.com Starter (Legacy) | 3% |
| WordPress.com Free | 10% |
| Jetpack Plan | Related Fees |
|---|---|
| Security and Complete | 2% |
| Security Daily | 4% |
| Jetpack free | 10% |
| Woo Express Plan | Related Fees |
|---|---|
| Essential | 0 |
| Performance | 0 |
In addition to the fees listed above, Stripe collects 2.9% + US$0.30 for each payment made to your Stripe account. Not in the USA? Check Stripe’s fees in your currency.
This system allows you to offer Payments with minimal upfront investment. As you collect more supporters, it may make sense to move to a higher plan to retain more revenue.
Note that if your WordPress.com or Jetpack plan expires, the fee associated with your plan will increase to 10%. The Stripe fee will be unaffected.
You can view and manage your donors and earnings by visiting Tools → Monetize → Payment Settings (or Hosting → Monetize → Payment Settings if using WP-Admin). Visit our Payments Management guide to learn more.

