The Cover block displays an image or video that you can add text and other content on top of — great for headers and other banner-style displays. This guide will show you how to use the Cover block to give any page or post a sleek, professional look.
In this guide
Video Transcript
The cover block is a great way to add some visual interest to your pages and posts. It allows you to use an image, video, or solid color as a background, and then add content blocks to the foreground.
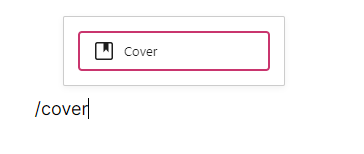
To add a cover block, click the Block Insertor button, and then search for the cover block. Or type a forward slash on a new line, followed by the word “cover.” then press Enter to add the cover block.
Next, select one of the preset colors from your theme to use a solid color as the background. Or you can upload a background image or select an existing image from your media library, your Google Photos account, or the Pexels Free Photo Library.
Generally speaking, abstract or decorative images work best, since the full image may not always display, and you’ll likely add some text or other content over the image.
Once you’ve selected a cover image, you can add any text you like. You can use this, for example, to title a new section of a post, or create a header for a page. But you could also add other blocks, like a quote or a button block.
To select the parent cover block, click the button on the left side of the toolbar. Then, you can change the width and the alignment of the cover block.
And you can change the position of the content within the block by selecting one of the content position options.
If you want, you can toggle the full height option to show the entire cover image. Or you can change the height of the cover block by clicking the handle at the bottom and then dragging it up or down.
If you’d like to get a little more creative, you can apply a duotone filter to create a two-tone color effect. You can select one of the preset color combinations, or choose the colors you’d like to use for the shadows and the highlights. To remove the effect, click the Clear button.
And of course, you can always replace this image with another one any time you like.
From the Options menu, you can show a few additional settings for the cover block.
First, you can choose how the background image behaves when you scroll up and down the page. A fixed background means the cover image will stay in place while your content scrolls along with your page. If you use a smaller image, you can choose to repeat it like a pattern to cover the entire background of the block.
If the Fixed Background option is turned off, you can also set the main point of interest, or focal point, within the photo. Click on the picker to drag it to the spot you want, or use the horizontal and vertical position percentages below to set it manually.
It’s always a good idea to add an alternative text description, which not only gives search engines an idea of what this image is, but also helps your visually impaired visitors to know what the image represents.
To remove the cover image and use a solid background color instead, click the Clear Media button.
By default, the cover block adds a gray transparent overlay to darken the background image, but you can choose any color you like, or even a gradient if you prefer. You can also set the opacity of the overlay color. Move the slider to the left to make the overlay color more transparent, or to the right to make it darker and more opaque.
You can change the padding within the cover block by entering a value here.
And finally, you can set the minimum height of the cover image in pixels. So it will always be displayed at this height. no matter what size screen your visitors may be using.
With all these options, the cover block is a great way to add some visual interest to your pages and posts. For more help with the cover block, please visit wordpress.com/support.
To add the Cover block, click on the + Block Inserter icon and search for “cover”. Click it to add the block to the post or page.
💡
Using your keyboard, you can also type /cover on a new line and press enter to quickly add a new Cover block.
For more information, visit our detailed instructions on adding blocks.
After adding the block, you will have the following options to set an image or video:
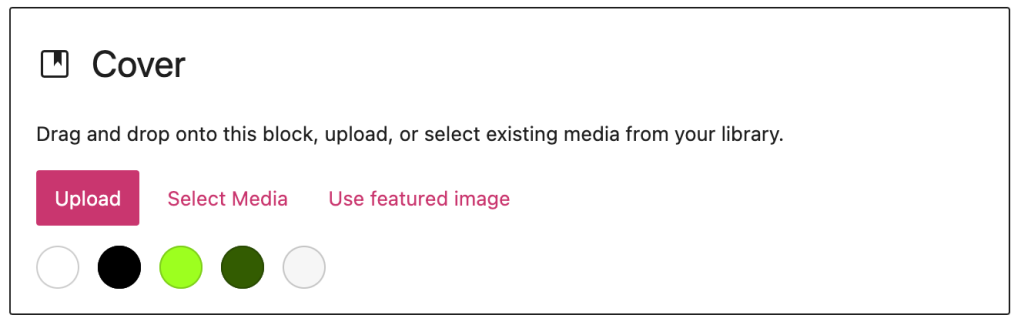
- Upload: Click to upload a new image (all plans) or video (video-enabled plans only) from your computer. See the supported file types you can upload.
- Select Media: Choose from an existing image or video from:
- Images in your site’s Media.
- Your phone, via the Jetpack Mobile App.
- Your Google Photos account.
- The Pexels Free Photo library.
- The Openverse library of free photos.
- Use featured image: Pull in the featured image of your page or post, if one is set.
- Select a color: Click on the colored circles to use that color for your cover. A few common colors are first presented, which you can later change to any other color in the block style settings.
The Cover block is decorative rather than functional, so it will not play any sound from a video file. Instead, use the Video block for videos to play with sound.
- Decorative or abstract images work best since the full image may not always display.
- Type any text on top of the image, as opposed to designing the text inside the image itself. This ensures the text will scale effectively for all screen sizes.
- The Cover block uses the image as a background image, and will not resize to show the entire image width on smaller-sized devices. Using the focal point picker setting, you can select which part of the image to focus on when viewed on smaller screens.
- If you have content in the image that needs to be displayed in its entirety on all device sizes, you can use an Image block instead.
Now that you’ve selected your image, video, or solid color, you can write text and add other content over it. Click the + block inserter to add other blocks to show on top of the Cover block, such as a Paragraph block, Buttons block, and Heading block.
When you click on the Cover block, a toolbar of options will appear above it:

These options are:
- Change block type.
- Drag the block.
- Move the block up or down.
- Apply duotone filter
- Align the image (left, right, and center, plus wide and full-width options if supported by the theme)
- Change content position
- Toggle full height
- Replace the current image with a new one
- More options
Like many other blocks, you can align the Cover block to the left, right, and center of the page. When using the left or right alignment, you can align other content next to the Cover block.
The Cover block also has Wide and Full-width alignment options that are useful for creating banner-style headers and widescreen effects. These two options are available if your theme supports this kind of alignment.

Use the Content Position option to adjust where the text and other content appears on the image:

To set the image to always show the full height, you can set the “Toggle Full Height” option in the block’s toolbar.
This option in the Cover block toolbar will appear after you’ve added an initial image or video. Choosing Replace will allow you to select a new media file.
When you select a block, you will find additional block settings in the right sidebar. If you do not see the sidebar, you may need to click the Settings icon in the top-right corner to bring up the settings. This icon looks like a square with two uneven columns:
When the option Inner blocks use content width is toggled ON, blocks added within the Cover block will display within the specified width.
- Content: The width of the content area for blocks not set to wide or full-width.
- Wide: The width of the content for blocks set to wide width.
There is no option for Full because blocks set to full-width will span the entire width of the screen.
Fixed Background
When the Fixed background setting is toggled ON, the Cover block image will appear to stay still in the background while the foreground scrolls vertically. This is sometimes called parallax scrolling.
Note that this feature may be disabled on some mobile devices to improve the page’s performance.
When the Fixed background setting is toggled OFF, the Cover block image will scroll with the rest of the page.
Repeated Background
The Repeated background option lets you repeat the same image to form a pattern in the Cover block. For example, if you have a small image of a balloon and you want it to repeat multiple times in the Cover block, you can toggle this option on. Here’s what that would look like:

Focal Point Picker
You will see the Focal point picker if the Fixed background option is turned off. Use the Focal point picker to specify the main point of interest in the photo and highlight it. This is especially helpful if the wrong part of an image is being shown on smaller screens.
Click on the picker to drag it to the desired spot, or use the Left and Top position percentages below to set it manually.
Alternative Text
In the text field, you can write an Alternative Text description, which is important for accessibility and SEO.
Clear Media
Click Clear to remove the image or video in order to use a solid colored background instead.
For more, visit our detailed instructions on Advanced settings.
In the block settings sidebar, click on the Styles icon to access the design settings for the block. The Styles icon is in the shape of a circle with half of the circle filled in:
The Cover block styles include the following:
- See the Color Settings guide.
- Jump to Overlay opacity.
- See the Typography guide.
- See the Dimensions guide.
- Jump to the Aspect Ratio setting.
- Jump to Minimum height of cover.
- See the Border and Radius guide.
By default, the cover adds a gray transparent overlay to darken the background image, but you can choose any color you like, or even a gradient if you prefer.
You can also set the opacity of the overlay color. Move the slider to the left to make the overlay color more transparent, or to the right to make it darker and more opaque. Set the opacity to zero for no overlay.
The aspect ratio is the relative size of the width and height of an image. For example, an aspect ratio of 1:2 would mean the image’s width is half the size of the image’s height.
You can choose from the following common image dimensions:
- Original – The same aspect ratio as when you uploaded the image.
- Square – 1:1
- Standard – 4:3
- Portrait – 3:4
- Classic – 3:2
- Classic Portrait – 2:3
- Wide – 16:9
- Tall – 9:16
You can set the minimum height of the cover image in pixels or other units. By setting a minimum height, the image will always be displayed at this height no matter what size screen your visitors may be using.

