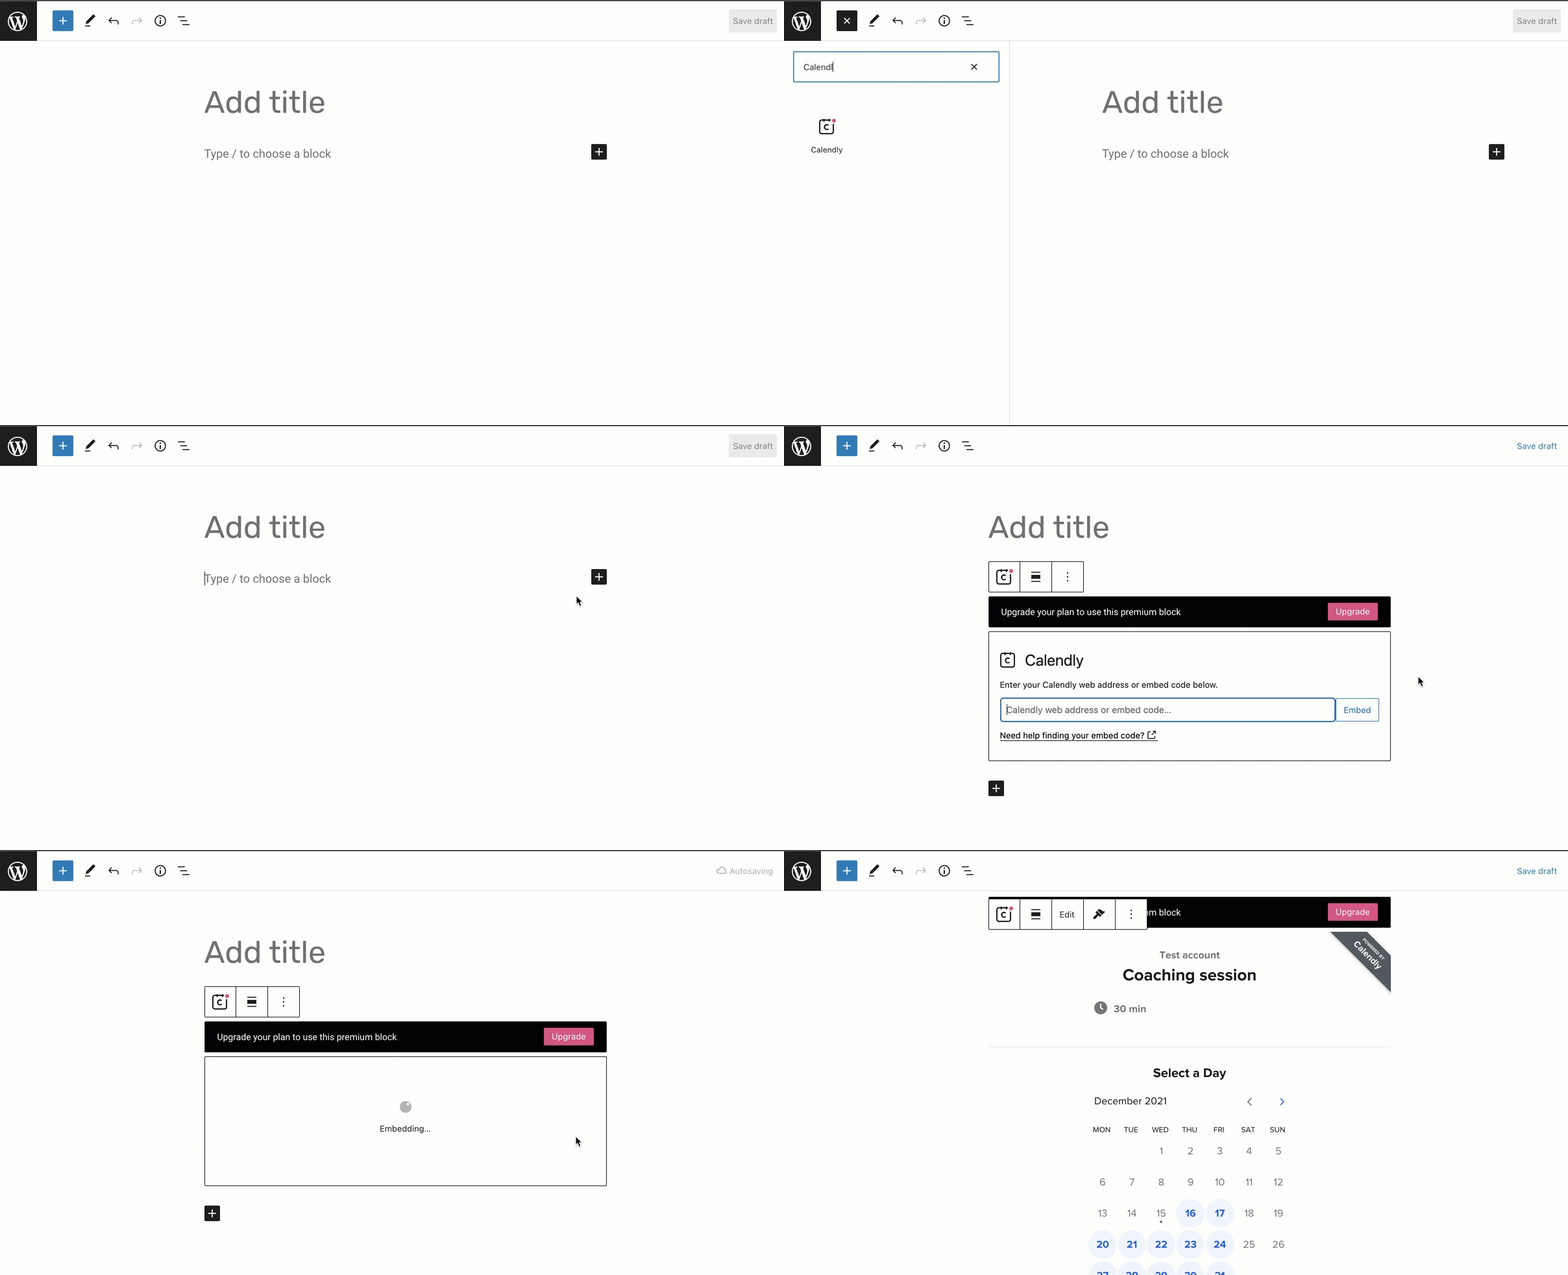
Use the Calendly block to embed a calendar for customers to schedule appointments. This guide will show you how to use the Calendly block to add appointment bookings to your website.
This feature is available on sites with our WordPress.com Explorer, Creator, and Entrepreneur plans. If your site has one of our legacy plans, it is available on the Pro plan.
In this guide
Calendly is a popular tool for easy and efficient scheduling, useful if you want your site visitors to book a specific time slot in your calendar for online and offline meetings directly on your site. It integrates with your personal calendar so you can avoid missing or double-booking appointments.
Calendly offers both free and paid versions. You can use either on your WordPress.com website depending on the features you need.
If you don’t already have an account with Calendly, sign up here to use the Calendly block.
To add the Calendly block, click the + Block Inserter icon and search for “Calendly”. Click to add the block to a page, post, or template.

💡
Using your keyboard, you can also type /calendly on a new line and press enter to quickly add a new Calendly block.
After adding the Calendly block, you’ll have a box for you to insert your specific Calendly link. Here’s how to get the link:
- Log in to your Calendly account.
- Click on the blue button in the top right corner to go to the “My account” section.
- Click on the “Copy link” button at the bottom left of the event you’d like to embed on your site:

- Back in the WordPress editor, paste that link into the Calendly block.
You can customize different aspects of how the calendar appears, as described in the following sections. Depending on what you want to customize, you’ll make the changes in either your Calendly account or in the block’s settings in the WordPress editor.
To change the look and feel of the Calendly embed (style, color, shape, size), follow these steps:
- In your Calendly account, select the calendar you wish to edit.
- Click on the “Share” option.
- Select Add to website → Embed inline → Continue.
- On the left, you can edit the background color, text color, button, and link color.
- Recopy the web address or embed code and insert it as described above.
You can also change the style of the button itself by accessing the color, width, and border options in the settings on your right. These settings are the same as any other Buttons block.
When you click on the Calendly block, a toolbar of options will appear above or below it:

The Calendly block has the following options in its toolbar:
- Change block type.
- Drag the block.
- Align the block to the left, right, or center.
- Edit the Calendly URL.
- Choose between an Inline Calendar or Button display.
- More options.
Calendly can be displayed on your post or page as a full calendar, button, or popup.
After inserting a calendar via the Calendly block, you can toggle between two modes in the block settings on the right: Inline calendar and Button:

If you do not see the sidebar on the right, click the Settings icon in the top right corner to bring up the settings. This icon looks like a square with two uneven columns:

You can access the same options by clicking on the paintbrush icon in the block toolbar.
This section of the guide applies to sites with the WordPress.com Creator or Entrepreneur plan. If your site has one of our legacy plans, this feature is available on the Pro plan.
Calendly also offers a floating button option which you can insert on your site by following these steps:
- Go to your Calendly account.
- Click on the blue “Share” button.
- Click on the “Add to website” tab.
- Select “Widget popup” and click “Continue.”
- Click on the “Copy code” button.
- Insert a Custom HTML block (not a Calendly block.)
- Paste the code into the block.
