VideoPress is a lightweight and responsive video player that allows you to host and embed videos on your site. This guide will cover how to upload and work with the videos on your site.
In this guide
This feature is available on sites with our WordPress.com Explorer, Creator, and Entrepreneur plans. If your site has one of our legacy plans, it is available on the Pro plan.
VideoPress gives you a simple and tidy video player for your website. Whether you’re a videographer, creator, filmmaker, educator, or blogger who’s new to this kind of tool, VideoPress makes it easy to upload high-quality videos. It works smoothly on all modern browsers and devices, ensuring great playback on screens of all sizes, from smartphones to desktops. Check out the VideoPress Service Guidelines for some basic tips on how to use our service effectively.
The VideoPress player is straightforward, unbranded, and ad-free. It places the focus on your content, so it can shine! Here is an example of the embedded player in action:
VideoPress is compatible with various video formats, including MP4 (.mp4, .m4v), QuickTime movies (.mov), Windows Media Video (.wmv), Audio Video Interleave (.avi), MPEG (.mpg), Ogg (.ogv), 3GPP (.3gp), and 3GPP2 (.3g2). For optimal results and better compatibility with other WordPress editor blocks (aside from the Video block), refer to our Recommended Video Settings.
VideoPress converts your uploaded video file into the MP4 format. Our MP4 files are encoded with H.264 video and AAC audio lossy compression codecs.
VideoPress performs effectively for files up to 1GB. Keep in mind that as the file size increases, there’s a higher chance of the upload process failing. Many networks have a timeout limit, typically when a file size exceeds 1.4GB. Videos that are smaller or compressed also load more quickly for your visitors. While the maximum upload size is 6GB, plugin-enabled sites have a limit of 2GB. However, on plugin-enabled sites, you can still upload larger files using SFTP (Secure File Transfer Protocol).
Videos over three hours will be converted to standard resolution but won’t be available in higher-resolution formats.
All files are optimized for progressive loading, enabling viewers to play your video while it downloads.
You can upload a video as a VideoPress video in the following ways:
- Click the + block inserter and add a VideoPress block.
- Click the + block inserter and add a Video block. Then, click the Transform blocks to VideoPress button in the block settings.
- Drag and drop a video file from your computer to the editing screen.
- In your dashboard, click on Media. Click Add New to upload a video file to your site’s Media.
After uploading, you may see a message saying, “Your video is being processed.” Behind the scenes, VideoPress is creating new video files based on your upload for maximum compatibility with popular forms of playback. We duplicate your video across our many data centers for maximum availability and accessibility.
If you are dragging from iPhoto and the file generates an error or doesn’t fully upload, ensure you have installed the most recent versions of iPhoto, your browser, and your operating system. Alternatively, if you have trouble with the upload, try dragging the file from iPhoto to your desktop, then from your desktop into your media library, post, or page.
Note that a slow or unreliable internet connection can limit the video size you can upload. If you are having trouble, try uploading at a different time of day or from a computer with a faster internet connection. Failed attempts don’t count against your storage space limit.
VideoPress automatically chooses the best player size to suit the width of your site’s content area. To change the size of the video, click and drag the controls on the side of the video, as demonstrated in the following GIF:
Set a Video Size Using a Shortcode
You can also insert a video and control its size using a shortcode, by following these steps:
- In your dashboard, click on Media.
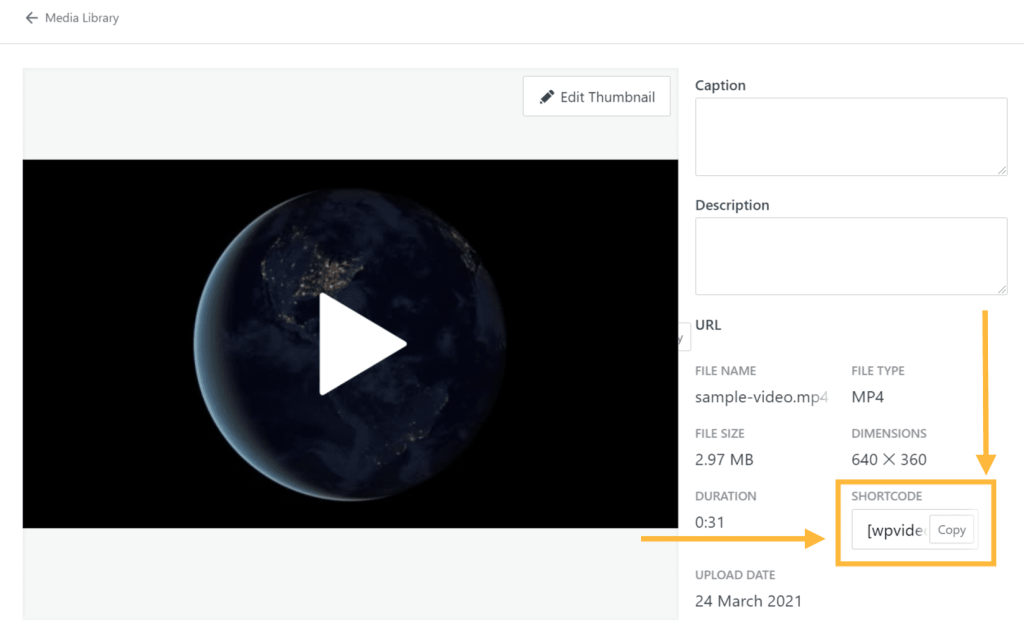
- Select the video you want, then click Edit.
- Copy the provided shortcode by clicking the Copy button, as shown in the image below.
- A VideoPress shortcode will start with the [ symbol, followed by
wpvideoorvideopress, a string of characters, and a closing ] symbol. - For example:
- A VideoPress shortcode will start with the [ symbol, followed by
[wpvideo OcobLTqC]
- Edit the post or page that you want to show this video on.
- Click the + block inserter and add a Shortcode block.
- Paste the shortcode from step 3, then add
w=XXXbefore the end bracket to specify the width in pixels, like this:
[wpvideo OcobLTqC w=400]
You may set the video width to a larger or smaller size, as long as it fits the width of your theme’s post column.
The shortcode can accept the following attributes to modify the default behavior:
w=Xfor width in pixels, do not include units.h=Yfor height in pixels, do not include units.hd=true/falseto force HD playback.freedom=true/falseto force only use open source video formats.autoplay=true/falseto automatically play the video when it loads.loop=true/falseto automatically play the video over and over.
You can use the attributes you’d like by adding them before the closing ] symbol: [wpvideo OcobLTqC attribute=value]. For example:
[wpvideo OcobLTqC w=640 h=400 autoplay=true loop=true]
The thumbnail, or Poster Image, is the image a viewer sees before clicking the Play button on a video.
To select a video thumbnail in the block settings, follow these steps:
- In the editor, click on the block and view the block settings on the right side.
If you do not see the sidebar on the right, click the Settings icon in the top right corner to bring up the settings. This icon looks like a square with two uneven columns:

- Under the Poster and Preview heading (or, just Poster, as in the example below) find the following settings:
- Pick from video frame: Scroll through each second of the video to select a frame to use as the thumbnail/ poster image.
- Select Poster Image: Select from your site’s Media, Google Photos, Pexels, or Openverse.
- Click Update or Save to save these changes.

The VideoPress player includes picture-in-picture on supported web browsers. This means you can float the video into a corner of your browser tab and play it while you scroll on the page or perform other tasks.
To use picture-in-picture mode, click on the icon in the lower right corner of the video player (it looks like a square with a smaller square in the corner):

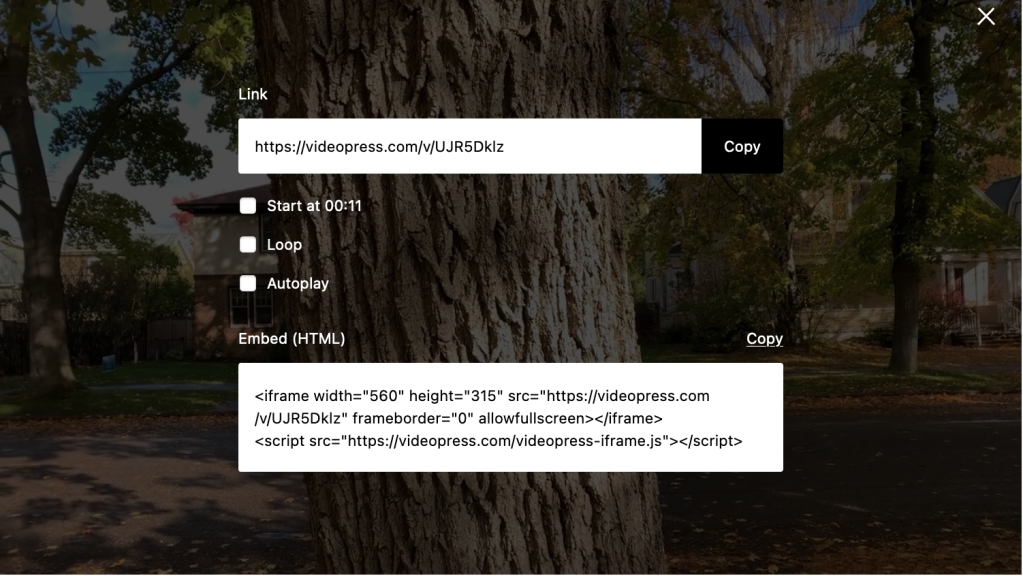
VideoPress makes video playback and sharing a straightforward experience for your viewers. Using the share links, viewers can easily share and embed your videos. Click the Share button (a curved arrow icon) in the top-right corner of the video player to reveal the following sharing options:
- Link: Copy the URL of the video.
- Start at: Adds the
?at=parameter to the URL. Anyone who clicks the URL will see the video starting at the timestamp of your choice. - Loop: The video will repeat itself for the viewer.
- Autoplay: The video will start playing automatically for the viewer, without needing to click the Play button.
- Embed (HTML): Copy an iframe code to embed the video on another website.
Disable Video Sharing in Block Settings
To turn off sharing and download settings, follow these steps:
- In the editor, click on the block and view the block settings on the right side.
If you do not see the sidebar on the right, click the Settings icon in the top right corner to bring up the settings. This icon looks like a square with two uneven columns:
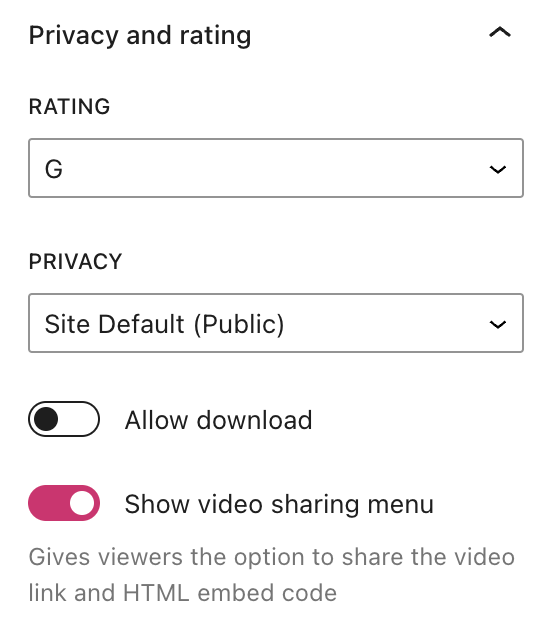
- Under Privacy and rating, find the following settings:
- Rating: Choose if the video suits a G, PG-13, or R audience.
- Privacy: Set the video to private, public, or use the site’s privacy settings as the default.
- Allow download: Enable a download button on the video for viewers to save the video file.
- Show video sharing menu: Gives viewers the option to share the video link and HTML embed code.
- Click Update or Save to save your changes.
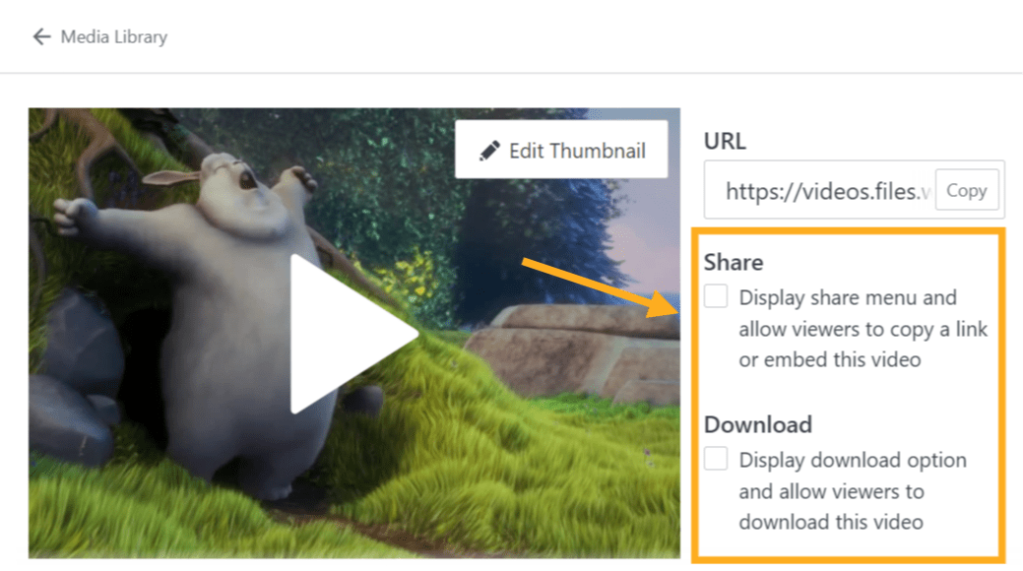
Disable Video Sharing in Media
You can disable sharing for an individual video by following the steps below:
- In your dashboard, go to Media.
- Locate the video and click on it once.
- Click Edit.
- On the right side of the video, you can check or uncheck the boxes for:
- Display share menu and allow viewers to copy a link or embed this video
- Display download option and allow viewers to download this video
Disable Video Sharing in Media Settings
If your site has no plugins installed, you can also disable sharing for all uploaded videos.
- Visit your dashboard.
- Go to Settings → Media and scroll down to the Video Player section.
- Uncheck the box for Share embed codes and download links:

⚠️
Disabling sharing removes the functionality, but it is still possible to download the video from your browser. We take reasonable steps to prevent embedding on other sites by hiding the sharing options, and that will stop most attempts.
Videos that are contained on a Private Site or explicitly flagged as private will only be accessible from within the content of the site itself to authenticated site visitors. If you receive an “Unauthorized” message, please ensure you are signed in with an account that has access to the site where the video was uploaded to.
An “Unauthorized” message may also appear if a video has been blocked due to a violation of our Terms of Service.
You can change a video’s privacy settings in the block’s settings.
- Video Stats and Insights: See the number of views and other data about your site’s videos.
- Add Chapters and Captions to a Video: Enhance the engagement and accessibility of a video with chapters and captions (subtitles).

