You can upload many types of documents to your WordPress.com site. This guide will show you how to work with documents on your site.
You can upload many different types of documents directly to a WordPress site. See the Accepted File Types page for a full list of supported document file types.
You can use documents to share anything with your readers, such as a meeting agenda, school policy changes, sermon notes, a resume, or anything else you wish to share with others. There are several ways to add files.
If you want to embed a PDF file, visit our guide to embedding a PDF file.
You can also embed Google Docs, including Spreadsheets, Forms, and Presentations. See our Google Docs guide for more.
The following process describes uploading a document from your computer to your site’s Media and inserting a download link into a post or page:
- Visit your site’s dashboard and click on Media.
- Click on the Add New button found in the top left corner:

- Choose a file (or multiple files) from your computer to upload.
- Once the file has finished uploading, click the Edit button.
- Click the Copy button to copy the file URL to your clipboard:

Now that you have the URL, you can insert this as a link or a button on any post or page. You can also use the File Block to create a download button for documents.
The following process describes inserting a download link to a file that already exists on another website. This method will not upload the document/file to your site’s Media Library, so if the file is removed from its location, your link will appear broken. This is not recommended unless you know the file will always be available at the specified location.
- Visit your site’s dashboard and click on Media.
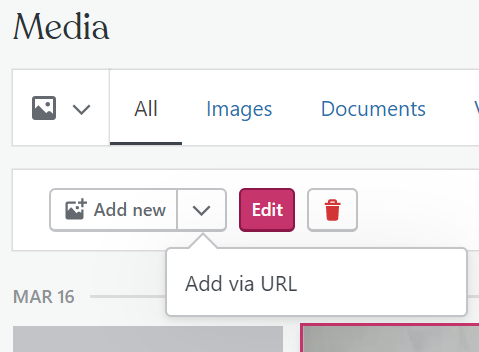
- Click on the chevron symbol next to the Add New button and click Add via URL:

- Enter the URL and click Upload.
- Once the file has finished uploading, click the Edit button.
- Click the Copy button to copy the file URL to your clipboard:

Now that you have the URL, you can insert this as a link or a button on any post or page.
To view the documents uploaded to your site, follow these steps:
- Visit your site’s dashboard.
- Select Media.
- Click on the Documents tab at the top.
Select any document and click Edit to view and edit details about the file. To delete the file, click the trash can icon next to Edit.
