You can transfer ownership of a site and its related purchases by following the steps in this guide.
In this guide
To begin the process of transferring your site to a new owner, the current owner must take the following steps:
- Visit your site’s dashboard and navigate to Settings → General (Or, Hosting → Settings if using WP-Admin).
- Scroll down to the “Site tools” section.
- Click the “Transfer your site” option:

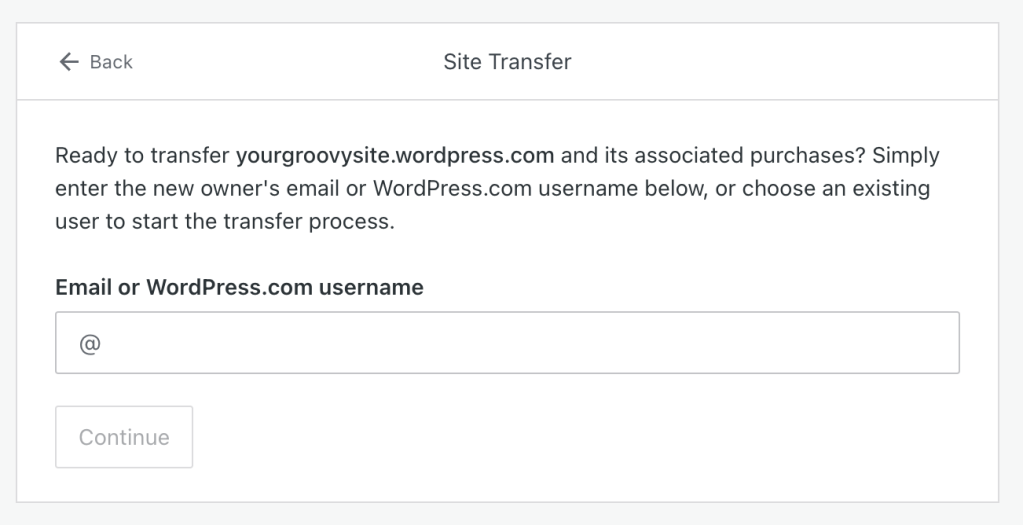
- Type any email or WordPress.com username. If the new owner isn’t on WordPress.com yet, we’ll guide them through a one-click sign-up process.
- Click the “Continue” button:
Carefully read the warning message that appears on the next screen to confirm that:
- You will be transferring the ownership of the site but will remain as an administrator yourself. The new owner can remove your admin access from the site.
- Any posts you have published will remain authored by your account. The new owner may change the author.
- Your WordPress.com plan and any other paid upgrades will remain on the site but will be transferred to the new owner. Your old billing history will remain on the original site owner’s account, while future transactions will be associated with the new owner’s account.
- Any domains you own and registered on the site will remain on the site but will be transferred to the new owner.
If you wish to continue with the transfer, toggle the statements at the bottom to confirm, then click the “Start transfer” button.
You’ll receive an email to your email address asking you to confirm the transfer. Click the “Authorize transfer” button in the email to complete the transfer:

The new owner will then receive a confirmation email:

The new owner will also receive an email for each transferred domain.
Domain owners are required to provide current and valid contact information. After transferring the domain, the new owner must update the domain contact information from your information to theirs.

