Categories provide a helpful way to group related blog posts together. Follow the steps in this guide to create and categorize your posts and display them on your website.
In this guide
Categories keep your posts organized and easy for your readers to navigate. You might want to create categories for different topics you cover on your blog. For example:
- A food blog may use categories for Breakfast, Lunch, Dinner, and Dessert.
- A company may create categories for News, Promotions, and Product Releases.
- A graphic designer may have categories for Illustration, Video, UX Design, and Logo Creation.
No matter the topic of your blog, categories keep your posts in order as your blog grows.
New blogs start with one default category called Uncategorized. To create your first categories, follow these steps.
Select the appropriate tab for your admin interface style:
- Go to your site’s dashboard.
- Navigate to Posts → Categories.
- Click Add New Category.
- Give the new category a name and (optionally) a description.
- Click Add to save the new category.
By default, the category will be added as a Top level Category. This means that it is not a subcategory.
To create subcategories, toggle off the switch for Top level Category and choose the top-level category you want this subcategory associated with. For example, a food blog might have a top-level category for Dessert and subcategories for Cakes, Pies, and Ice Cream.


When you create a new post, it is automatically assigned the default category. All posts must be given a category. The default category is Uncategorized. You can follow these steps to change it.
Select the appropriate tab for your admin interface style:
- Visit your site’s dashboard.
- Navigate to Posts → Categories.
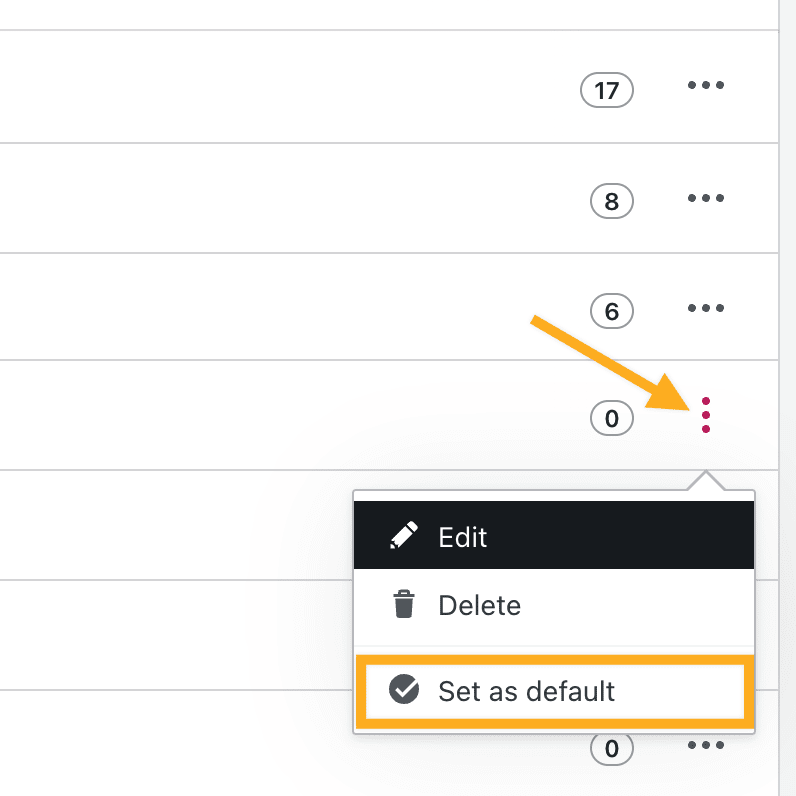
- Click the ellipsis (three dots) to the right of the category you want to assign as the new default.
- Select Set as default from the drop-down menu.
While it is not possible to delete the “Uncategorized” category, you can rename it to whatever you want by clicking the Edit option in the dropdown menu next to the category name.
Now that you have created some categories, as described in the previous section, the next step is to add those categories to your posts:
- Visit your site’s dashboard
- Click on Posts.
- Click on the post you want to assign to a category.
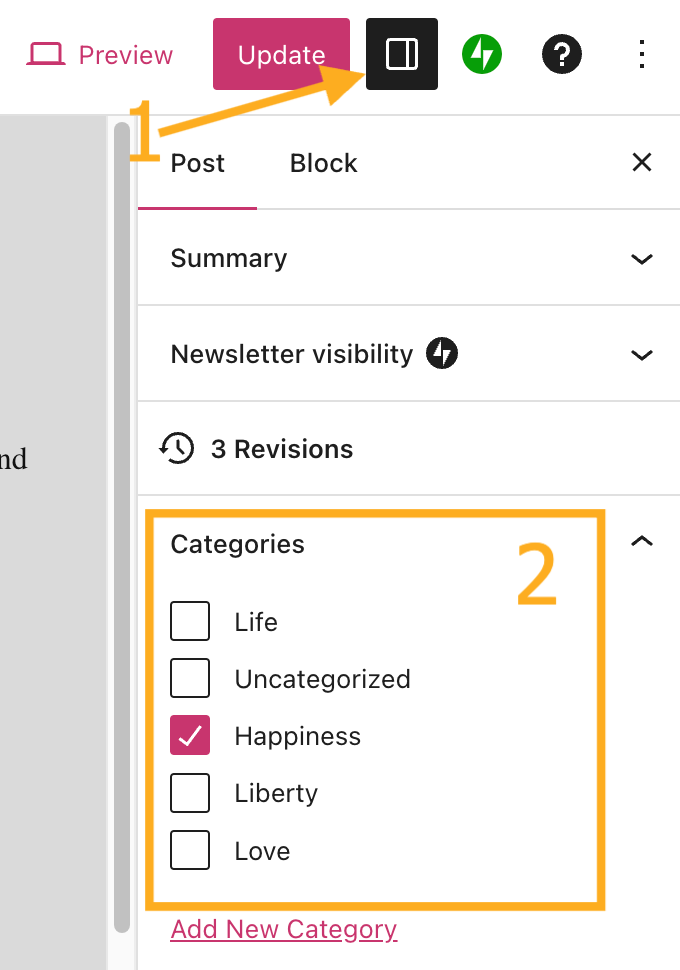
- Open the post settings sidebar (marked with a 1 in the adjacent image.)
- Find the Categories section (marked with a 2 in the adjacent image.)
- Click the checkbox next to the category you want to assign to the post.
- Click Update or Publish to apply the changes to that post.
You can remove a post from a category by unchecking the box next to the category name.
It is possible to quickly create a new category here by clicking on Add New Category below the list of your existing categories.
Categories will appear with the selected category or categories at the top of the list and the remaining categories in alphabetical order.
You can select multiple categories for a single post. However, posts with more than 15 combined categories and tags will not appear in the WordPress.com Reader.
After categorizing your posts as described in the previous section, you may wish to display those categories on your site to make it easier for your visitors to find what they’re looking for. There are several ways to do this:
- List your categories in your site’s navigation menu. Visit Add Categories to a Menu to learn how.
- Display a list of category names, commonly shown in a sidebar or footer. Insert the Categories List block to do this.
- Display posts of a particular category on a page:
- WordPress automatically creates these pages for you – see below.
- Insert a Query Loop, Post Carousel, or Blog Posts block that you can filter to show posts of a specific category.
WordPress automatically generates a category page for every category on your site. This page displays all of the posts assigned to that category and automatically updates with every new post you publish with that category.
The category page will have a link in the following format:
https://yourgroovysite.com/category/category-name/
To visit any category page on your site, use the above URL and:
- replace
yourgroovysite.comwith your website’s address. - replace
category-namewith the name of your category.
You can also visit a category page by viewing a blog post on your site as a member of the public and clicking on the category name, typically displayed at the top or bottom of the post.
The design of these category pages is controlled by your site’s theme. If your theme supports the Site Editor (Appearance → Editor), you can customize the category page design by editing the Archive template.
If a category page displays a message such as “not found” or “nothing found”, no published posts are assigned to that category yet. After you assign at least one public post to a category, it will appear on the category page.
Deleting or editing a category will not delete or modify any posts assigned to that category. To edit or delete a category follow the steps below.
Select the appropriate tab for your admin interface style:
- Visit your site’s dashboard.
- Navigate to Posts → Categories.
- Click the ellipsis (three dots) to the right of the category you want to edit or delete.
- Choose:
- Edit: Change the name, parent category, and category description.
- Delete: Remove the category from your site. This does not delete any posts which had that category.
- Set as default: Assign as the default category.
If you have a large number of categories that you wish to delete and it would be tedious to delete them one at a time, you can use the bulk delete option.
These instructions are referring to the WP-Admin interface. To view this interface, click the View tab in the upper right corner and select Classic view.
Under Posts → Categories, tick the checkbox next to all the categories you wish to delete. In the Bulk Actions drop-down above the list, select Delete, then click the Apply button.
People can add specific tags and topics in their WordPress.com Reader for topics they’re interested in following. Then, when your post uses a category they’ve added to their topics, they’ll see your post in their Reader. Therefore, assigning tags and categories to your post increases the chance that other WordPress.com users will see your content.
However, you don’t want irrelevant content on the topics listings or search, and neither do we. That’s why we limit the number of tags and categories used on a public topic listing. We recommend adding a maximum of 5 to 15 combined categories + tags to each of your posts. The more categories you use, the less likely your post will be selected for inclusion in the topics listings. Learn more about Topics here.
You may need to provide the Category ID for access restrictions on specific membership plugins or to implement custom CSS on a particular category page. You can find the category ID by going to Posts → Categories.
These instructions are referring to the WP-Admin interface. To view this interface, click the View tab in the upper right corner and select Classic view.
Scroll over the category you need a category ID number for, and click the Edit link under the category. You will be taken to the Edit Category screen.
Then, the Category ID for that category is visible in the page URL after tag-ID at the top of your browser screen:


