You can earn income from your site by publishing content as a newsletter your site visitors can read with a paid subscription. This guide will show you how to set up a paid newsletter on WordPress.com.
In this guide
A WordPress.com newsletter enables visitors to subscribe to your posts, which will be emailed to them whenever you publish a new post on your site. Paid newsletters are a fantastic way for creators and businesses to connect directly with their audience and generate revenue. People who sign up for your newsletter are already interested in your ideas, recommendations, and products, and are more likely to pay to access exclusive content.
To create a paid newsletter, all you need is:
- A WordPress.com website set to public.
- A free Stripe account to accept payments to your bank account.
First, set the price you will charge your subscribers to access your content:
- Visit your site’s dashboard.
- Click on Tools → Monetize (or Hosting → Monetize if using WP-Admin).
- Next, click on the “Payment Settings” tab.
- If you have not connected your Stripe account, you will be prompted to do so at the top of the screen.
- Click on “Payment plans” → “Add a new payment plan.”
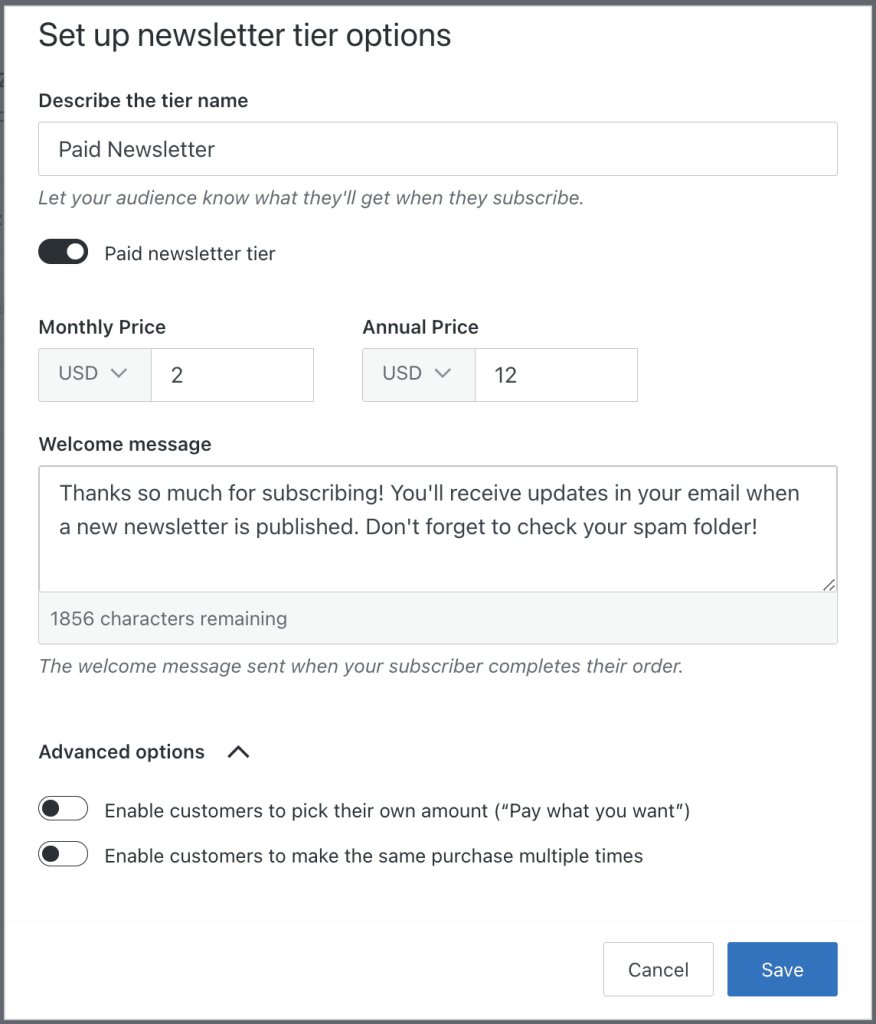
- Toggle the “Paid newsletter tier” option “on” and you’ll then have the options for adding a Monthly and Annual Price for your paid newsletter:

- Fill out/review the following fields:
- A name for your plan, which you can type in the field labeled either “Describe the plan” or “Describe the tier name“, depending on whether you’re setting up a plan or a newsletter tier. This name will be seen by your subscribers when they sign up.
- Amount (currency and price) you will charge subscribers.
- Welcome message: write a brief message to welcome your subscribers.
- Click “Advanced options” to reveal the following options. You can turn these options on or leave them turned off:
- Enable customers to pick their own amount (“Pay what you want”)
- Enable customers to make the same purchase multiple times (likely not suitable for paid newsletters)
- Click the “Save” button to create your payment plan.
Your new payment plan will appear under Payment Settings, where you can edit or delete the plan.

For details on payment fees, monitoring your revenue, issuing refunds, and more, see our Payments guide.
Next, you’ll start preparing your first piece of content for your paying subscribers.
- Visit your site’s dashboard.
- Click on Posts → Add New Post.
- Start writing your post and add images and other content using the WordPress editor.
Before publishing your post, visit the next step to learn how to share it with paying subscribers.
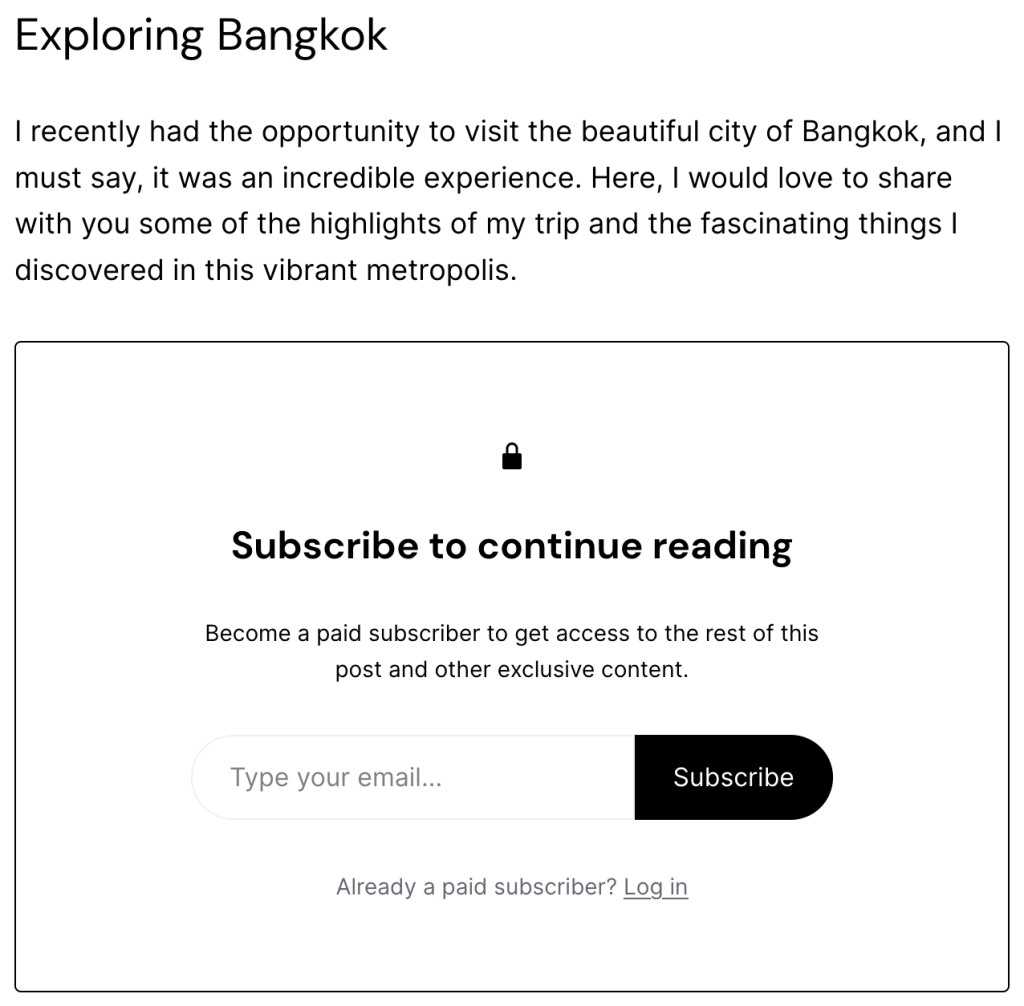
By default, a blog post is visible to everybody when published. There are two ways to restrict the post visibility to paying subscribers.
- Access Settings: To make the entire post visible to subscribers or paying subscribers only.
- Paywall Block: Show a part of the post to everyone while making the rest of the content accessible for subscribers or paying subscribers only.
Let’s look at both of these approaches in detail.
The Access settings are found in the post settings on the right sidebar of your post.
If you do not see the sidebar on the right, click the Settings icon in the top right corner to bring up the settings. This icon looks like a square with two uneven columns:

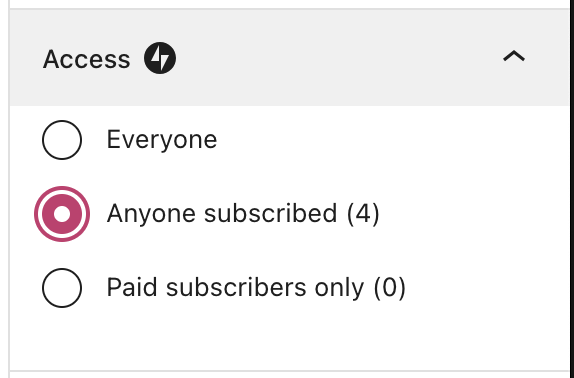
- Scroll down to the “Access” section.
- Choose one of the following options:
- Everybody: the post will be visible to everyone.
- Anyone subscribed: the post will be visible to your subscribers only. This includes free subscribers. Anyone who has not subscribed will see an option to subscribe.
- Paid subscribers only: the post will be visible to subscribers who have paid through the payment plan you set up in Step 1. If you have set more than one paid newsletter tier plan, selecting this option will enable you to select which tier can access to the post.
- Click the “Publish” button to share your post with the desired audience, who will receive an email notification.
Using the Paywall block, you can provide full access to content to all subscribers or paid subscribers only, while displaying a preview to non-subscribers.

You can add the Paywall block towards the beginning of a post. Any content before the Paywall block will be accessible to everyone. Any content after the Paywall block will be accessible to subscribers or paid subscribers only, depending on what you choose in the block toolbar — “Anyone subscribed” or “Paid subscribers“:

You can also use the Paywall block settings to restrict content to subscribers or paid subscribers:
- If the block settings do not appear, click the Settings icon on upper right hand side, as shown in the image.
- Click the Block tab to reveal the block settings.
- Under Content access, choose from the two options “Anyone subscribed” or “Paid subscribers“.

Click Publish to share your post with the audience you set in the previous step. An email notification will automatically be sent out to your chosen subscribers.
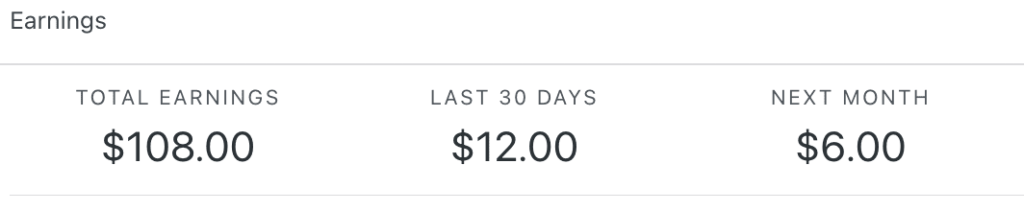
You can view your earnings, subscribers, and payment plans by visiting Tools → Monetize.
Visit our Payments Management guide to learn more.
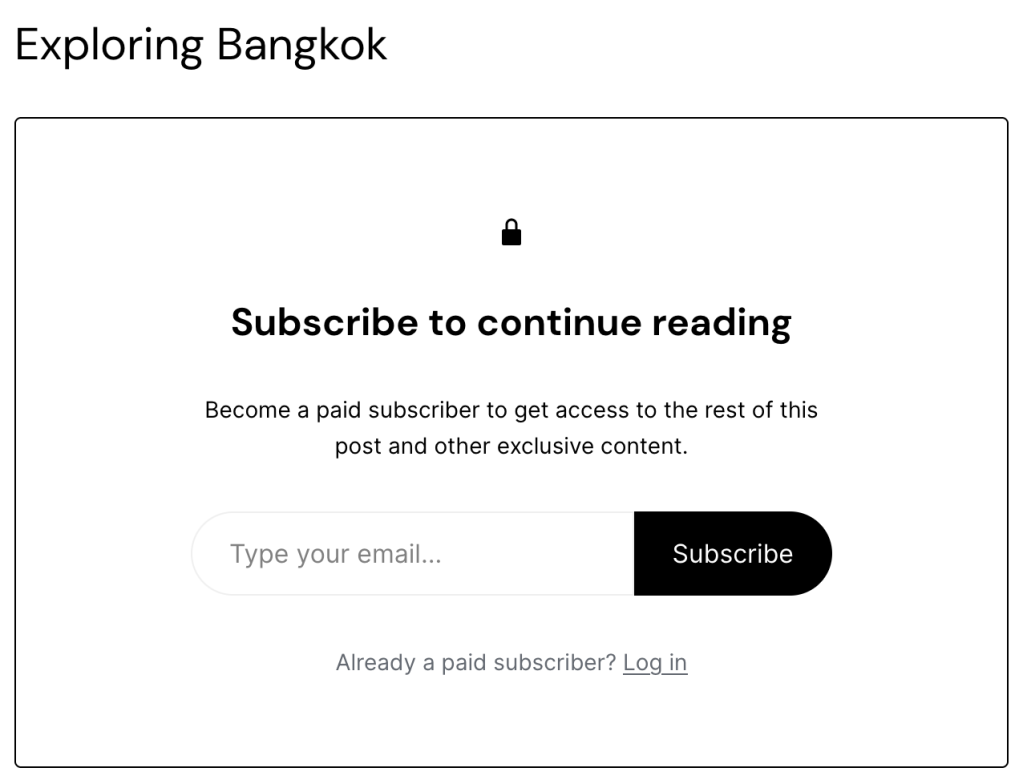
If you use the post’s Access Settings to limit the post to subscribers, non-subscribers will not have access to the content. Instead, they will be notified that the post is for subscribers and have the option to enter their email to subscribe, as shown in the image below on the left. If you have set up a payment plan described in this guide, they will be prompted to pay to view the content.

If you used the Paywall block, non-subscribers will see the content added before the Paywall block, and then they will see the option to subscribe:
Fees for payments are based on the WordPress.com or Jetpack plan you have and are calculated as a percentage of your revenue:
| WordPress.com Plan | Related Fees |
|---|---|
| WordPress.com Entrepreneur | 0 |
| WordPress.com Creator | 2% |
| WordPress.com Explorer | 4% |
| WordPress.com Starter | 8% |
| WordPress.com Pro (Legacy) | 2% |
| WordPress.com Starter (Legacy) | 3% |
| WordPress.com Free | 10% |
| Jetpack Plan | Related Fees |
|---|---|
| Security and Complete | 2% |
| Security Daily | 4% |
| Jetpack free | 10% |
| Woo Express Plan | Related Fees |
|---|---|
| Essential | 0 |
| Performance | 0 |
In addition to the fees listed above, Stripe collects 2.9% + US$0.30 for each payment made to your Stripe account. Not in the USA? Check Stripe’s fees in your currency.
This system allows you to offer Payments with minimal upfront investment. As you collect more supporters, it may make sense to move to a higher plan to retain more revenue.
Note that if your WordPress.com or Jetpack plan expires, the fee associated with your plan will increase to 10%. The Stripe fee will be unaffected.

