A landing page is a standalone page that encourages visitors to take a specific action. This guide will show you how to create a landing page on your site, and (optionally) set it as the site’s homepage for a one-page website.
In this guide
A landing page is a page on your site focused on a single purpose, sometimes called a Call To Action (CTA). The goal of the landing page can be to encourage visitors to sign up for a service, buy a product, join a mailing list, or convert visitors to take any other action. This demo site shows a basic example of a landing page.
A website can have multiple landing pages. For example, you may create different landing pages to test out different messaging or layouts and see which version your visitors respond to the most. You can also create different landing pages to send visitors through a series of choices to land on a tailored CTA (this is known as a click funnel.)
You can also set a landing page as the site’s homepage, creating a one-page website. We’ll cover that in step 4 of this guide.
To follow the steps in this guide, choose a theme that supports the site editor. A quick way to determine if your site uses the site editor is to check for Appearance → Editor in your site’s dashboard.
- Visit your site’s dashboard.
- Click Pages → Add New Page.
- Choose a pre-defined page layout to start with, or choose to start with a blank page.
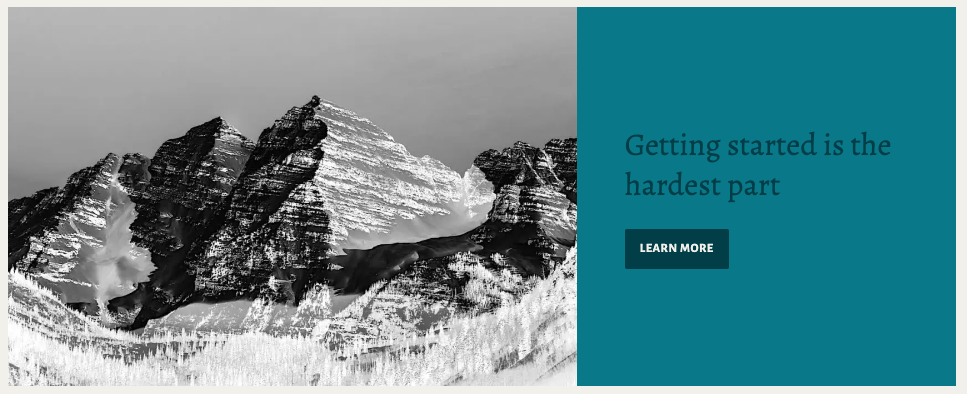
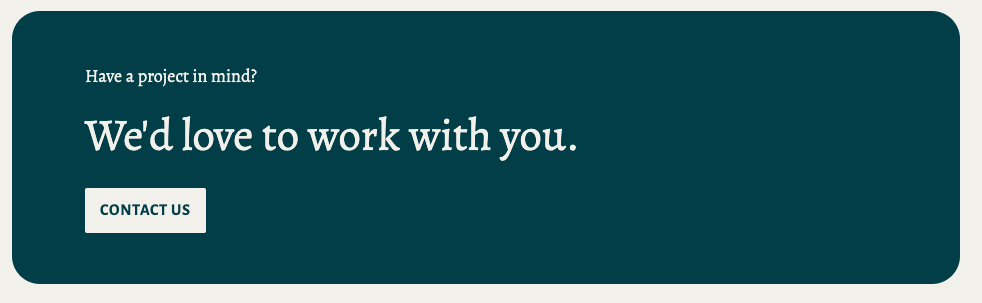
Block patterns are readymade designs you can use to easily optimize your landing page design. Here are just some examples of call-to-actions you can add to your page in one click:


To add a block pattern:
- Click the + block inserter icon and select Patterns:

- Select your desired category. The examples shown above are from the Call to Action category.
- Browse through the patterns and click a pattern to add it to your page.
- Replace the example text and images with your own.
Other blocks you might want to consider for your landing page include the following:
- Buttons block to encourage visitors to click.
- Mailchimp block to encourage signups to a Mailchimp mailing list.
- Cover block for large banner images.
- Group block for setting full-pager background images.
- Media & Text block for placing images and text side by side.
- Columns block for placing any content next to each other in multiple columns.
- Social Icons block for linking to your social media profiles.
When you’ve added all your content, review it to ensure everything is ready, then click the “Update” or “Publish” button in the top right corner to save your progress.
Landing pages often omit certain elements typically found on standard pages of a website, such as the menu, header, and footer. Removing these elements keeps your landing page focused on a single goal.
If you’d like to hide these elements, create a new template to use for your landing pages. While staying on the same screen where you created your page in the previous step, take the following additional steps:
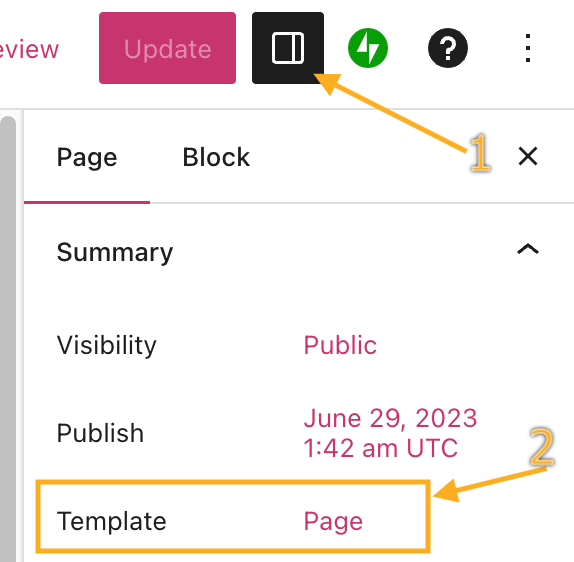
- Open the page settings (see the image on the right).
- Click on the name of the template. For new pages, this defaults to the Page template.
- Create a new template by clicking the template icon with a + on it.
- Give your new template a name, such as “Landing Page”.
- Click the “Create” button.
- The template editor will open, where you can change, add, or remove any element of the template used for your landing page. In this example, we’ll remove the header and footer to focus the landing page on the main content:
After following steps 1 to 3, your landing page is now ready for you to share the URL with the world.
You may way wish to set the landing page as your site’s homepage, commonly used for a one-page website. Visit the Set the Homepage guide to learn how to set your newly created landing page as your site’s front page.

