A website uses pages to display content – Home, About, and Contact are common examples of pages. You can have an unlimited number of pages on your WordPress.com website. This guide will show you how to create and manage the pages of your site.
In this guide
How to create a page in WordPress – Transcript
0:07 In this video, we’ll talk about Pages — which are typically some of the most important content for your visitors.
0:15 When you first get started on WordPress.com, we’ll create a few pages for you, like the Blog page—where your blog posts are displayed—a Homepage, an About page, and a Contact page.
0:28 To edit an existing page, click on the title of the page to open it in the Editor.
0:33 Then, you can add text, images, buttons, or any other content you like.
0:43 Or, click the plus icon in the top left corner to open the Block Inserter.
0:49 Then, select the Patterns tab to browse a collection of pre-made page layouts.
0:53 You can use the drop-down menu to only show patterns from a specific category.
0:57 Or, click the Explore button to view a larger preview.
1:02 When you find a pattern you like, select it and the entire layout will be added to your page.
1:09 Click the gear icon in the top right corner to open the settings for this page.
1:16 Status and Visibility lets you change some basic information about the page, including who can see this page once it’s published on your site… when it was published… and the author.
1:31 If your theme supports it, you can choose a different template or layout for your page.
1:40 The “permalink” is the URL—or web address where your visitors will view your page.
1:47 If you want, you can choose a custom header image for the page, by selecting a Featured Image.
1:53 And, you can write a brief excerpt, or summary of the page that may appear throughout your site, or as a preview for search engine results.
2:02 If you want, you can allow your visitors to add comments to this page.
2:06 And, finally, under Page Attributes, you can select a Parent Page, under which this page will appear.
2:18 If you’d like to continue working on this page, you can switch it to back a draft… or preview what it will look like on a desktop computer, tablet, or even a mobile device.
2:29 And when you’re ready for this page to appear on your site, click the Update button.
2:36 To return to the Pages menu, click the WordPress logo in the top left hand corner, and select “All Pages”.
2:45 You can add as many pages as you want, and update pages as often as you like.
2:52 To add a new page, click the “Write” button in the top toolbar.
2:55 Or, go to My Site… Pages… and select, “Add New”.
To add a new page to your website, take the following steps:
- Visit your site’s dashboard.
- Click on Pages on the left side.
- Click on the “Add new page” button.
- Choose from a large collection of readymade page layouts, or click “Blank page” to create an empty page.
- Give your page a title by typing it in the box at the top that says “Add title“.
- If you selected a page layout in step 4, a title will have been added for you. You can edit this title if you wish.
- Click on the + block inserter icon to add new content, or click on any block to edit existing content (learn how to use the WordPress editor here!)
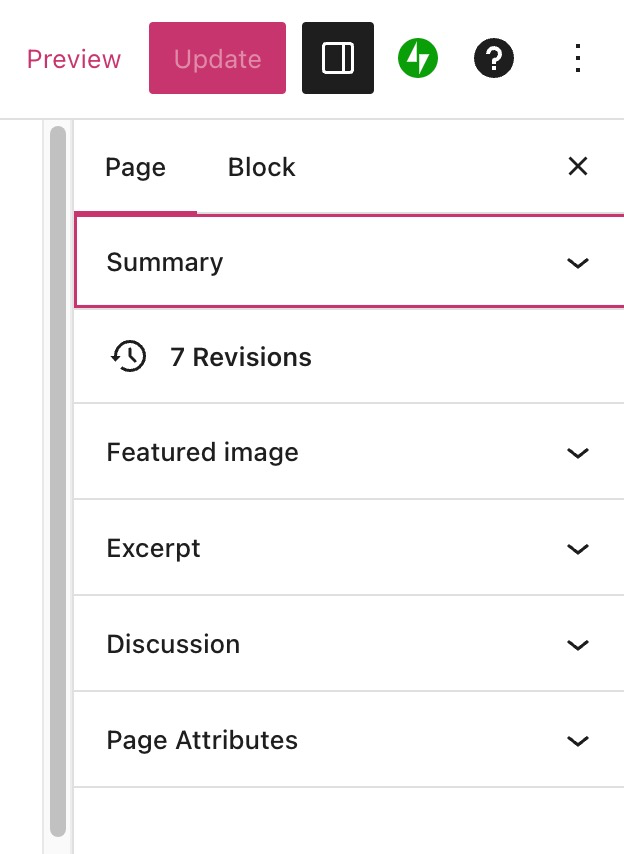
When working on a page, you’ll find the page settings in the sidebar on the right side of your screen.
If you do not see the sidebar on the right, click the Settings icon in the top right corner to bring up the settings. This icon looks like a square with two uneven columns:

You can control the following aspects of the page here:
- Under Summary, you will find the following options:
- Use Visibility to make the page public, private, or protected behind a password. Learn more.
- Set the page to Publish immediately or choose a date and time in the past or future. Learn more.
- Select the Template that will control how the content of your page is presented. Page is the default template for pages. Learn more.
- See and change the URL of the page. Learn more.
- Mark the page as “Pending review” for other users of your site. Learn more.
- Change the author of the page to another user on your site.
- On already-published pages, a “Switch to draft” button will appear. Click this to revert the public page to a non-public draft.
- Delete the page by clicking the “Move to trash” button. Learn more.
- Write an excerpt to describe the page. Learn more.
- Revisions: Using revisions, you can restore previously saved versions of the page. This option will appear only after you have saved some changes to the page. Learn more.
- Choose a featured image to represent the page. Learn more.
- Discussion: Allow people to leave public comments on the page. Learn more.
- Page Attributes: Select the page’s parent and order number. Learn more.
In the top right of the screen, above the page settings, you’ll see several options for your new page:

These options are:
- Save draft: Save the latest version of your draft page.
- If this shows Saved instead, it means the latest version of your draft has been saved successfully.
- Preview: See what your page will look like on desktop, mobile, and tablet screens. Click Preview in new tab to see how the changes will look on the live site.
- Publish: Publish the draft page to your website.
- Settings Icon: Show or hide the page settings.
- Jetpack Icon: Show or hide additional options provided by the Jetpack plugin:
- Shortlink: Copy a shortened URL of the page.
- Social Previews: See how the page will appear on Google and social media.
- Likes and Sharing: Enable the Like button and social media sharing buttons.
- SEO: Customize the title and description of the page (eligible plans only.)
- QR Code: Generate a QR code for the published page.
- Help Icon: Open up the help center to search for guides or access support.
- Ellipses Menu (the three vertical dots): Open additional editor settings.
After publishing a page, you can return to the page to continue editing it:
- Visit your site’s dashboard.
- Click on Pages on the left side.
- Choose from one of the following tabs:
- Published: Pages you have published to your site.
- Drafts: Pages you have started but have not yet published.
- Scheduled: Pages you have set to be published at a future date.
- Trashed: Pages that will be deleted after 30 days.
- Locate your page in the list and click the title of it to open the editing screen.
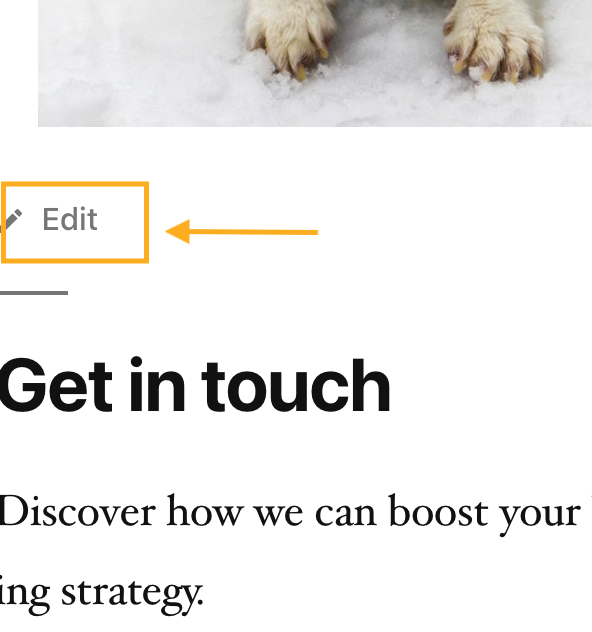
When viewing your website publicly, you may also see a link that says “Edit”, “Edit page”, or “Edit this page” to quickly open the page editor. The availability of this link depends on your browser settings and your site’s theme, and can’t be removed.
The link will only show to you as the site owner, while logged into your account. It will not appear to your visitors — no visitor would have the power to edit your site.
A published page will show the following options at the top of the screen:

- View page (arrow icon): Open the live version of the page in a new browser tab.
- Preview: See what your page will look like on desktop, mobile, and tablet screens. Click “Preview in new tab” to see how the changes will look on the live site.
- Update: Save your changes to the already-published page.
Once you have published your page, you’ll want your website visitors to find it. There are several methods to do so:
A website typically displays a menu of pages for visitors to browse through. You can add any published page to your menu – see Add Links to a Menu to learn how.
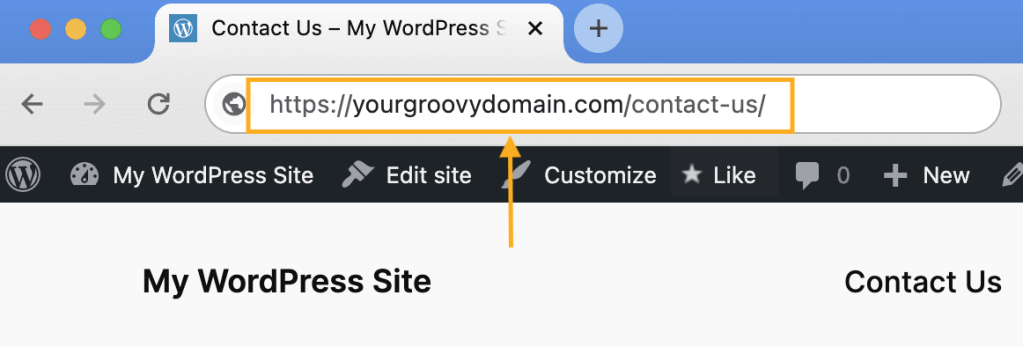
Every page has a unique URL you can use to share the page with the world. To find the page’s URL, take the steps below.
Select the appropriate tab for your admin interface style:
- Visit your site’s dashboard.
- Click on Pages on the left side.
- Locate your page in the list and click the three dots next to the page’s name.
- Click the “Copy link” option.

The link will be copied to your computer’s clipboard for you to share on social media, in an email, or anywhere you’d like.
To make your newly published page the first page visitors see when arriving on your site, you can set it as your site’s front page. See Set the Homepage to learn how.
You can find the page’s ID in your browser’s address bar after opening the page in the editor. For example, the page ID for the following example is “58167694”:


