Site Menus
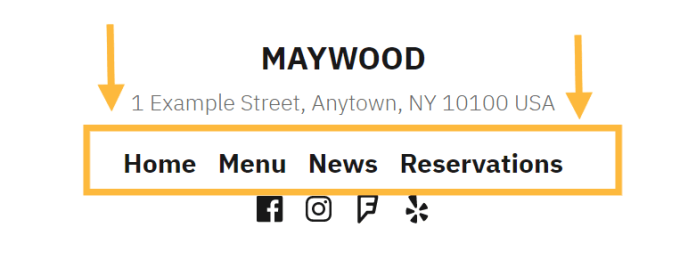
Site Menus are the list of links that are usually displayed as the main navigation for your site. The menu location can vary depending on your theme, and some themes offer additional menus such as social links menus.
- Create a Menu
- Add Menu Items
- Menu Display Location
- Automatically Add Pages to your Menu
- Reorder Menu Items
- Create Drop-Down Menus
- Make an Unclickable Menu Item
- Delete Menu Items
- Customize the Menu Item Text
- Customize the Menu Design
- Save your Changes
- Frequently Asked Questions
- Menus in WP Admin
- Advanced Menu Settings

Create a Menu
The steps below will show you how to edit existing Site Menus, or create your own custom Site Menu.
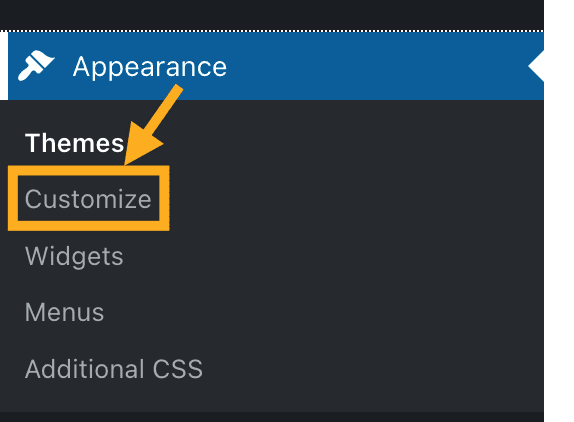
- Go to My Site(s) → Appearance → Customize.
- In the Customizer, click the Menus tab.
- If your theme already has a default/primary menu, you can click on it to begin editing.


- If your theme does not already have a default or primary menu click Create New Menu.
- Give your menu a name.
- Select where you want the menu to appear.
- Your Menu Location options will depend on your theme.
- Click Next to begin adding items to your new menu.
✅
The Menu Locations available in the Rivington theme are the Primary Menu and the Social Links Menu.
The Social Links menu styles menu items as social icons. In this case, we want the Primary Menu.


Add Menu Items
In addition to pages you have already published, you can add several different types of menu items to your custom menu:
- Custom Link – a custom URL linking to another site.
- Pages – a link to another page on your site.
- Posts – a blog post on your site.
- Testimonials – a link to testimonials.
- Projects – a link to a page of your portfolio projects.
- Categories – a feed of blog posts from a given category.
- Tags – a feed of blog posts from a given tag.
- Project Types – a link to a specific portfolio project type.
- Project Tags – a link to a specific portfolio project tag.
To add one of these menu items:
- Click the + Add Items button.
- Choose a menu item type from the list. For example Pages.
- Select one of the options displayed for that type. For example, click + Home to add a link to your home page to the menu.
- Add more items to your Custom Menu by clicking the plus next to each item.
- Click Save Changes to save your changes.

💡
If you wish to add a brand new page or post to your menu, you can add its title in the field for Add New Page or Add New Post. A blank page/post will be added to your site and automatically added to your menu.
You can then add content to the page or post through your Site Pages/Posts
Menu Display Location
If you want this menu to display on your site, select a Menu Location. For the main navigation, the correct setting depends on your theme. Often it is listed as Primary, Header, or Top.
If your theme offers a Social Links Menu, it will automatically convert menu items to corresponding icons for popular social media sites.

Automatically Add Pages to your Menu
Under Menu Options, check the “Automatically add new top-level pages to this menu” if you want newly created pages to automatically be added to the menu.

📌
If you leave this option unchecked, you will want to remember to edit your custom menu to add new pages to your navigation.
Reorder Menu Items
To re-order the items on your menu, move a menu item by clicking the Reorder link:
- Click on the Reorder link.
- Click the up or down arrows to move a menu item up and down in the menu.
- Click the right and left arrows to nest or un-nest pages under other pages.
- This is how drop-down menus are created.
- More information on drop-down menus can be found below.
- Click Save Changes at the top to save the changes.
You can also drag and drop a menu item into location without clicking the Reorder button first.

Create Drop-Down Menus
Nesting a page creates a sub-menu or drop-down menu.
- Click on the Reorder link.
- Click the > right arrow to nest a page under a parent page, creating a drop-down menu.
- Once you’re satisfied with your drop-down menu, click Done
- Then, click Save Changes to push your changes live.


Make an Unclickable Menu Item
You can create an unclickable menu item which is useful when creating dropdown menus.
- Click Add Items.
- Click the Custom Links option.
- In the URL field enter the # symbol.
- In the Link Text field enter the test you want to appear in your menu.
- Click Add to Menu.
Once the unclickable menu item is added, you can add the pages or posts that you want to show up under that menu, then reorder them to create your drop-down menu.

Delete Menu Items
You can remove menu items by clicking on them in the settings on the left. When you do, they will expand and reveal a Remove button. Click that to remove the menu item.

✅
Editing what shows in your site menu will not remove pages or posts that you created for your site. Removing a menu item only removes the link to the page from your menu.
Customize the Menu Item Text
You can change the name of the menu item as it appears on your site by editing the navigation label.
- Click on the menu item on the left of the Menu Customizer to expand additional options for the menu item.
- Change the Navigation Label to what you want to show on your menu.
💡
For example, you might name your page something like Contact the Team, but on the menu, you just want it to show as “Contact.”

Customize the Menu Design
If you want to make changes to how the menu appears, such as the position, alignment, or size, you can use Custom CSS available on the WordPress.com Premium plan on higher.
Save your Changes
Once you have organized your menu, be sure to click the Save Changes button to save your site menu.
Frequently Asked Questions
It’s showing a Menu but when I go on my site the menu is not there, how do I fix it?
If your theme isn’t showing your default menu, try making any change to the menu and re-save — this should force the theme to use that menu.
Was this guide helpful?
Next page: Menus in WP Admin
Menus in WP Admin
Most Custom Menus will show in the header area at the top of your site (the main navigation area), though this location can vary from theme to theme. With some themes, you may have the option to create and display multiple custom menus in different places on your site, such as the footer or special sidebar areas.
These instructions are referring to the WP Admin dashboard. To view these dashboard pages, visit your Account Settings and enable the option show advanced dashboard pages.
Creating a custom menu allows you to do the following things:
- Change the order of pages in your menu, or delete them
- Create nested sub-menus of links, sometimes referred to as “drop-down” menus
- Create links to category pages allowing you to collect together posts based on that category
- Add custom links to other sites, such as a link to your Twitter or Instagram profile
This video shows the basic steps for creating your first custom menu, and you can read more about each feature (plus advanced tricks) below.
Create a Menu
To create a custom menu, go to Appearance → Menus in your dashboard.
To create a new menu, click the create a new menu link, then type in a Menu Name (to help you remember what it is), and click the Create Menu button.
After you create your first menu, you will notice that two new options appear to control the following:
- Auto add pages – If checked, new pages will be added automatically when you create them.
- Theme locations – Allows you to decide where you would like your custom menu to appear in your theme. By default, your menu will show up in the main navigation area of your theme. However, you can select a different location if your theme is capable of multiple menus.

Add Menu Items
In addition to pages you have already published, you can add several different types of menu items to your custom menu:
- Pages – Adds a link to another page on your site.
- Posts – links directly to a blog post on your site.
- Testimonials – links to testimonials.
- Projects – links to a page of your portfolio projects.
- Custom Links – Adds a custom URL linking to another site.
- Categories – Shows a feed of blog posts from a given category.
- Project Types – links to specific portfolio project types.
- Project Tags – links to specific portfolio project tags.
Each section (except Custom Links) defaults to a list of the most recent items in that section. You can choose to View All, or Search for a specific item.
Only published pages, posts, etc, will show in your list.

If you have a page that is privately published, it won’t appear on this list. If you want to keep the page private but still add it to the menu, please change the page visibility Public (see Page Visibility here), add it to the menu, and then change the visibility of the page back to Private.
Add Custom Links
Type in the URL where you want to take someone when they click on it, add Link Text to specify what the tab will say, and then click Add to Menu.
Optionally, you can have a custom link open in a new window or tab by enabling Link Targets described on the advanced menu settings page.

Add Category Pages
Unlike your main blog page, which displays all of the posts on your site, a Category Page will allow you to create a filtered blog feed that displays only the posts from within a specific category.

Reorder Menu Items & Add Drop-Down Menus
At any time, you can change the order and placement of menu items by dragging and dropping the items to change their order. To create sub-menus or “drop-down” style menus, drag individual items to the right to “nest” them under a given parent tab. You can undo this by dragging them to the left.

Be sure to click Save Menu to save any changes to your custom menu.
Create Static Parent Tabs
Sometimes when you nest items, you don’t have any content on the parent (top-level) tab, in which case you do not want it to be clickable. To make it static, use a Custom Link (see Adding Custom Links above) for the parent tab.
The URL field is required, so add # or the URL to your site in this field.

Then, click the Save Menu button.
Menu Item Settings
In addition to arranging menu tabs to your liking, you can also customize the text and other details of each item that you add to your menu. To edit a menu item’s settings, click the down arrow to the right of the menu item. Once expanded, you can modify the following:
- Navigation Label – Enter your custom link text here. This overrides the default name of the menu item, replacing it with the name you give it instead.
- Title Attributes – Adds custom hover text (a tooltip) and improves usability for impaired visitors using assisted devices.
- Remove – Lets you delete the item from the menu completely.
- Cancel – Allows you to cancel any changes you have made to it.
Be sure to click the Save Menu button to save any changes to your menu items. Your menu item will now look something like this:
Edit Your Menus
If you need to edit your custom menu for any reason, return to the Edit Menu screen by going to Appearance → Menus in your WordPress Dashboard. You should see your custom menu and its contents displayed, and you can make any changes you wish to update the menu. Make sure to click Save Menu to save your changes.
Note, if you have more than one menu saved to your site, you will see a selector to choose the menu you want to edit. Learn more about advanced menu settings here.
Manage Your Menus
If you have created more than one menu, you can manage them by clicking on the Manage Locations tab at the top of the Menus page.

On the Manage Locations screen, you will see what locations are available for displaying menus in your theme, and can assign a menu to each location by selecting it from the drop-down. You are also given options to Edit (which launches the selected menu in the Edit Menu screen) or Use new menu instead, which will allow you to create a new menu for use in that location.
Troubleshooting
If you get a warning that says ‘The current theme does not natively support menus, but you can use the “Custom Menu” widget to add any menus you create here to the theme’s sidebar.’ then your theme may not support custom menus. This is usually the case with some of the older themes in our theme library.
In this case you may wish to switch to a theme that supports menus for navigation by searching in Appearance → Themes and choosing “Custom Menu” from the Feature Filters menu. If your theme doesn’t have the navigation support, you can use the Custom Menu Widget in one of the sidebar areas instead.
Next Page: Advanced Menu Settings
Advanced Menu Settings
Once you have created a menu and added any pages, category pages, or custom links you like, you may want to check out these advanced menu capabilities to get the most out of your custom menu.
These instructions are referring to the WP Admin dashboard. To view these dashboard pages, visit your Account Settings and enable the option show advanced dashboard pages.
Screen Options
Adding Individual Posts, Tag Pages, and Post Format Pages
In addition to Pages, Links, and Categories, you also have the option to add the following modules to the menu editor, to customize it further. These modules are hidden by default, so to display these modules in the custom menu editor, click the Screen Options drop down at the top-right of your screen, and check the boxes for the module you want to use.
- Posts – Allows you to add individual posts to your custom menu.
- Tags – Allows you to create a filtered blog feed displaying posts from a particular tag.
- Format – Allows you to create a filtered blog feed displaying posts from a particular custom format, such as all your gallery posts or quotes

Link Targets
If you would like to control whether your menu links open in a new tab or window when clicked, check the “Link Target” advanced property from within Screen Options to reveal this setting on individual menu items.
CSS Classes
CSS Classes are an advanced menu property that allow you to apply a CSS class to individual menu items. Turn on the CSS Class capability by clicking the Screen Options drop down at the top-right of your screen, and check the box for CSS Classes:


For some themes, there is existing CSS in the theme that will convert your menu item to a photo. All you need to do is add the class to a custom link that the theme documentation refers to.
If you are looking to implement your own CSS styling on your menu items, you will need a WordPress.com plan which includes advanced customization. In the above example, you could then stylize the link with the selector .twitter
in your CSS.
Was this guide helpful?