Many people use Mailchimp for their email lists. If you’d like to give your visitors a way to subscribe to your Mailchimp list on your website, you can add a regular signup form or a pop-up. This guide will show you how to display a Mailchimp pop-up.
This feature is available on sites with the WordPress.com Creator or Entrepreneur plan. If your site has one of our legacy plans, it is available on the Pro plan.
In this guide
After following the steps in this guide, the first time a visitor comes to your site, they’ll get a pop-up with your subscription form. Mailchimp stores a cookie in the visitor’s browser so they don’t get the pop-up more than once. Here is an example:

The Mailchimp pop-up can only be added to plugin-enabled sites, as Mailchimp requires verification by adding code to the <head> of your site. If your website does not support plugins, you can use the Mailchimp block instead.
Here’s how you can set up a Mailchimp pop-up on your site:
- Create a Mailchimp account or log in to your current one.
- Next, create a Mailchimp email list (Mailchimp calls this an “Audience”) for your website’s followers.
- Once your new audience is created, click “Manage Audience” and then “Signup forms”:

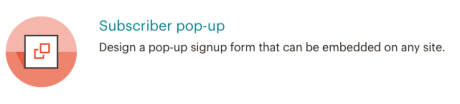
- Select the “Subscriber pop-up” in the Signup forms section of your Mailchimp Audience:
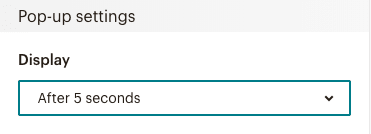
- Design and configure your form however you’d like.
It’s tempting to set up your form to show a pop-up as soon as visitors open your site. However, it’s recommended to show the pop-up after some time, such as five seconds, instead of immediately. The Mailchimp form will only show to visitors once, so the more time they have to familiarize themselves with your site, the more likely they’ll sign up for your mailing list.
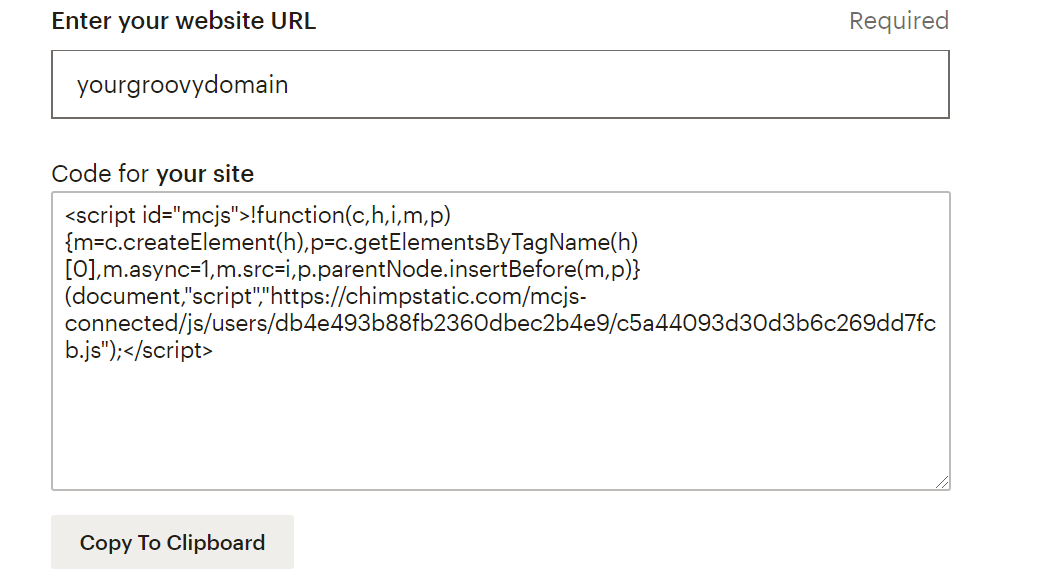
When creating your form in Mailchimp, you will find a prompt to “Connect your website to publish your pop-up on your site.” Click the “Connect Now” button, and Mailchimp will request your website’s URL:

Enter your website’s URL, accept Mailchimp’s terms, and proceed to the next screen, where they will give you a piece of <script> code:
You will now need to paste the code into the <head> section of your website.
To add the code to your website header, take the following steps:
- Install and activate the free Insert Headers and Footers plugin by WPCode.
- On the left-hand side of your dashboard, navigate to Code Snippets → Header & Footer.
- Paste the code into the Header box and click the “Save Changes” button:

⚠️
Make sure your site is not set to private or Coming Soon mode, or Mailchimp will not be able to verify your site!
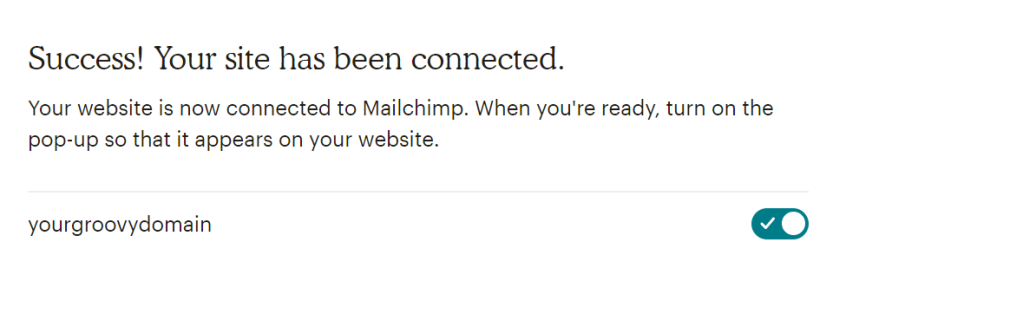
Back in Mailchimp, click the “Check Connection” button to tell Mailchimp to check your site for the code. If you added it correctly, you’ll see a success message:
If you’d like to make changes to your form, return to your settings in Mailchimp to make your edits. As soon as you publish those changes to the Mailchimp form, they’ll automatically be reflected when the pop-up is shown to the next visitor on your site. You don’t need to copy/paste the code again.

