Welcome, Blogger blogger. We’re really glad you’ve decided to join WordPress.com!
To get you back on the blogging path, we’ve put together this getting started guide. Let us pull your content over to WordPress.com, customize your new site, and start blogging again ASAP.
In this guide
Before you import, you’ll need to export your content from the Blogger service:
- Log in to your Blogger account.
- Go to Settings → Manage Blog.
- Click to Back up Content → Download.
This generates an .xml file with all your blog’s content that you can then use to import to WordPress. You can learn more in this guide from Google.
The export saves your posts and comments — including text, photos, videos, and other embedded files — but not your theme, custom domain, or personal settings. We’ll help you set those up later in this guide.
To import your Blogger content file to WordPress.com, take the following steps:
- Visit your WordPress.com site dashboard.
- Navigate to Tools → Import on the side.
- In the list of supported services, select Blogger:

- Drag your XML file into the box, or click the box to select the file on your computer:

- Wait for the importer to process the uploaded file.
- Click the “Start Import” button.
- If you have multiple authors on the Blogger site, you’ll be asked to reassign the authors of the imported items to an existing user on your WordPress.com site before the import process gets going.
With your content imported, you can now work on your WordPress.com site and customize it to your liking.
A theme is a template for your site, like on Blogger. We have a large collection of themes. Explore your options in our Theme Showcase, where you can sort themes by appearance and feature — minimalist themes, grid-based themes, themes for photographers, themes for wedding sites, three-column themes, you name it.
Like on Blogger, you can add more functions to your blog and let you pull in content from other online hangouts. WordPress.com has dozens of blocks that do pretty much anything — check out the full list.
Some blocks that are especially popular with bloggers include the Blog Posts block, Archives block, Categories List block, Donations block, Latest Posts block, Latest Comments block, Related Posts block, Subscribe block, and the Search block.
You can register a new domain for your blog to use instead of the .wordpress.com site address. If you own a domain already, you can connect or transfer it from another service.
Use our auto-sharing feature to automatically share new posts on Facebook, LinkedIn, Tumblr, and other social networks. To enable it, head to Tools → Marketing → Connections and select your site. Click the “Connect” button next to the service you want to publish to:
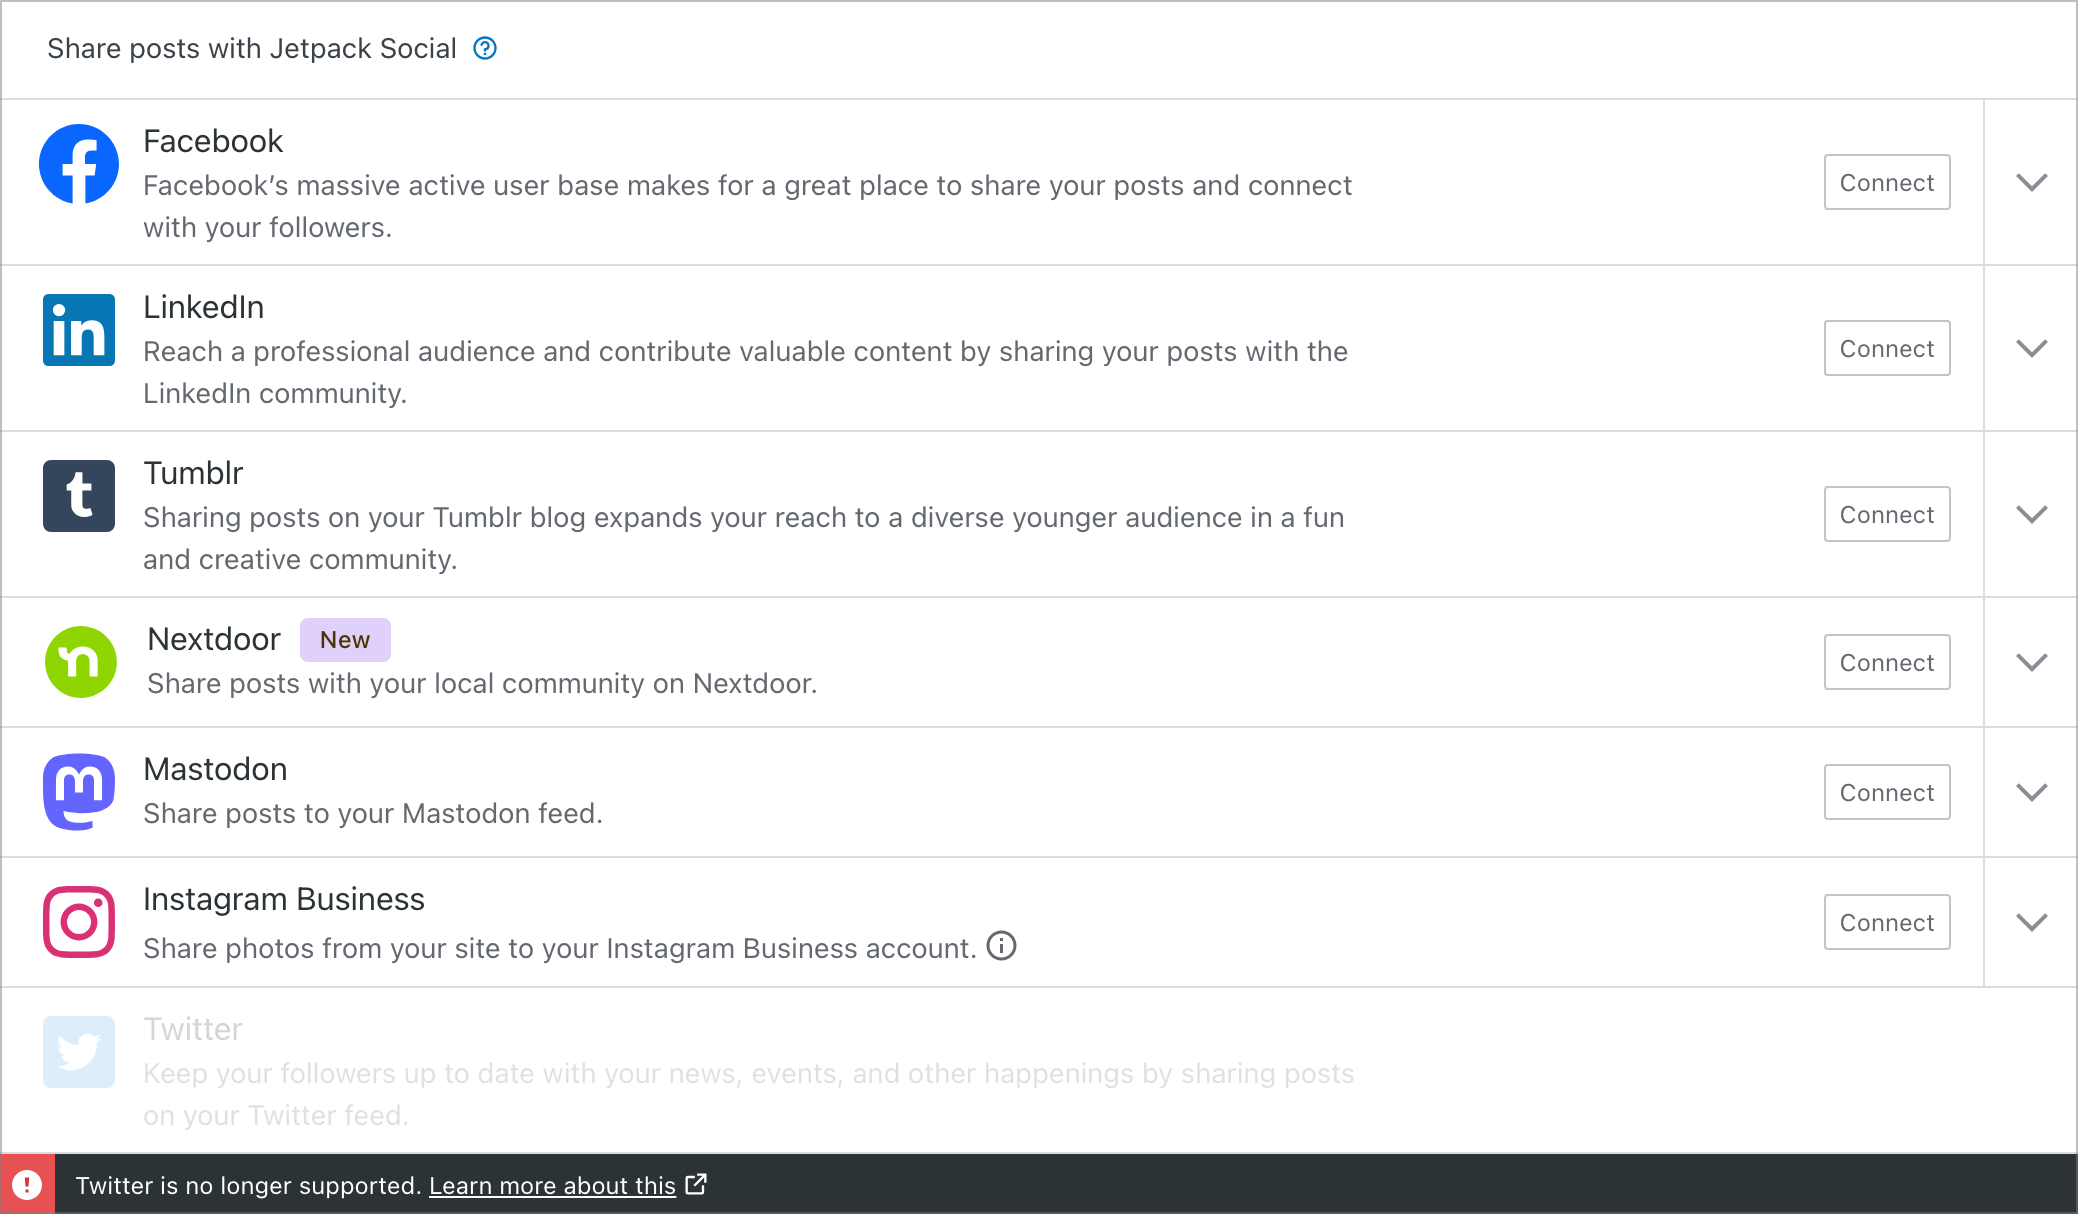
Once you’ve enabled at least one service, you’ll see auto-sharing information when you write a new post. You can opt out from any of the services for a particular post, or include a custom message (the default is post title). Learn more in our Post Automatically to Social Media guide.
You can publish posts on WordPress.com in several ways: from WordPress.com, our apps, or by email.
When you’re logged in to your account, click the “Write” button ![]() on the top right of the toolbar.
on the top right of the toolbar.
This opens the WordPress Editor, a robust tool for writing, inserting media, and configuring post-specific settings.
Along with your post, add a title and some tags – tags group related posts together on your blog and in the WordPress.com Reader, which makes them easier to find.
When you’re ready, click Publish. You’ll see a confirmation appear at the top of your screen.
There’s a Jetpack app for just about every device. Pick your flavor, learn more, and download:
- Jetpack for iOS
- Jetpack for Android
- WordPress.com for Mac OS X
- WordPress.com for Windows
- WordPress.com for Linux
Install the appropriate app, and log in with your WordPress.com username and password. You’ll be able to add a title and tags, upload photos from your library or take a new picture, preview, and publish your post.
Posting by Email
To post by email, create a unique email address in WordPress.com. When you email it, your subject line becomes the post title and the email text becomes the post content.
When you become a part of WordPress.com, you’re getting two awesome services for the price of none: your blog, plus your Reader, which brings every WordPress.com blog together in one easy-to-search place. In the Reader, you can:
- Find great reads.
- Catch up with blogs you follow.
- Like, comment, and reblog posts you love.
Find Great Reads
For a jump start, check out our hand-picked content at Discover. To head into the unknown, use the tag list in the Reader to search for whatever you want.
You can also follow non-WordPress.com blogs — Blogger, Tumblr, whatever. Click Followed Sites → Manage in the Reader and put in the URL of any site you want to keep up with.
Catch Up with Bloggers You Follow
When you follow a blog, you can decide how you want to get new posts — they’ll all be collected in the “Followed Sites” tab, or you can get them via instant, daily, or monthly email. You might choose the instant email option for blogs your particularly love, or the daily email for a blog that posts multiple times a day.
To change or update your email delivery settings globally, head to your Notification settings.
Comment, Like, or Reblog Posts You Love
One of the best parts about blogging in a community is interacting and sharing with other bloggers. You can show your appreciation for a post with a Like, elaborate with a comment, and share your finds with your readers by reblogging.
Reblogging is a quick way to share posts published by other WordPress.com users while allowing the author to control their content. When you reblog a post, an excerpt shows up on your site along with a link to the original and any commentary you’ve added.
You can reblog from within the Reader or from an individual blog. When you’re logged in to WordPress.com, you’ll see a reblog option in the toolbar that’s at the top of your screen.
WordAds is WordPress.com’s in-house advertising network. If you sign up, we’ll place ads on your blog and share the revenue. Like other networks you may have used (BlogHer, FoodBuzz, etc.), we handle all the negotiation, administration, and technical aspects.
Our WordAds team partners with major online advertisers and we’re always evaluating new ad partners. Working together, we develop high-quality ads that don’t detract from your site and bring in maximum revenue. We also optimize ads based on geography, which means ads that are more targeted for your readers (which increases payouts).
Any WordPress.com site that meets these three criteria is eligible for WordAds:
- It’s family-friendly – Would you be comfortable with a child or co-worker seeing the site?
- It has a custom domain – For example, myawesomesite.com.
- It has meaningful traffic – Advertisers don’t pay to appear on sites with minimal views.
If you think you might want to be a part of WordAds, go to Tools → Marketing → View Ad Dashboard to get started.
That’s it! We’ve cherry-picked the bits and pieces of WordPress.com wisdom most important for a smooth Blogger import here — there’s more to learn, but you can always visit the full get-started tutorial. Happy blogging!

