Google Analytics is a powerful tool available on eligible WordPress.com plans for tracking traffic to your site. This guide will show you how to add Google Analytics to your website.
This feature is available on sites with our WordPress.com Explorer, Creator, and Entrepreneur plans. If your site has one of our legacy plans, it is available on the Pro plan.
In this guide
All WordPress.com sites include built-in analytics called Jetpack Stats. View your stats to learn how much traffic your site gets, where it’s coming from, and which content receives the most views. Using the information from Jetpack Stats, you can track trends on your site and make decisions to improve your site’s performance.
Google Analytics includes advanced features to complement Jetpack Stats. Funnel reports help track the path visitors take through your site, and goal conversion lets you measure how visitors complete specific tasks (such as reaching a product page or contact form).
You can use several methods to add Google Analytics to a WordPress website, but most require installing a plugin like Google Site Kit or adding code to the site header. For WordPress.com site owners, we offer an easy-to-use setting to enable Google Analytics without any plugins or code.
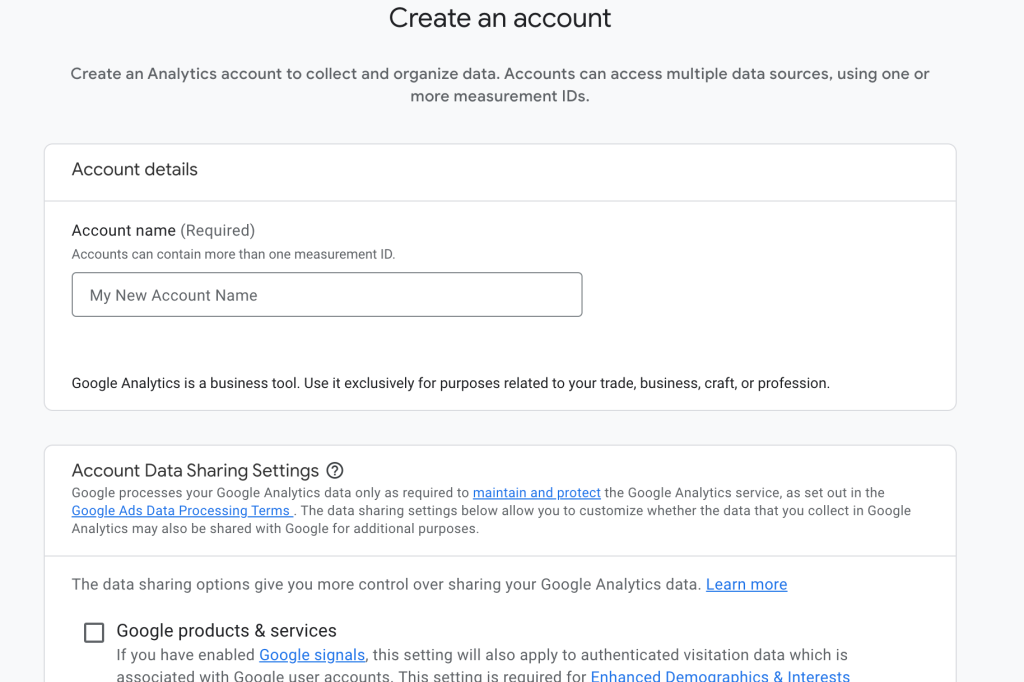
To get started, sign up on the Google Analytics website by clicking the Get Started button. When signing up, you’ll fill in an “Account name” and review some data-sharing options to opt in or out of, as shown below. When you’re ready, click the Next button.
If you already have a Google Analytics account for other sites, click Admin and then click “Create Account” and then continue with the next steps.
The next step will ask you to create a property, which will likely be your website’s name.

On the Property Setup screen, fill in the following details:
- Property Name: Enter a name for your property, such as your site title.
- Reporting Time Zone: Choose the timezone you want the reporting of your website to be in.
- Currency: Choose the currency of the location you normally operate in.
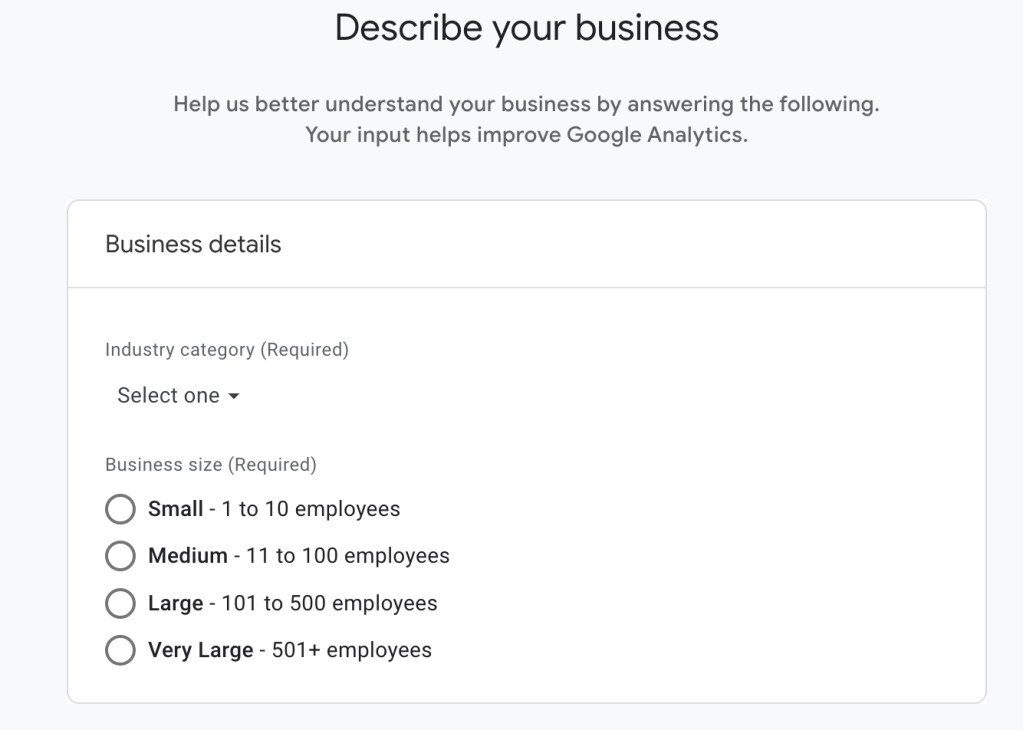
On the next screen, fill in the requested details about your business or industry, and click the Next button.
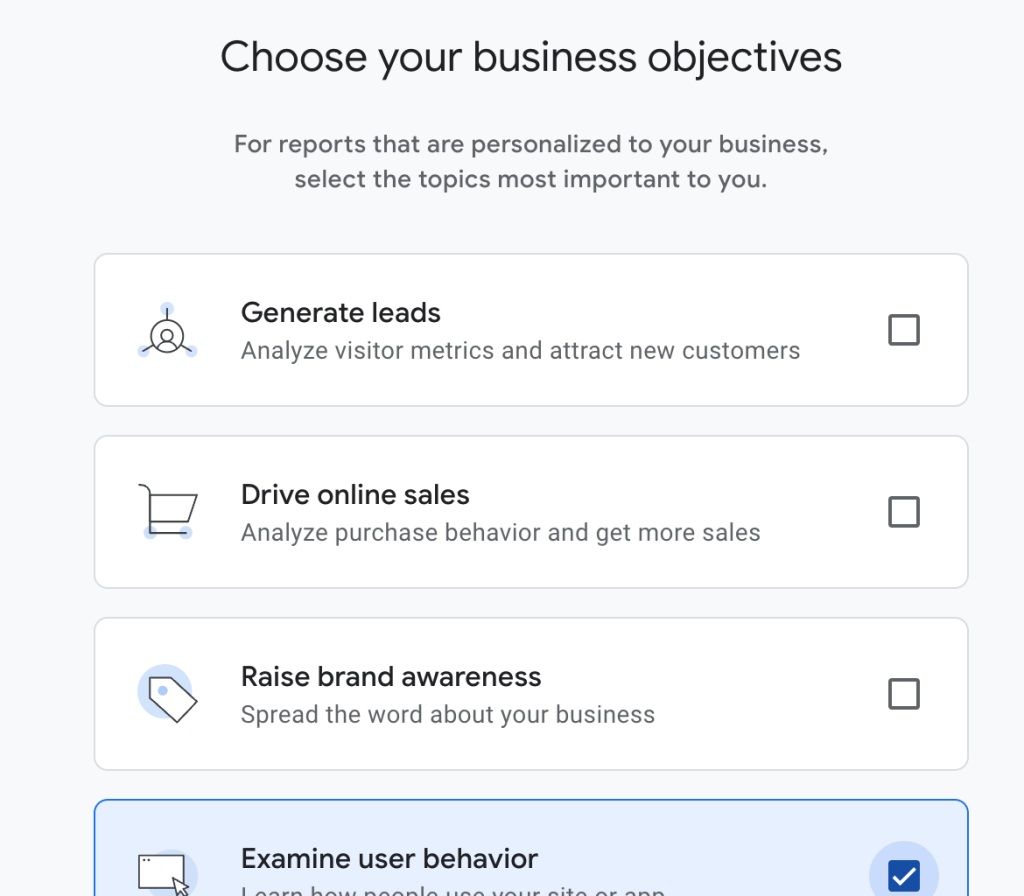
The next screen will ask you about your goal(s) for using Google Analytics. Select all that apply, and then click the Create button:
A pop-up will appear with the Google Analytics Terms of Service agreement. You must accept the terms to use Google Analytics.
You will then be presented with this screen asking you to choose a property:
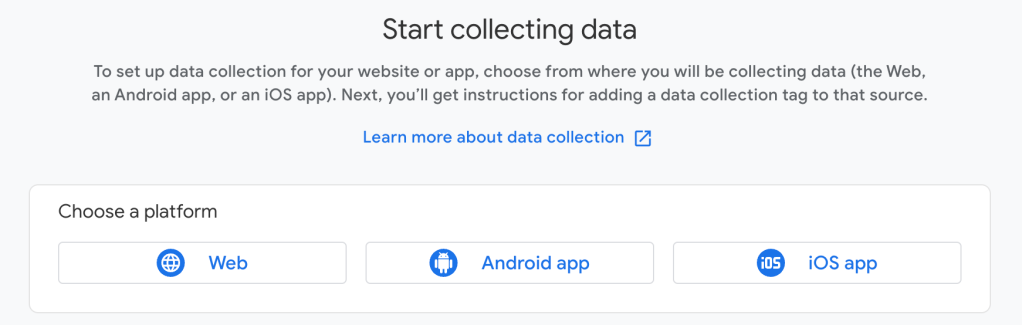
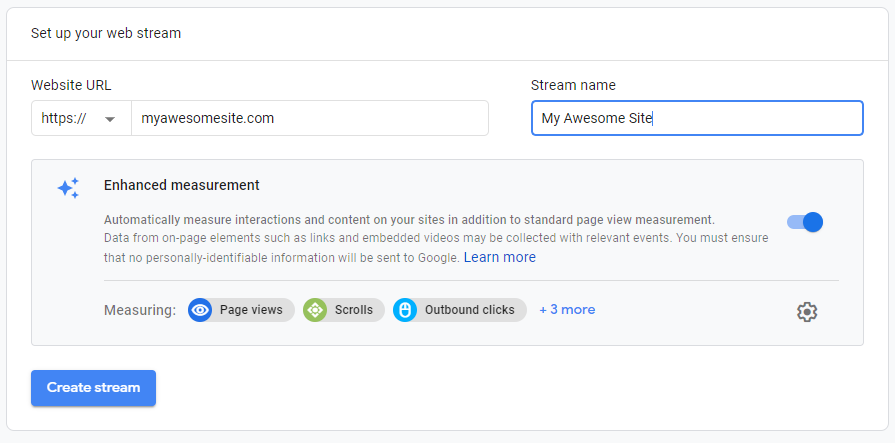
Choose Web here. Keep https:// selected, then type your domain without the www. Type something in the Stream Name box (this can be your site’s title again) and click Create Stream.
After following the steps in the previous section, you will be presented with this screen to install a Google tag on your site:
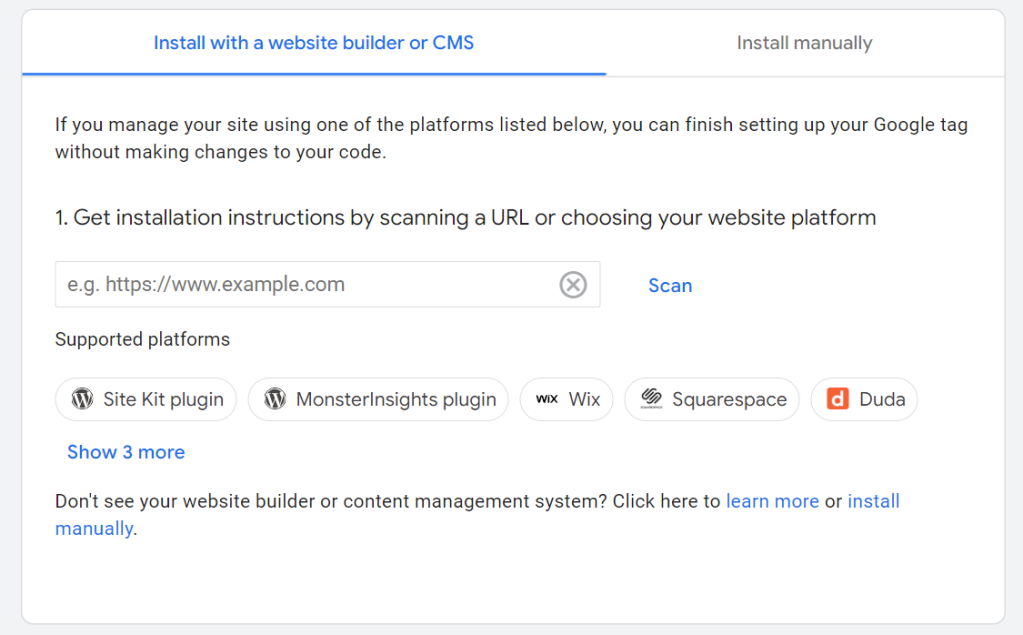
Click “Site Kit plugin” with the WordPress logo next to it. We’re not going to use the plugin — instead, choosing this option will show you your site’s tag ID that looks like this example:

Click the copy icon next to your tag ID to copy it to your clipboard.
If you have a plugin-enabled site, you can follow Google’s steps to use their Site Kit plugin to set up your Google tag. However, this is not required because WordPress.com provides you with a setting to paste your tag ID. Copy just the tag ID as shown above, then move on to the next section in this guide.
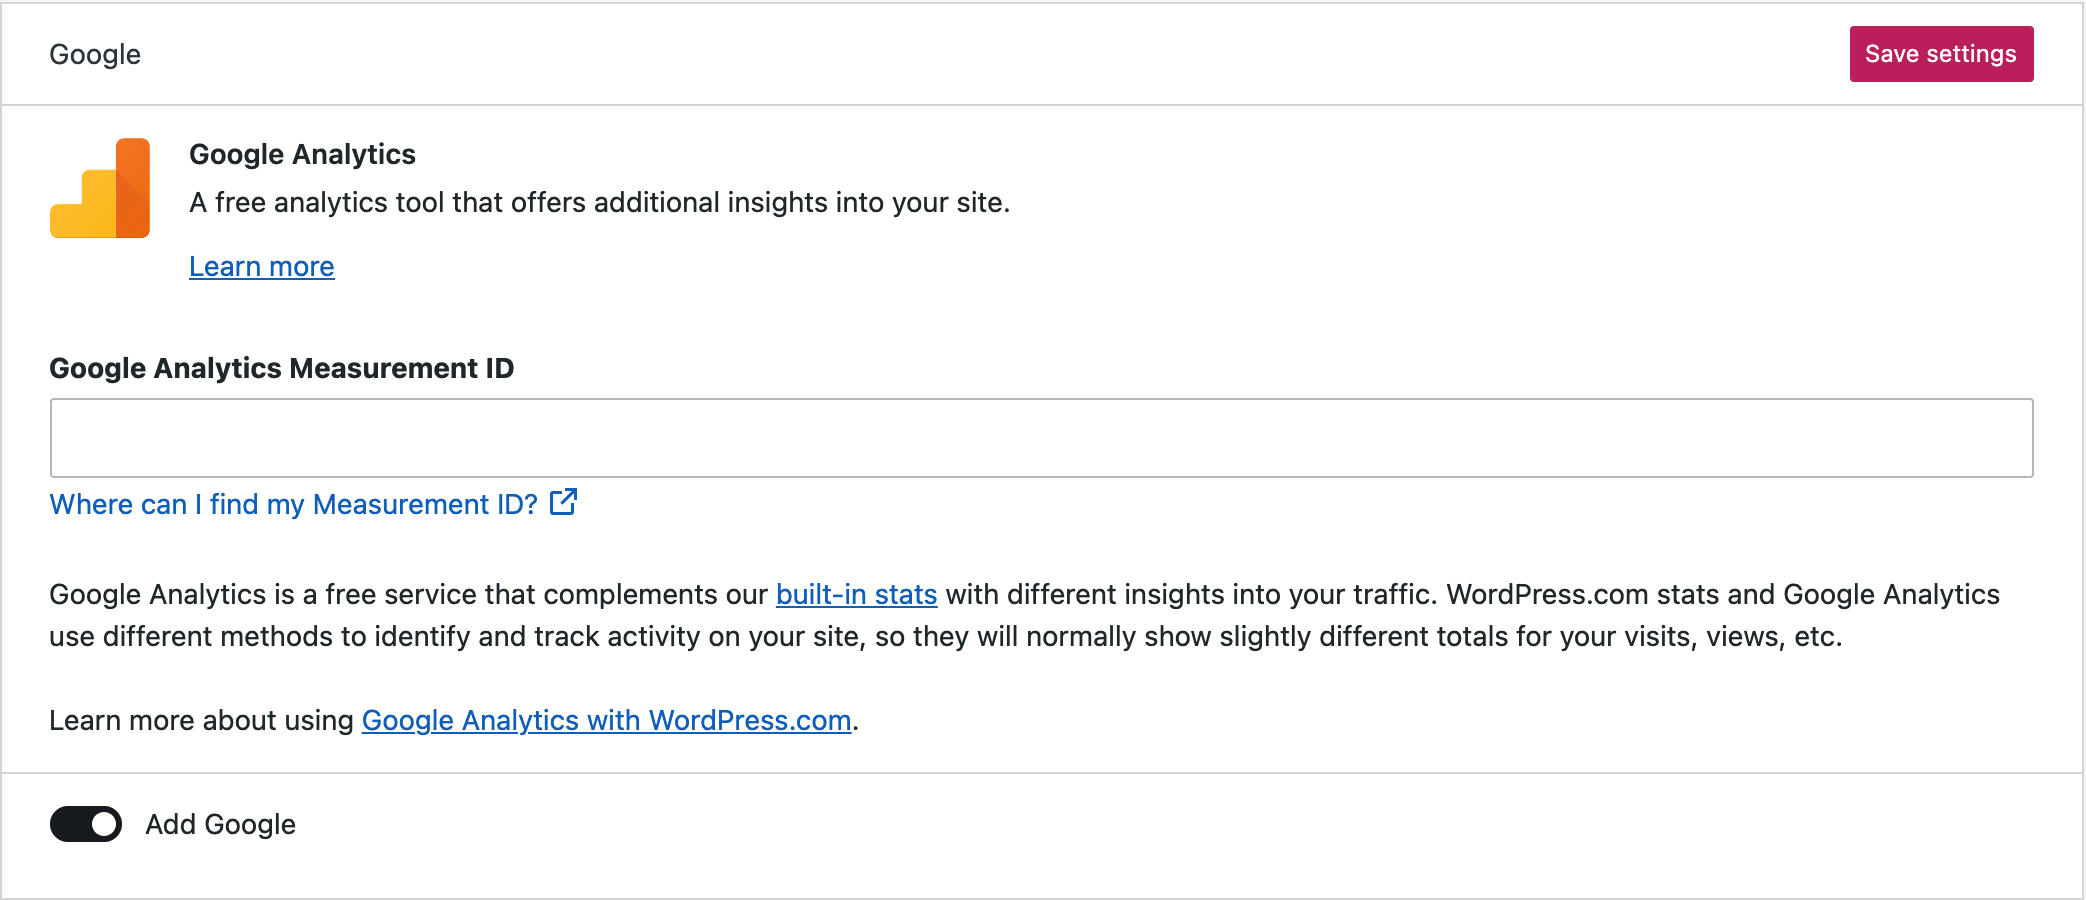
- Visit your site’s dashboard on WordPress.com.
- Navigate to Tools → Marketing (or Jetpack → Settings if using WP-Admin).
- Select the Traffic tab.
- Scroll about halfway down the page to the Google section.
- In the box labeled “Google Analytics Measurement ID,” paste in your tag ID.
- Click the Save settings button.
Your site will now connect to Google Analytics and send data to Google. Give it time for Google to start displaying your site’s information (statistics will not appear from before your site was connected to Google Analytics.)
If you have activated the WooCommerce plugin on your site, you can enable additional analytics options for your store, including product page views, activity around adding and removing products from shopping carts, and initiated, abandoned, and completed transactions.
Follow these steps to enable additional e-commerce tracking:
- In Google Analytics, navigate to Admin and choose the account you want to enable Enhanced Ecommerce.
- Click Ecommerce Settings and toggle both Ecommerce Settings and Enhanced Ecommerce Settings to On.
- Visit your site’s dashboard on WordPress.com.
- Navigate to Tools → Marketing (or Jetpack → Settings if using WP-Admin).
- Select the Traffic tab.
- Scroll about halfway down the page to the Google section.
- Toggle the settings on to track (or off not to track) features like purchase transactions, add-to-cart events, product impressions, and the checkout process:

You can read more about enabling Enhanced Ecommerce Tracking, as well as learn about the benefits of this enhanced tracking.
Instead of the steps in this guide, you can integrate Google Analytics on an Entrepreneur plan site using one of the following options:
- Set up the included WooCommerce Google Analytics Integration.
- Install the Google Site Kit plugin.
- Manually add your Google Tag code using a plugin like Insert Headers, Footers, and Code Snippets.
Google is sunsetting Universal Analytics. Google Analytics 4 will replace it.
If your Google Analytics tag at Tools → Marketing → Traffic (or, Hosting → Connections if using WP-Admin) begins with the letters UA, that means you are using the old method, and it is recommended that you swap it for the new tag that begins with the letter G.
Visit the guide from Google to Add a Google Analytics 4 property (to a site that already has Analytics). Once you have your new ID, you can replace it in the Google Analytics setting on your site.
I connected Google Analytics, but I do not see visits reported. Is it working?
Most Google Analytics reports do not work in real-time. Reports are normally delayed by at least a few hours. The following Google help page will show you how to check whether your tracking code has been installed properly.
If you do not see visits reported after 24-48 hours and know you have had visitors based on your Jetpack Stats, go back to your Google Analytics dashboard and check that your domain is spelled correctly, does not contain www, and matches your primary domain. If it meets all of those criteria, generate a new tag ID. Enter the new ID in your site’s settings as outlined above.
The data from Jetpack Stats and Google Analytics don’t match. Is something broken?
Jetpack Stats and Google Analytics use different methods to identify and track activity on your site. You can expect Google Analytics and Jetpack Stats to always show slightly different totals for your visits, views, and other data. However, you will be able to notice the same trends and patterns in both systems.
Where can I get support for using Google Analytics?
Google Analytics is a very popular website analytics service, and you can find plenty of information about it in books, workshops, blog posts, online forums, and more. We suggest you start with Google’s help center for Analytics, specifically the getting started guide. You can also check out the Google Analytics Solutions Community to interact with other Analytics users.

