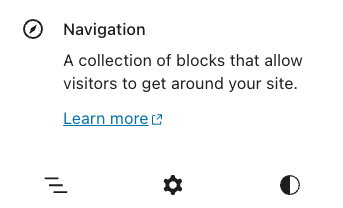
The Navigation block displays a menu of links to help your visitors navigate your website. This guide will show you how to create, modify, and style your menu using the Navigation block.
In this guide
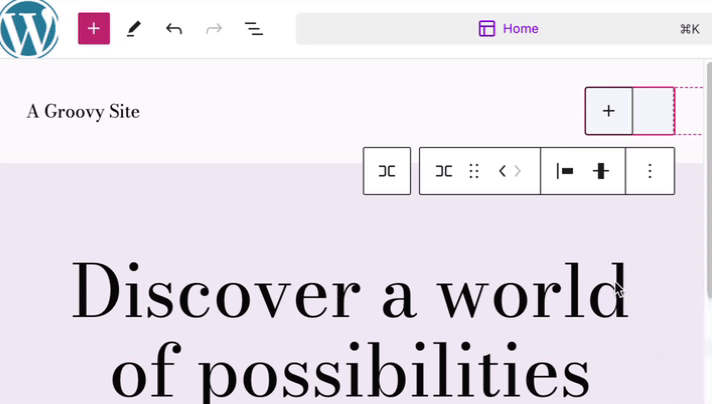
To add the Navigation block, visit the Site Editor and click on the + Block Inserter icon. Search for “navigation” and click to add the block to your site’s header, footer, or template.
For more information, visit our detailed instructions on adding blocks.
When you first add the Navigation block, it may be empty or show links to pages already published on your site. Click the + Block Inserter icon to add links to your menu, choosing from the following options:
- Search for pages, posts, categories, products, and other content published on your site. Private or draft content will not appear here.
- Type a URL to add a link to any page.
- Recently updated pages or posts on your site.
- Add block: Add other blocks to your menu, such as:
- Site Logo block – your site’s logo.
- Social Icons block – logos linking to your social media profiles.
- Search block – visitors can search your website to find pages they’re looking for.
- Page List – a list of all of your published pages.
View our dedicated guides to learn how to:

When you click on the block, a toolbar of options will appear above it:

The Navigation block has the following options in its toolbar:
- Change block type.
- Drag the block.
- Move the block.
- Change the block’s justification; left, right, center.
- Edit the menu in a focused view.
- More options.
Each individual link in the Navigation block also has a toolbar above it:

- Select Navigation (the parent block.)
- Change the block type.
- Drag the block.
- Move the item left or right within the Navigation block.
- Change the link or set it to open in a new tab.
- Add a submenu.
- Bold the text.
- Italicize the text.
- In the drop-down:
- Inline Image
- Strikethrough
- More options.
If you do not see the sidebar on the right, click the Settings icon in the top right corner to bring up the settings. This icon looks like a square with two uneven columns:

The Navigation block settings contain three tabs:
- List View
- Settings
- Styles
These settings are described below.
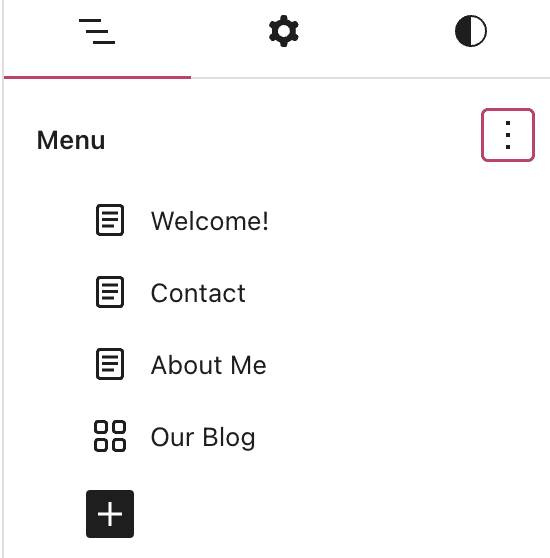
Use the list view to control the items in the menu. You can:
- Add links to the menu.
- Remove links from the menu.
- Create submenus.
- Click and drag a menu item to change its location in the menu.
Click the three dots to select a different menu for the Navigation block or create a new menu.
If you have classic menus, you can import them here. Classic menus will display “Classic menu:” before the menu’s name.
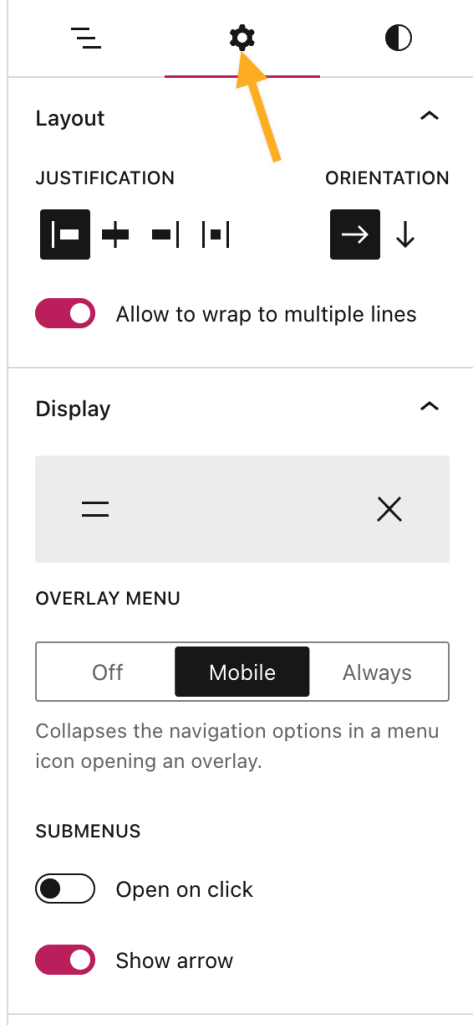
Click on the cog/gear icon to access additional settings for the Navigation block.
Choose the justification between the menu links, from justify left, center, right, or evenly spaced between the items.
Set the menu’s orientation. Choose between horizontal (the default) and vertical menu orientation.
Turn “Allow to wrap multiple lines” off to display the navigation on a single line.
Control how the navigation displays on mobile or all devices. Click the gray box to reveal the following settings:
- Show icon button: Toggle on to show the universally recognized “hamburger” icon of horizontal lines. Toggle off to display the word “Menu” instead.
- Icon: Choose between two or three lines for the icon.
- Overlay Menu collapses the navigation into a menu icon that opens as an overlay when tapped/clicked. Select between Off, Mobile (default), or Always.
If you have created submenus, you will have these additional options:
- Open on click: The submenu dropdown opens only when you click it. If this option is turned off, the dropdown will open when you hover on the menu item with the submenus.
- Show arrow: Choose whether to display an arrow indicating a submenu exists. The actual icons used are determined by your theme.
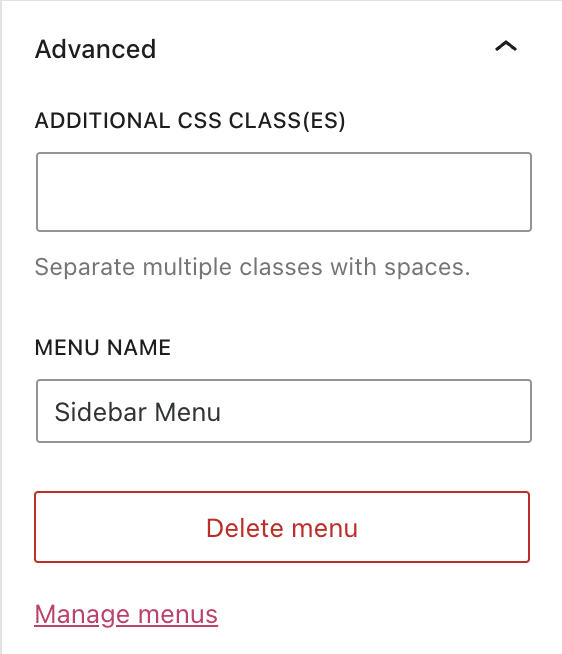
Change the name of the current menu used when editing your site (the name is not public.) Click the “Delete menu” button to erase the menu from your available menu list. Click the “Manage menus” link to access all of your existing menus.
Learn more about Advanced Block Settings.
In the block settings sidebar, click on the Styles icon to access the design settings for the block. The Styles icon is in the shape of a circle with half of the circle filled in:
Adjust your menu’s appearance with the following settings:
Learn more on how to customize the menu design.
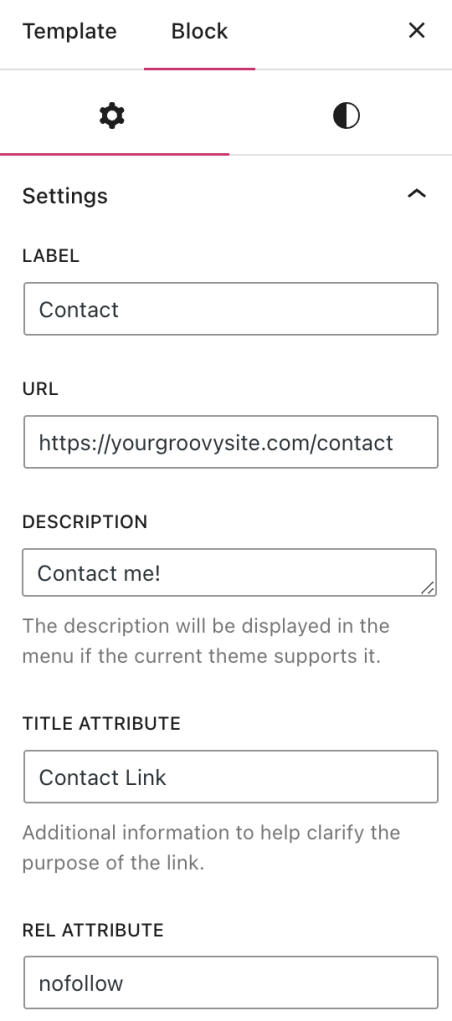
Each individual link within the Navigation block has additional customization options. Click on a link you want to customize to view the Link Settings in the sidebar.
Label
The label is the text that appears in the navigation menu.
URL
The URL is the link or page the menu item leads your visitor to.
Description
If you use a theme supporting link descriptions, the text added here will appear in the menu.
Title Attribute
A tooltip that appears when a visitor hovers over a link. It is also useful for screen readers.
Rel Attribute
This tells the browser the relationship between the page the visitor is on and the link they’re clicking. This is helpful if you want to include nofollow so that search engines don’t index or give ranking credit to the link.