JotForm is an online application that lets you quickly create custom online forms, which you can embed at WordPress.com. It offers a variety of form templates, and themes. To learn more about its features and capabilities, please check the JotForm FAQ.
To integrate JotForm on your WordPress.com website, you’ll first need to sign up for an account, and can then start creating forms. See the JotForm user guide for more information on how to do this.
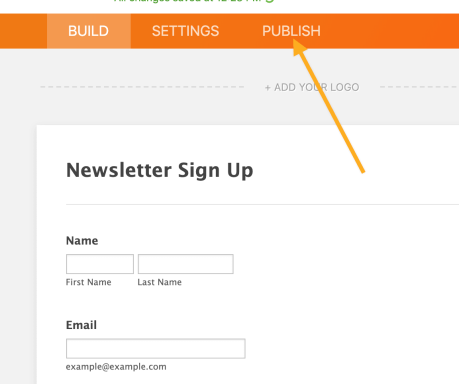
Once the form is created, click on Publish.
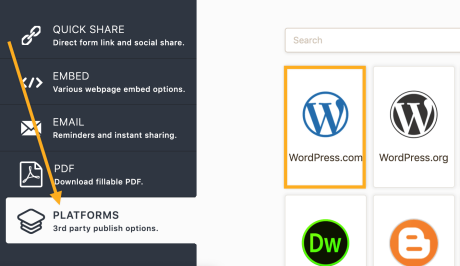
Click on PLATFORMS, then choose WordPress.com.
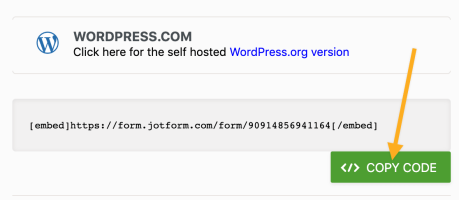
Click on COPY CODE.
- If you are using the Classic Editor, paste the shortcode into the Visual Editor.
- In the Block Editor, add a Shortcode Block and paste the shortcode.
- In your sidebar or footer (depending on your theme’s widget areas) go to Appearance → Widgets and add a Text Widget.
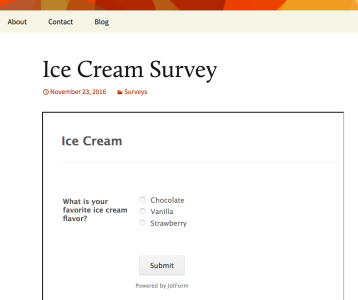
Once you’re ready, click Publish on your Page, Post, or Customizer. Here’s an example of how a JotForm will appear on WordPress.com.
JotForm also supports autoresponder email, which can be used in conjunction with the WordPress.com Post by Email feature to automatically post forms to your site.
Using a customized Sender Email instead of the default JotForm ones might prevent Post by Email to work correctly.
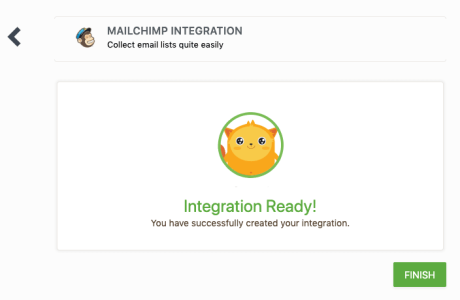
If you want to capture visitor information into a mailing list and would rather have an embedded form in a widget, instead of the Mailchimp subscriber pop up, or the Mailchimp block, you can integrate Mailchimp with JotForm.
Integrating Mailchimp with JotForm allows you to embed a JotForm form in a widget and the information collected will be sent to your Mailchimp list.
Once you have created the JotForm form, click on Settings and then Integrations.
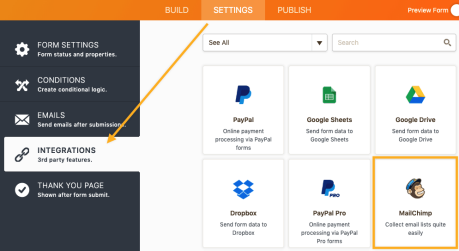
Click on the Mailchimp option to begin the authentication and integration process.
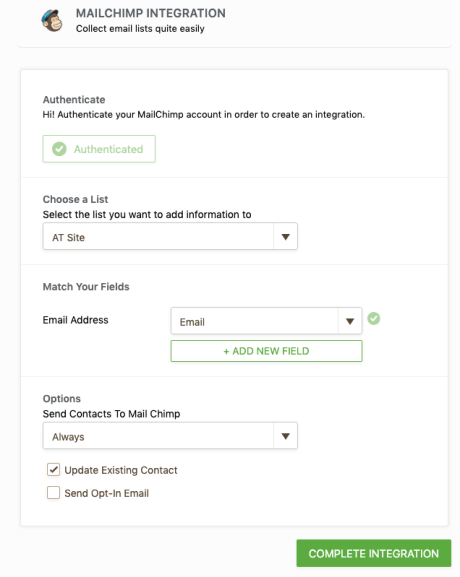
Click Complete Integration to finalize the integration of your JotForm form to your Mailchimp list.