This guide explains how you can add the Meta Pixel (formerly known as Facebook Pixel) to your website.
The Meta pixel allows you to measure the effectiveness of your Facebook advertising by understanding the actions people take on your website.
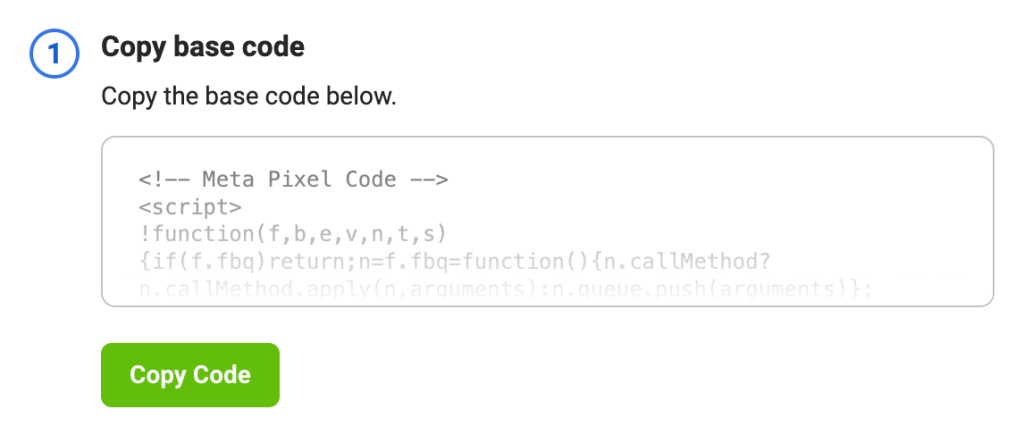
Meta (the parent company of Facebook) provides some code to integrate into your site. The code will look something like this:
Once you have the pixel code, you can add it to your WordPress.com website. The steps you take will be different depending on the type of site you have.
If you have a plugin-enabled site, you can add the full pixel code to a plugin-enabled site using any plugin that allows you to insert code into your website’s headers and footers. Here, we’ll share the steps for one such plugin called Insert Headers and Footers.
- Install and activate the free Insert Headers and Footers plugin by WPCode.
- In the left-hand side of your dashboard, click Code Snippets → Header & Footer.
- Paste the full pixel code into the Header box.
- Click Save Changes.
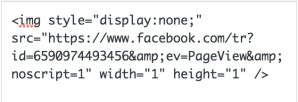
If you have a site that doesn’t support plugins, you can still add the pixel to your site by taking some additional steps.
First, copy the portion of the code that starts with <img and ends in /> as shown here:
Then, add this code using one of the methods described below. The steps you take will differ depending on the theme your site uses.
📌
Take into account that the modified Pixel verification steps above won’t support certain Facebook features such as the Event Setup Tool, Auto Events and Auto Advanced Matching. If these are features you want to use, upgrade to a plugin-enabled plan, install any plugin, then use the full Meta Pixel code.
Sites Using the Site Editor
If your site uses a theme that supports the site editor, you can change your site’s footer using this method. A quick way to determine if your site uses the site editor is to check under Appearance in your dashboard. If you see Editor here, you can add the modified pixel by following these steps:
- Visit your site’s dashboard.
- Navigate to Appearance → Editor.
- Click on Patterns.
- Click on “Manage all template parts”.
- Select your site’s active header or footer.
- Click the pencil icon to edit.
- Click the + block inserter and search for the Custom HTML block. Click to add it to the site.
- Paste the modified pixel code in the Custom HTML block.
- Click the Save button.
Once added, it can take up to 20 minutes for the Meta Pixel status to get updated on the Facebook dashboard.
Sites Using Widget Areas
If your theme supports widget areas, you can add the modified code into a Custom HTML widget so that the pixel will be present throughout your site. Make sure the widget is assigned to a widget area that is displayed on all the pages. Usually, a Footer widget area is displayed on all pages, so your Meta pixel will work there.
Once added, it can take up to 20 minutes for the Meta Pixel status to get updated on the Facebook dashboard.

