Using the Export tool, you can move your WordPress.com site’s content to a new home on the internet. This guide will explain the step-by-step process for exporting your site’s content.
In this guide
Before exporting your content:
- Make sure your site’s privacy settings are set to Public. This is required to ensure images are transferred to your new website.
- Clean things up as much as possible, such as removing unwanted draft pages and posts and deactivating unused plugins so that the export file contains only what is needed.
- Review and delete any comments marked as spam. If there are pending comments, approve or delete them as needed.
Your site’s content is downloaded into an XML file (a type of file used to transport data) that you can import to another WordPress.com site or a WordPress site with any other host.
Many non-WordPress platforms support XML files, too. If the service you want to move to can accept XML imports, you can migrate your WordPress.com site’s content to a non-WordPress site by exporting it using the same process described in this guide.
This XML file (also referred to as a WXR file) contains your posts, pages, comments, categories, and tags. It does not include the site’s design, themes, and plugins, so if you would like to migrate an entire site, you can follow these steps to use a migration plugin.
An XML export will also move your images and other media. However, XML export files contain no actual images or media files. They contain links to images and other media, which will transfer to the new site after you import the XML file to that site. For this reason, the site you exported from must remain publicly accessible until all images are present on your new site.
To create an export file with all of your site’s content, take the steps below.
Select the appropriate tab for your admin interface style:
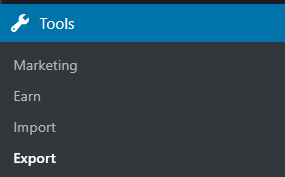
- In your site’s dashboard, navigate to Tools → Export:
- Click the “Export All” button (or click the downward arrow next to the button to select specific content to export.)

- Wait a few moments for the export to process.
- The following message will appear: “Your export was successful! A download link has also been sent to your email.” You can click the “Download” button in the message or download the file from your email inbox (the link will remain active for 7 days.)
- You will receive a
.zipfile to save to your computer with the.xmlfile inside of it. This file contains your posts, pages, comments, categories, tags, and references to your site’s images.- Larger sites may include more than one XML file. When importing into another site, you’ll need to unzip the file and import each of the
.xmlfiles individually.
- Larger sites may include more than one XML file. When importing into another site, you’ll need to unzip the file and import each of the
- Import your file to the new site. If you’re importing to another WordPress.com site, you can follow the steps in this guide.

If your site contains content created with WordPress.com-specific features and you’re moving to a self-hosted WordPress site, install the free Jetpack plugin on your new site to activate these features before importing your files. This includes Jetpack blocks, testimonials, and portfolio projects.
If you intend to delete your website after exporting it, it’s important to wait until after media files have been successfully imported into the new site, which may take up to several hours depending on the size of the site. You’ll know when all images have been copied over when the number of items in Media is the same on the new site as what you had on the original site.
If you’re moving away from WordPress.com to another host and no longer plan to use your WordPress.com website, you may wish to:
- Transfer your domain to another registrar.
- Cancel your WordPress.com subscriptions.
- Divert your WordPress.com site address (such as
yourgroovysite.wordpress.com) to your new site’s domain. - Migrate your subscribers by installing the free Jetpack plugin and using the Subscriber Migration Tool.
If your site is hosted here at WordPress.com, we handle all necessary backups. If a very large meteor were to hit all the WordPress.com servers and destroy them beyond repair, all of your data would still be safe, and we could have your site online within three days (after the meteor situation died down, of course).
If you still want to back up your site content manually, you can use the Export option described in this guide. After downloading the export file, import the file into another WordPress site such as another WordPress.com site or a local site. This will ensure images are backed up and you can access your backup site.
If your site has a plugin-enabled plan, you can download entire site backups and restore your site to any previous point in time. Learn more about these backups.
There may be times when you get an error message when attempting to export your site content. The most common reason for this is very large files. To resolve this, you can export smaller sections at a time. You can export content in smaller groups organized by date, author, status, or category, as explained in Step 2 above.
If you’re still having any trouble, it can help to deactivate plugins on your site (which will not be in the export file anyway) and delete any spam or pending comments to clear out anything you don’t need.

