This guide will show you how to transfer a domain to another person’s account on WordPress.com. The steps described below apply both to domains registered with WordPress.com and connected domains registered with another provider.
In this guide
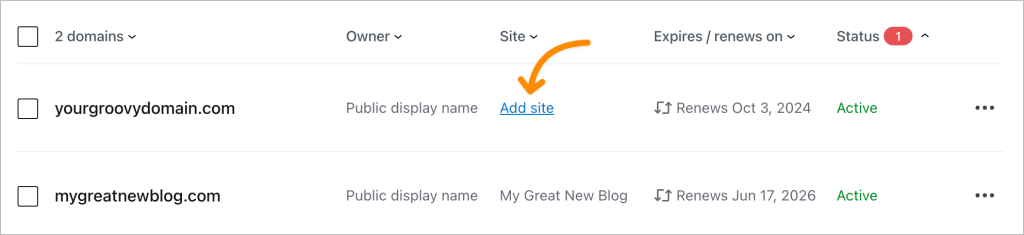
If the domain is not attached to any WordPress.com site, you can use the following steps to transfer such a domain to another WordPress.com user account. You will see such domains with the “Add site” link on the All Domains screen:
To transfer a domain that is not attached to any WordPress.com site to another WordPress.com user:
- Visit the All Domains page in your WordPress.com account.
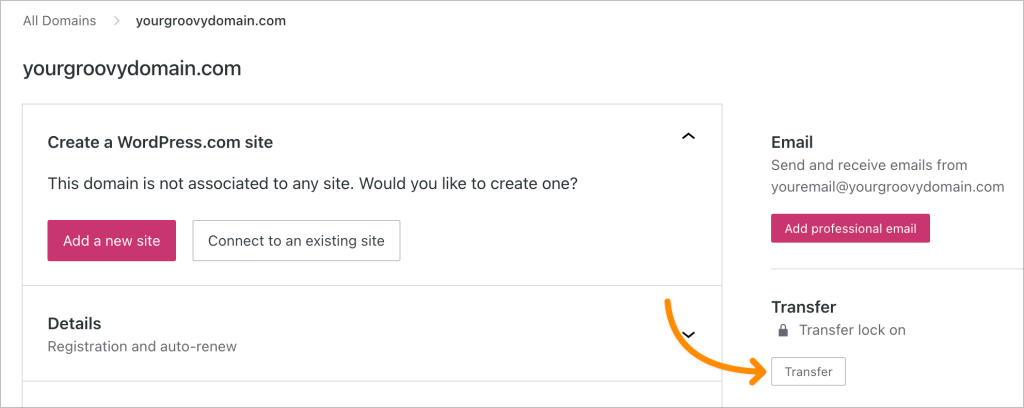
- Click on the domain to open its Settings page.
- Click on the “Transfer” button on the right sidebar.
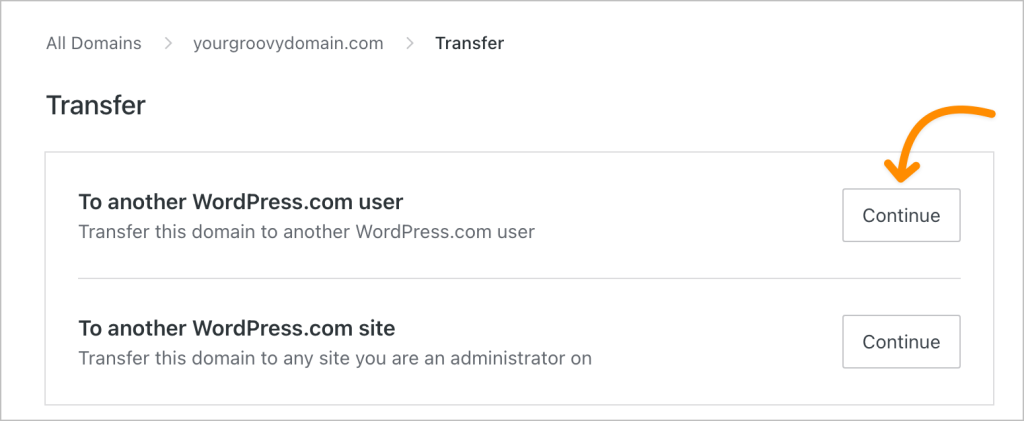
- In the “To another WordPress.com user” section, click on the “Continue” button.
- Add the new owner’s email address in the “Enter domain recipient’s email for transfer” box, and click the “Transfer domain” button.

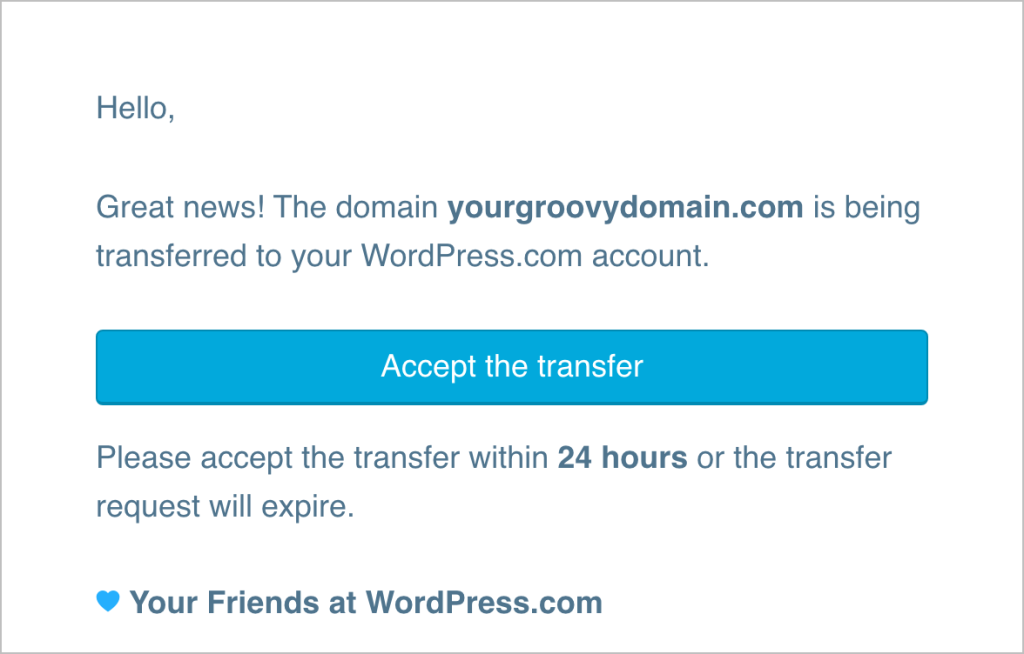
The new owner will then receive an email asking them to accept the transfer.
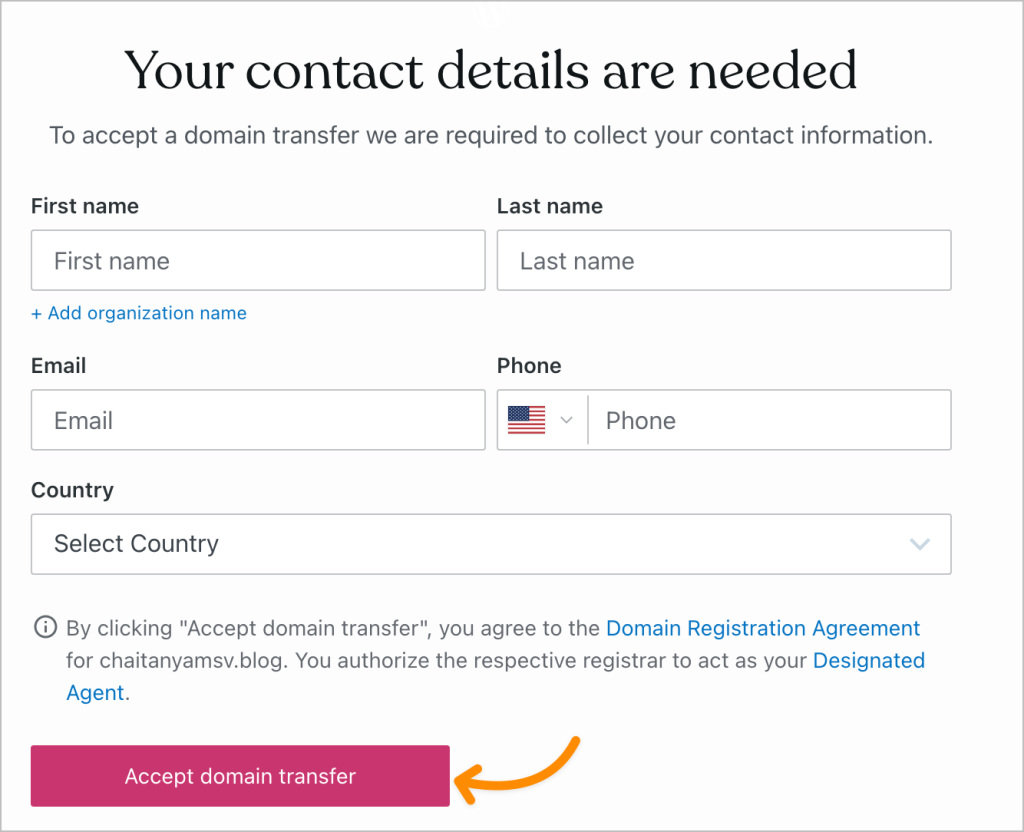
To accept the transfer, the new owner must click the “Accept the transfer” button in the email.
- When the new owner clicks the “Accept the transfer” button in the email, they will be asked to add their contact details and click the “Accept domain transfer” button.
- The new owner will then see a message that the domain transfer is underway to their account. They can click the “Manage domains” button to manage the domain from their account.

If the domain is attached to a site, you can use the following steps to transfer the domain to another WordPress.com user account.
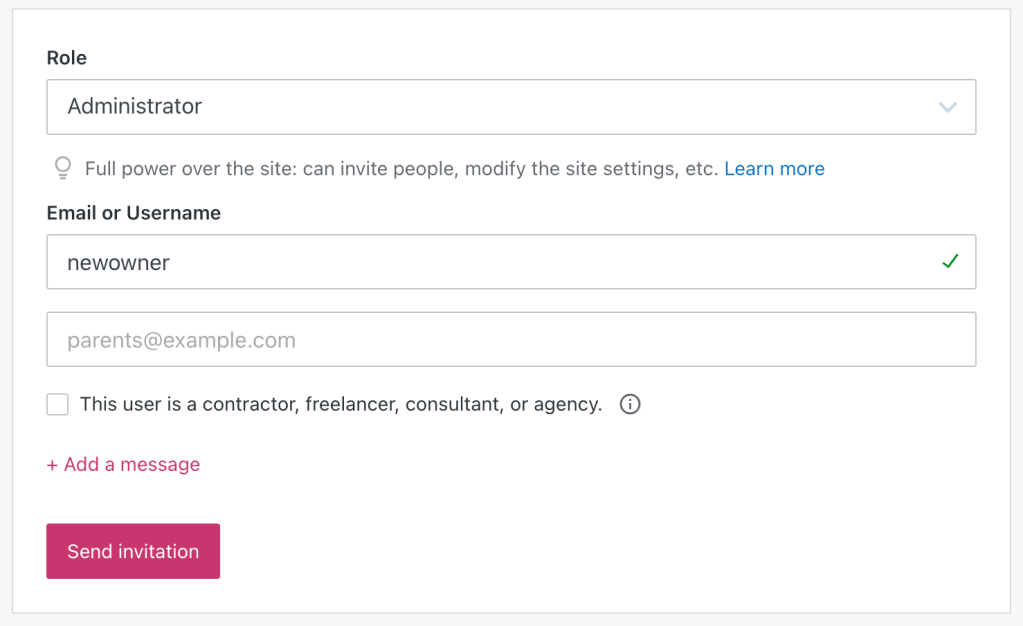
First, add the new owner as a site admin if they aren’t one already. To add the new owner as an admin:
- Visit the dashboard of the site your domain is associated with.
- Navigate to Users → Add New.
- In the box for Role, select Administrator.
- Type their email or username in the box provided.
- If the new owner already has a non-admin role on the site, you can change their role to admin at Users → All Users.
- Click the Send invitation button.
- Wait for the new owner to accept the invitation to join the site as an admin, then move on to the next step.
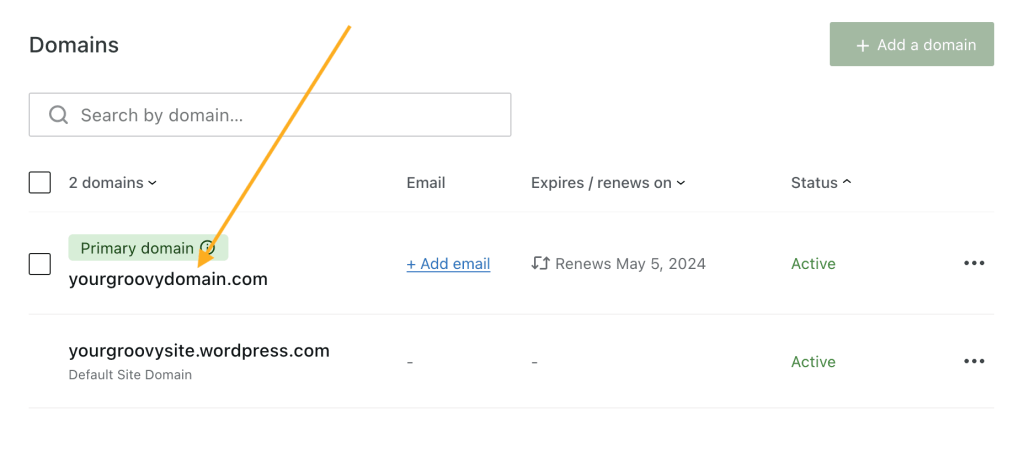
From your dashboard, navigate to Upgrades → Domains (or Hosting → Domains if using WP-Admin) and select the domain you want to transfer from the list:
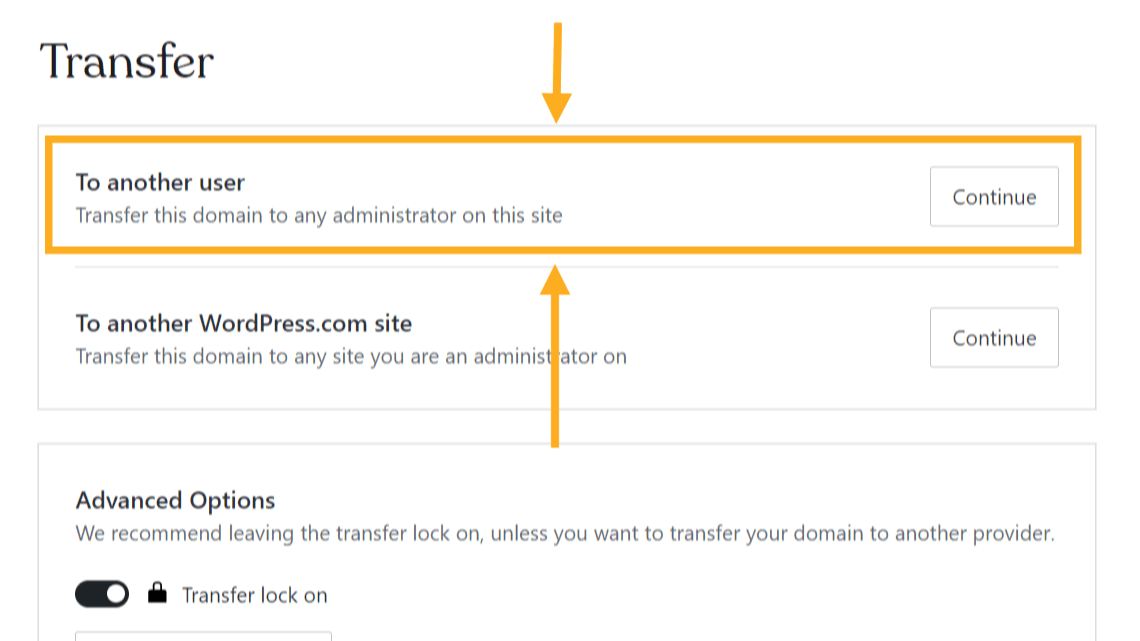
On the next screen, you will find information, settings, and options for your domain. Click the “Transfer” button:

Here, you can transfer the domain to another user, site, or provider. Select “To another user” and click the “Continue” button:
On the next screen, you will find a drop-down list of all administrator users on your site. Select the new admin you added in step 1:
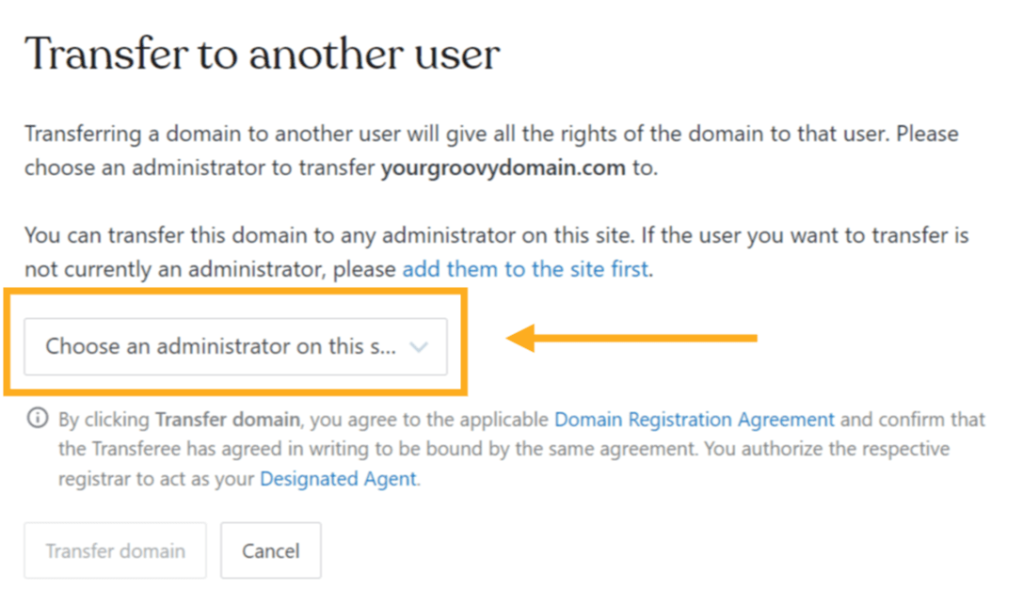
There is also some text to explain that if you proceed, you authorize us to act as your Designated Agent to complete the transfer on your behalf. This applies to registered domains only (not domains connected from another provider.)
Click the “Transfer domain” button. You will be presented with one last confirmation pop-up:

Once you click the “Confirm Transfer” button, the domain will be transferred to the new owner.
Domain owners are required to provide current and valid contact information. Therefore, remind the new owner to update their contact details on the domain from your information to theirs.
To ensure the new owner doesn’t let the domain expire by accident, they can add a payment method and enable auto-renewal for the domain from their WordPress.com account.

