DNS records are special settings that control what people see when they visit your domain. They also allow you to connect your domain to third-party services such as an email provider. This guide will show you how to add, remove, and change your domain’s DNS records.
In this guide
You may want to edit the DNS for your domain if you are:
- Verifying your ownership of a domain for services such as Google.
- Configuring a custom email service with a third-party provider.
- Pointing your domain to a different website hosted elsewhere.
- Creating a subdomain.
📌
As long as your domain is using WordPress.com name servers, you will manage the DNS from your WordPress.com account. If your domain is not using WordPress.com name servers, make any DNS changes at your registrar/DNS provider.
To see the current DNS records on your domain, take the following steps:
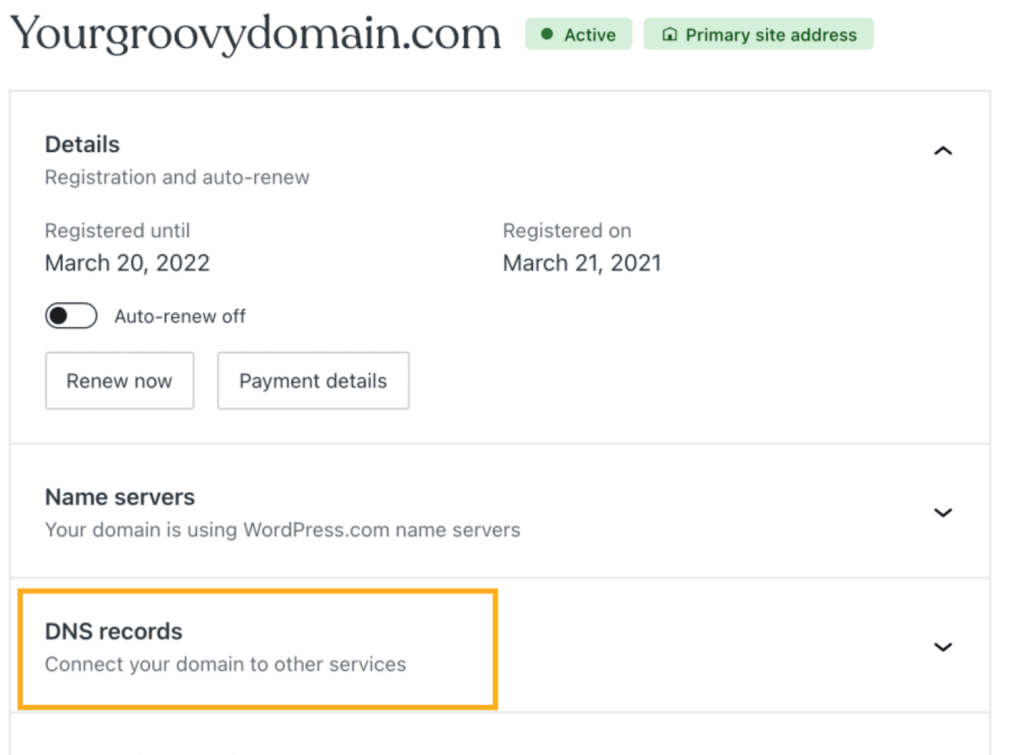
- Visit your site’s dashboard and navigate to Upgrades → Domains (or Hosting → Domains if using WP-Admin) to view all the domains associated with that site:

- Click on the domain and then click on the “DNS records” option:
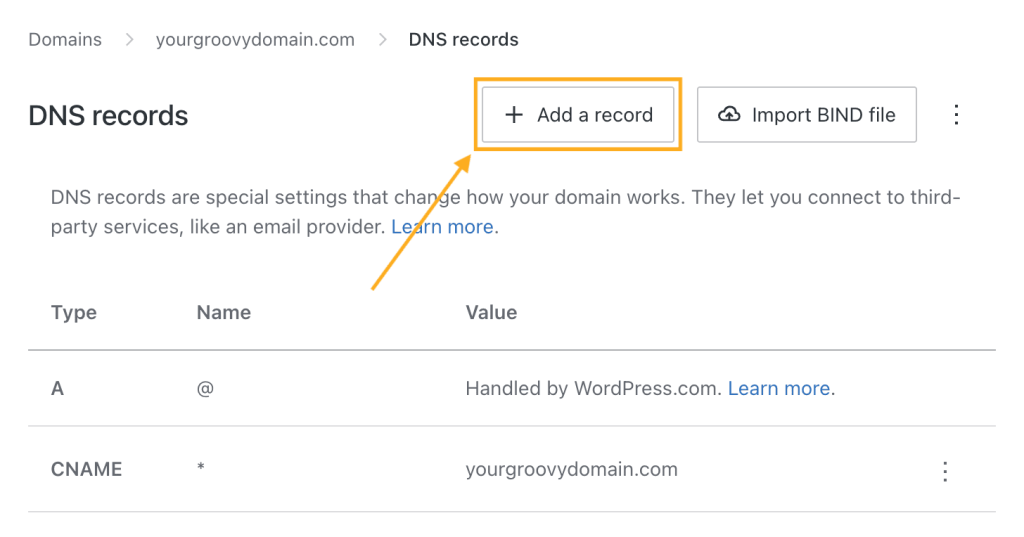
- Here, you will find a list of the current DNS records. You can then click on the “Manage” button to make changes:

You can add the following DNS records on WordPress.com:
- A (see the Setting a Custom A Record page for more info.)
- AAAA
- ALIAS
- CNAME (see Connect a Subdomain for more info.)
- MX (see Add Email Through Other Providers for more info.)
- TXT (2048 characters or less.)
- SRV
To add a new DNS record:
- Click on the “Add a record” button in the upper right corner:
- Click on the Type dropdown to select the type of DNS record you wish to add (A, AAAA, CNAME, MX, TXT, or SRV.)

- Fill in the remaining information provided to you by the service you’re adding the record for. The fields available will change depending on the record type you are adding.
- There is no standard set of terms for the various fields of a DNS record, so different providers may use different terminology from what you see on WordPress.com.
- TTL (time to live) is measured in seconds, so a TTL value of 3600 = 3600 seconds, or 1 hour.
To change or remove an existing DNS record, you can click the three dots next to an existing record, and select either Edit or Delete:

Some records are created by default and their value fields show a “Handled by WordPress.com” message. These records have special behavior depending on their type (A, CNAME, or MX):
- The default A record ensures your domain displays your WordPress.com site. To replace the default A record, add a new A record — the default A record will automatically be replaced. If you have your domain pointed to another host, but you want it to point back to your site on WordPress.com, you can restore these default A records by removing the custom A records or by selecting the Restore default A records option from the action menu at the top of the DNS page:

- The wildcard CNAME record ensures that subdomain requests like
www.yourgroovydomain.comare redirected to the site as well. In specific cases, such as connecting your domain to Shopify, you may be advised to delete this record. - If you have set up email forwarding from WordPress.com, you’ll find a default MX record. If you delete this record, it will disable email forwarding for your domain.
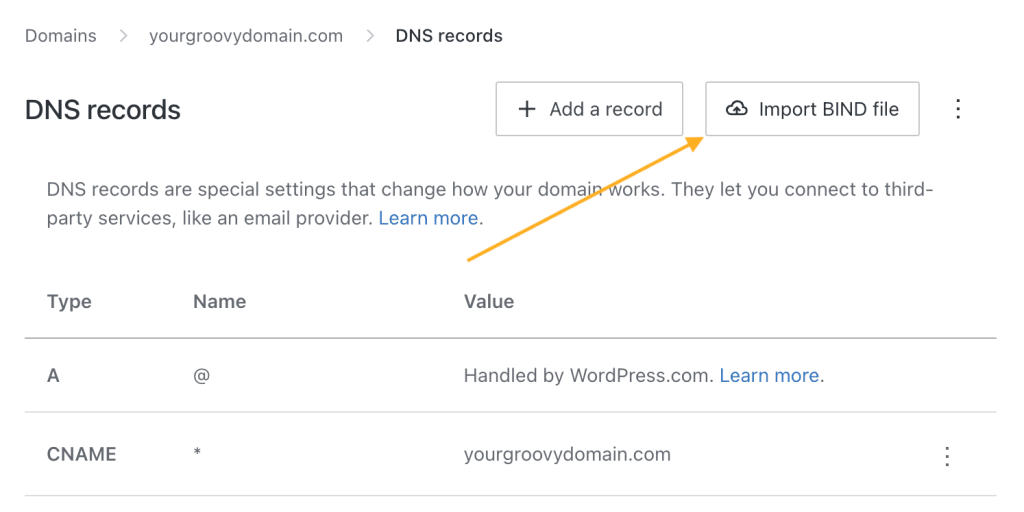
Import existing DNS records to your domain using BIND files, also known as zone files. BIND files are a standard way of importing and exporting large numbers of DNS records. You can import DNS following these steps:
- Click on the “Import BIND file” button in the upper right corner:
- Select the BIND file you wish to import using your systems file navigation and choose the “Open” option.
- If the BIND file contains a DNS record that would conflict with an existing record, an error will occur.
- Only supported DNS records can be imported: A, AAAA, CNAME, MX, SRV, and TXT.
- Confirm the DNS records you wish to add to your domain in the “Import DNS records” popup and select “Import records” to complete the import.
If your domain is using WordPress.com’s name servers, you will see an option to enable a particular DNS record called “_domainconnect”.
If you enable this record, you can connect to other services such as Microsoft Office 365, without requiring you to manually edit DNS records.
You can enable this record by clicking on the three dots next to it and selecting the Enable option. Likewise, you can disable it by selecting the Disable option for the active “_domainconnect” record:


