You can create a subdomain of any domain you own. This guide will show you how to connect a subdomain to your site on WordPress.com.
In this guide
A subdomain has an extra piece of text before your main domain (called the root domain.) For example, if your root domain is yourgroovydomain.com, you can create subdomains such as blog.yourgroovydomain.com and shop.yourgroovydomain.com.
You can connect a subdomain to:
- A separate WordPress.com website to your root domain on WordPress.com (this guide).
- An external website hosted elsewhere with a different hosting provider. See our Connect a Subdomain to an External Site guide.
- A non-homepage on your root domain hosted on WordPress.com or a different hosting provider. See our set up subdomain forwarding guide.
Identify the WordPress.com site to which you want to connect the subdomain to. If you don’t have a site, you can create a new site here. Connecting a subdomain is included with any paid WordPress.com plan (each site requires its own plan.)
To connect a subdomain to a site on WordPress.com, take the following steps:
- Visit the dashboard of the site you wish to use with your subdomain.
- If you don’t yet have a site for your subdomain, create a new site in your account here.
- Navigate to Upgrades → Domains (or Hosting → Domains if using WP-Admin).
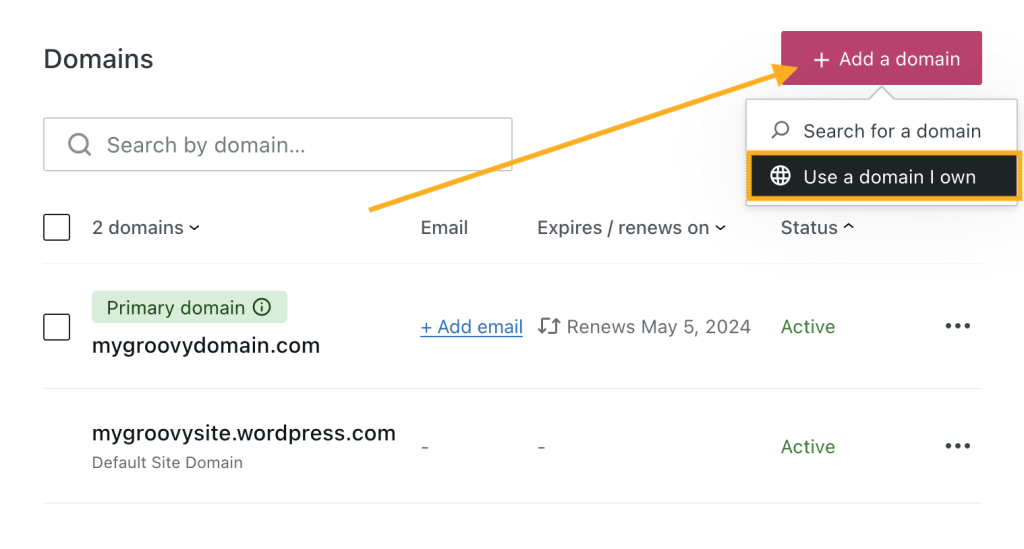
- Click the “Add a domain” button.
- Select “Use a Domain I own” from the drop-down menu:
- Type the full subdomain you want to use, such as
blog.yourgroovydomain.comfor example. - Click the “Next” button.
- On the next screen, click “Select” in the “Connect your domain” section:

- If the site does not have a WordPress.com plan, you will be taken to checkout to complete your purchase. Otherwise, you’ll see a message that your subdomain has been created.
Sometimes, you may be asked to submit an authorization code to confirm you are the domain owner and complete the subdomain connection.
If requested, you’ll need to obtain the authorization code from your domain registrar to verify your domain ownership. If your domain is registered with WordPress.com, follow the steps here. If your domain is registered at another provider like Bluehost or GoDaddy, you can obtain the code via your domain settings in your account with that provider.
The authorization code is sometimes referred to as a transfer, auth, or EPP code and is commonly used for domain transfer. Once you provide the authorization code, you can proceed with the next step to connect your subdomain. We only use the authorization code to verify your domain ownership — your domain will not be transferred by providing the code.
If your root domain uses WordPress.com name servers, our system will have already set up the required DNS records for your subdomain. You can test your new subdomain now to ensure it’s working as expected.
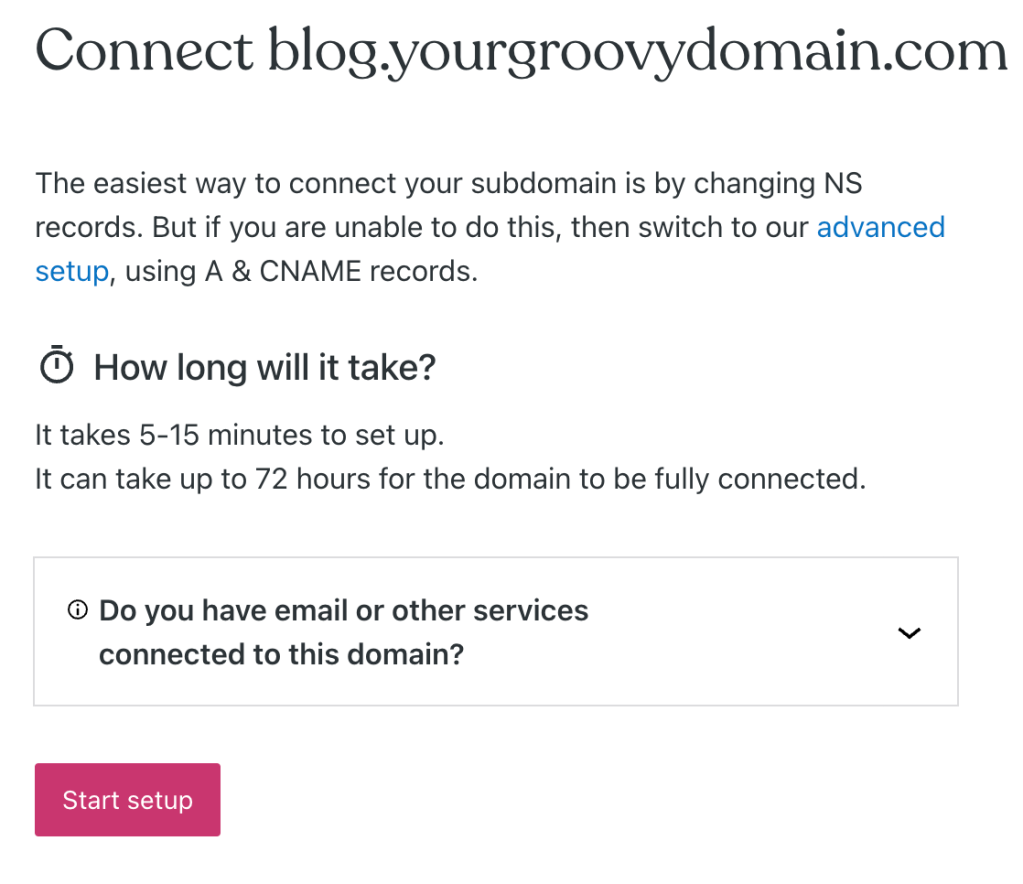
If your root domain does not use WordPress.com name servers, you’ll be prompted to make some changes in your DNS so that your subdomain can function.
- Click the “Start setup” button.
- Open a new browser tab and log in to your account with your domain provider (where your name servers are set.)
- Back on WordPress.com, click “I found the domain’s settings page“. We’ll then show you the required DNS records.
- Enter the necessary DNS records for your subdomain in your domain provider’s DNS settings.
- Back on WordPress.com, click “Verify connection“.
The recommended method is adding NS records to your subdomain’s settings page. Alternatively, you can click the advanced setup link to use A records (IP addresses) and CNAME records.