The dashboard is the first screen you land on right after you log into your WordPress site. It is the main screen of the admin area of your website.
WordPress.com offers best-in-class hosting and two different dashboards you can use, depending on which one you prefer:
- The WordPress.com dashboard
- WP-Admin (considered the classic WordPress dashboard)
While you can do almost everything in your main WordPress.com dashboard, you can also switch to WP-Admin if that is your preference. This guide will show you how to access your WordPress dashboard.
Interested in migrating your site to WordPress.com?
For a short time, we’re offering migrations from your existing WordPress site to WordPress.com for free! Sign up for a new Creator or Entrepreneur plan and our expert Happiness Engineers will handle the migration for you.
In this guide
The WP-Admin dashboard is also known as /wp-admin or the classic WordPress dashboard. You will often see images of this dashboard when looking at WordPress tutorials online — usually with a black left sidebar. Some folks fondly called this “the admin area.” While you can do almost everything in your main WordPress.com dashboard, you can use WP-Admin if that is your preference.
The WordPress.com dashboard and WP-Admin are connected. Therefore, any changes you make on one dashboard will be reflected on the other.
When you first log in to your WordPress.com account, you will see the default WordPress.com dashboard. To access the WP Admin dashboard:
- Log into WordPress.com.
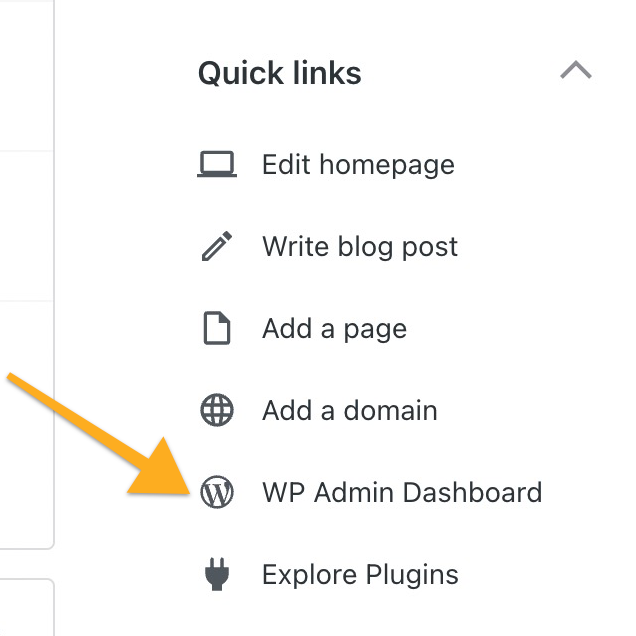
- Scroll lower on the page and look for the “Quick links” section on the right.
- Click on the “WP Admin Dashboard” option.
You can also access WP Admin by adding /wp-admin to the end of your website URL, such as yourgroovysite.wordpress.com/wp-admin or yourgroovydomain.com/wp-admin.
This section of the guide applies to sites with the WordPress.com Creator or Entrepreneur plan. If your site has one of our legacy plans, this feature is available on the Pro plan.
You can set your website to use the wp-admin classic interface whenever you log into your dashboard. This setting will also change the admin bar (the black bar that appears at the top of the screen while you’re logged in.)
To set the style for the admin interface, take the following steps:
- Log into your WordPress.com dashboard.
- Navigate to Settings → Hosting Configuration.
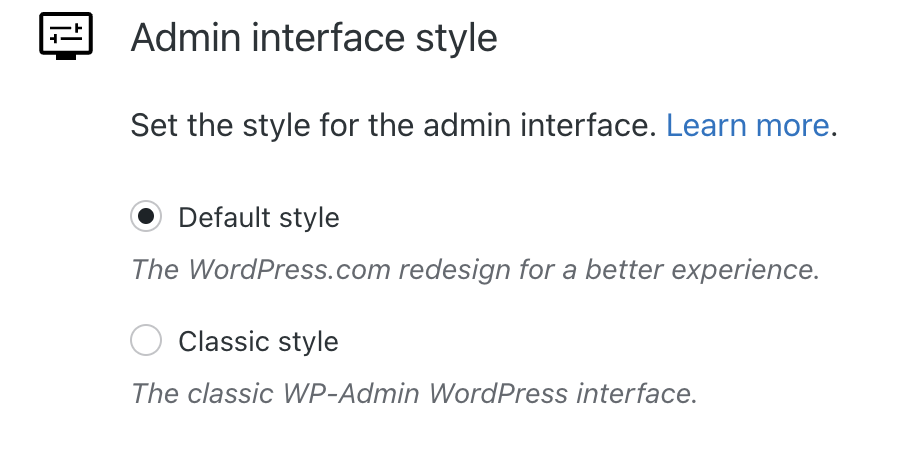
- Scroll down to the “Admin interface style” section.
- Choose between:
- Default style: The redesigned WordPress.com experience.
- Classic style: The classic WP-Admin WordPress interface.
After making a selection, your admin interface will update automatically in a few seconds.
To view the classic WP Admin version of any individual screen, you can click on the View tab in the upper right corner and select “Classic view“:
After switching to the Classic WP Admin view, you can return to the Default WordPress.com view by clicking the View tab in the upper right corner and selecting Default view:

📌
If you do not have the View tab, check to make sure “WordPress.com Log In” is set to the ON position at Settings → Security → WordPress.com Log In.
Classic view is available for:
In addition, the Classic Editor is accessible by following these steps.
When you switch to Classic view, it will not change back to the Default view unless you intentionally return to this view using the View tab.
You can control the view on a screen-by-screen basis. For example, switching to Classic view on Pages will not change the view on the Posts screen. Switching to Classic view on Posts is a separate action.
There are several quick actions you can perform right within the WP-Admin dashboard, as shown below:
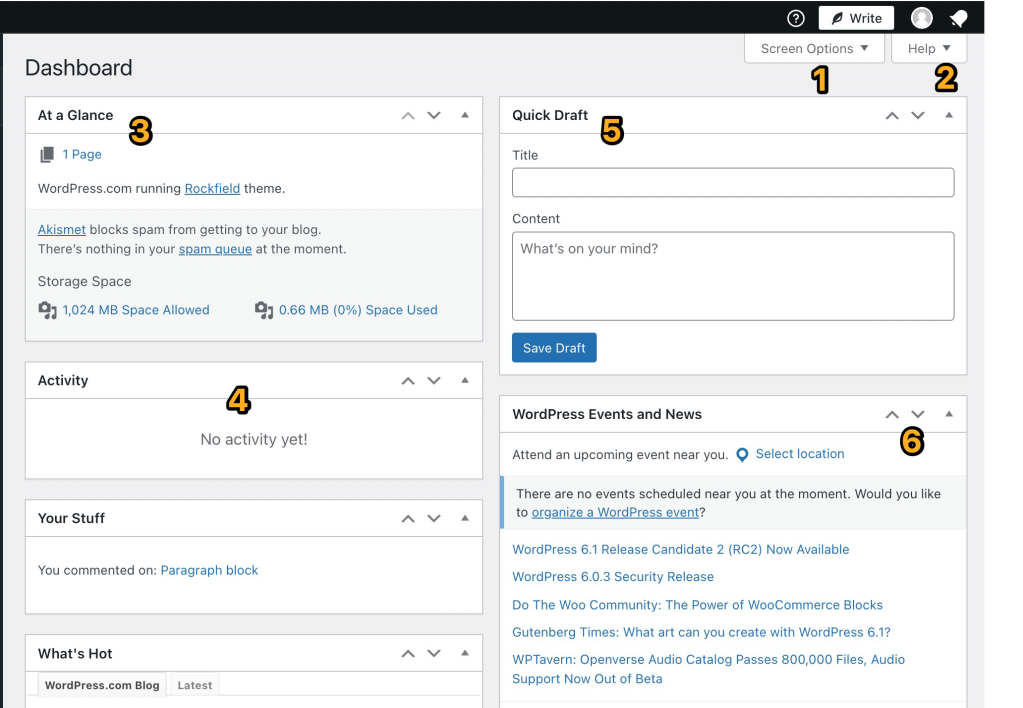
- Click on Screen Options to select the elements you want to show in your WP Admin dashboard. You can show or hide At a Glance, Activity, Quick Draft, and so on.
- Click on Help to access quick tutorials on navigating the WP Admin dashboard and get additional support if needed.
- At a Glance displays a summary of the content on your site and identifies which theme you are using.
- Activity: Shows the upcoming scheduled posts, recently published posts, and the most recent comments on your posts and allows you to moderate them.
- Quick Draft: This section lets you quickly create a new post and save it as a draft. It also displays links to the three most recent draft posts you’ve started. You can click on those links to edit the draft posts or access them by navigating to Posts → All Posts → Drafts.
- Click on any of the three arrows to move the current box element up, down, or toggle to shut it. You can also click and drag any boxes to move them into a different position.

