This guide explains how to use the Classic Editor, the legacy editing experience on WordPress. The modern WordPress Editor can do anything the Classic Editor can do and much more, so even though the Classic Editor is still available, it is not recommended.
In this guide
💡
Did you know? The WordPress Editor includes the Classic Block, which replicates much of the functionality of the Classic Editor inside the modern editor. You can use the Classic Block to take full advantage of all of the features of the WordPress Editor while retaining the classic writing experience.
You can still access the classic editor if that is your preference. The steps to access the Classic Editor depend on whether your site uses plugins or not:
To edit a page or post in the Classic Editor, take the following steps:
- Visit your site’s dashboard.
- On the left side, navigate to Pages or Posts.
- In the upper-right corner of the screen, click the “View” tab and select Classic view.
- Hover your cursor over the page or post you wish to edit, then select “Classic Editor“:

If you have a plugin-enabled site, you can access the Classic Editor by activating the Classic Editor plugin, which we automatically install for you.
- Starting from your dashboard, navigate to Plugins → Installed Plugins.
- Look for the Classic Editor plugin.
- Click the “Activate” link below the plugin name.
- When you create a new post or page, it will default to the Classic Editor.
If the Classic Editor plugin is active and editing a page still takes you to the WordPress Editor, check the following (this does not apply to sites that are not using the plugin):
- Visit your site’s dashboard.
- On the left side, navigate to Settings → Writing.
- Make sure you are in the Classic View by clicking the View tab in the top right, then select “Classic View.”
- Ensure the “Default editor for all users” is set to “Classic editor.”
- Scroll to the bottom and click the “Save Changes” button to apply any changes you made to the settings.

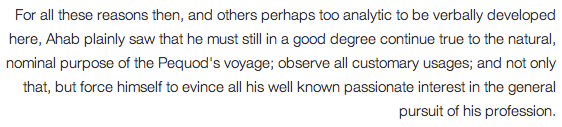
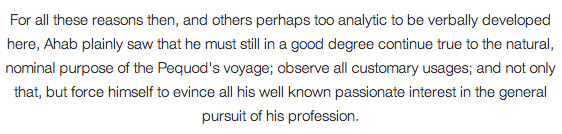
You can use the Classic Editor to create, edit, and format your content in a view similar to that of a word processor. You can also use the modern WordPress Editor to create anything the Classic Editor can do, from simple blog posts and articles to media-rich, mobile-responsive, and unique websites.
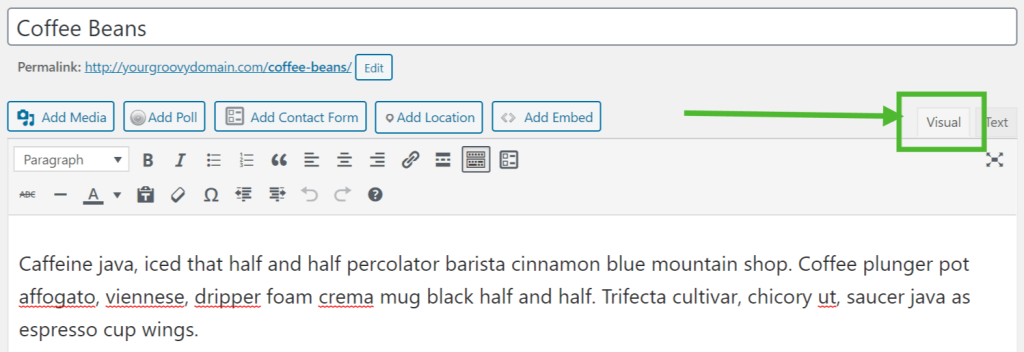
The Classic Editor has two views: Visual and HTML. Unless you are comfortable editing in HTML, ensure you have selected the Visual tab in the top right corner of the editor area:
The content in the classic editor is styled by the CSS (a type of code that gives HTML styling such as color, spacing, width, etc.) of your chosen theme. What you see in the editor may not precisely match the live site. You can use the Preview button to check how the post or page looks on the live site.
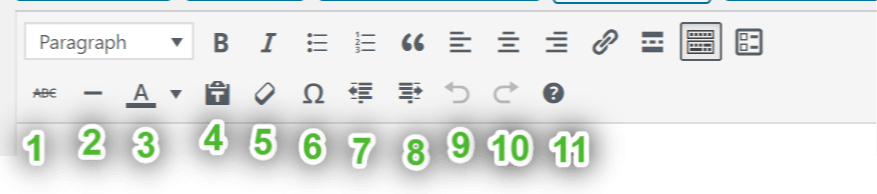
There are two rows of editing buttons in the classic editor. You can discover what each button does by hovering over it with your mouse. A small tooltip will appear describing the icon and its purpose.
When initially opened, the classic editor will display a single row of icons:

From left to right, these icons are:
- Add Media (images, videos, and more.)
- Style – various formatting styles defined by your theme
- Bold
- Italic
- Unordered list (bullet points):
- Item 1
- Item 2
- Ordered list
- Item 1
- Item 2
- Blockquote (a way of styling quoted text; each theme will style this differently.)
- Align Left
- Align Center
- Align Right
- Insert/edit/remove link
- Insert More tag
- Toolbar Toggle (reveals the second row of editing icons)
- Add Contact Form
To display the second row of icons, select the toolbar toggle icon on the right of the first row (button number 13 above). This will open a second toolbar that looks like this:
From left to right, these icons are:
Strikethrough- Horizontal line
- Select text color – changes the text color
- Paste as Text
- Clear formatting
- Insert special character
- Outdent – moves text further left
- Indent – moves text further right
- Undo – undoes your last action
- Redo – redoes your last action
- Help – displays keyboard shortcuts.
Both text and images can be aligned using the appropriate icons:
Left

Right
Center
The style drop-down menu allows you to change the formatting of any selected text. This includes various headings and other pre-defined styles built into your theme.
Note that further style modification requires Custom CSS (and appropriate knowledge of CSS).

To change text color, you must first highlight a section of text:
Clicking the down arrow next to the text color button will display a color selector. While the color selector is open, the arrow will point up. You can click on it to close the selector without selecting a color:

Selecting a color will apply that color to the selected text and make it the default color for the color button.
Clicking on the text color button itself will apply the last default color.

If you copy and paste text from somewhere else, you may discover that it does not always appear exactly as expected. This is because pasting from another program (such as an email or Word document) can bring with it some unwanted formatting.
If you use the “Paste as text” button, a special cleanup process will run to remove any special formatting and HTML tags that may otherwise change your text’s formatting.
Below is how the Toolbar looks in “Plain Text off” mode. Note that there’s no box around it:

Below is how the Toolbar looks in “Plain Text on” mode. Notice the icon now has a box around it, and the button is shaded black:


The clear formatting button removes all formatting (bold, italic, colors, etc) from a highlighted section of text. First, select your text:

When the button is clicked, all the formatting will be removed:

You can insert special characters into your post or page. Position your cursor to where you want to insert a character and click the insert custom character button. A popup window will appear:

Click any character, and it will be inserted at your cursor position.
The indent button will move text in by one level, and the outdent button will take away one level.


Hitting the Enter (Return) key will end the paragraph you are writing and start a new one. If you want to start a new line without creating a new paragraph, hold the Shift key while hitting Enter.
The classic editor has several keyboard shortcuts, or hotkeys, built in.
To see a list of all available shortcuts, click the toolbar toggle to show the second row of icons, and then click the “Keyboard Shortcuts” (question mark) icon at the end of the second row.
A window will show a list of keyboard shortcuts available in the editor.

To use the default shortcuts, press Command + key on Mac or Control + key on Windows:
| Key | Action | Key | Action |
|---|---|---|---|
| c | Copy | x | Cut |
| v | Paste | a | Select all |
| z | Undo | y | Redo |
| b | Bold | i | Italic |
| u | Underline | k | Insert/edit link |
For additional shortcuts, press Control + Option + key on Mac or Control + Alt + key on Windows:
| Key | Action | Key | Action |
|---|---|---|---|
| 1 | Heading 1 | 2 | Heading 2 |
| 3 | Heading 3 | 4 | Heading 4 |
| 5 | Heading 5 | 6 | Heading 6 |
| l | Align left | c | Align center |
| r | Align right | j | Justify |
| d | Strikethrough | q | Blockquote |
| u | Bullet list | o | Numbered list |
| a | Insert/edit link | s | Remove link |
| m | Insert/edit image | t | Insert Read More tag |
| h | Keyboard Shortcuts | x | Code |
| p | Insert Page Break tag |

