If you are proficient in writing CSS code, you can add a CSS class to a block and style that block with CSS. This guide explains how to use the Additional CSS Class(es) feature of the WordPress editor.
In this guide
To add an additional CSS class to a block, take the following steps:
- Click on the block you are editing.
- In the block settings on the right, click on the “Advanced” setting.
If you do not see the sidebar on the right, click the Settings icon in the top right corner to bring up the settings. This icon looks like a square with two uneven columns:

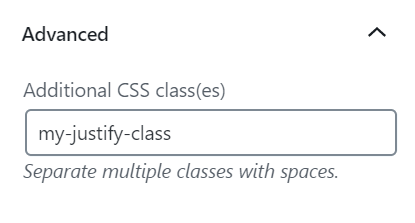
- In the box labeled “Additional CSS Class(es)“, define your class as either:
- A single word, such as
special - A term made up of multiple words with each word separated by hyphens, such as
special-class
- A single word, such as
- If adding multiple classes to the same block, separate each class by a space. For example:
special-class-1 special-class-2
When defining your class, be careful not to use a class that may already have been defined in the website’s code. You’ll want to use unique terms not already in use within the site’s CSS.
📌
You may know that when writing CSS code, we target a class by putting a period in front of the class, i.e.
.page. However, do not place a period in front of the class when defining it in the block settings.
After you have defined a CSS class and added it to a block, you can write custom CSS code to target the class you created. Visit our Add Custom CSS guide to learn where to add CSS to your website.
In the rest of this guide, we’ll share a few examples of how you can use Additional CSS Classes.
Let’s say you want to add an animation to one Image block on your site, but leave all other images untouched. In this example, we define the moving-image class in the Advanced block settings:

Then, we can add the following CSS to our site to give this block a cool animation:
.moving-image {
	animation-duration: 3s;
	animation-name: slidein;
}

@keyframes slidein {
	from {
		margin-left: 100%;
		width: 100%;
	}

	to {
		margin-left: 0;
		width: 100%;
	}
}
This is the result when you open the page:

You can change the icon used in a list from a circular disc to a square, an empty circle, a Roman numeral, and many more!
Define a class such as square-bullet-list-block like so:
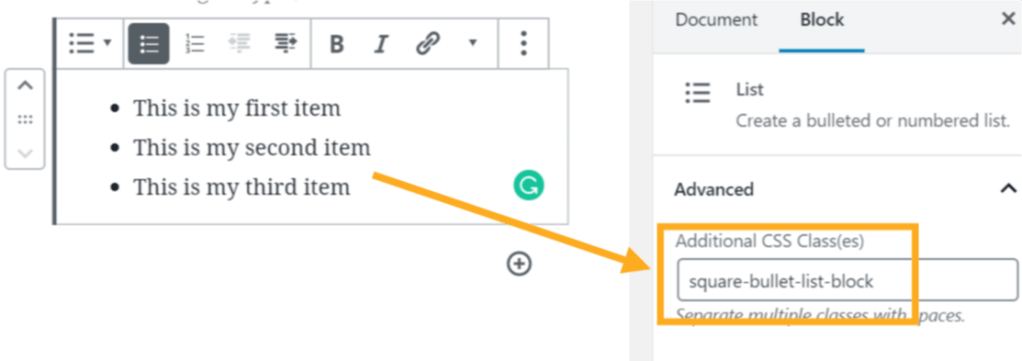
Then, add this CSS to your CSS editor:
.square-bullet-list-block {
     list-style-type: square;
}
and the result will be:

Depending on your theme’s design, you might need to add a class like <li> to the CSS above to target the correct class.
Some classes come pre-defined in WordPress; you can add those to your blocks for cool effects.
For example, the class has-drop-cap will make the first letter of a paragraph block appear in a large font size:
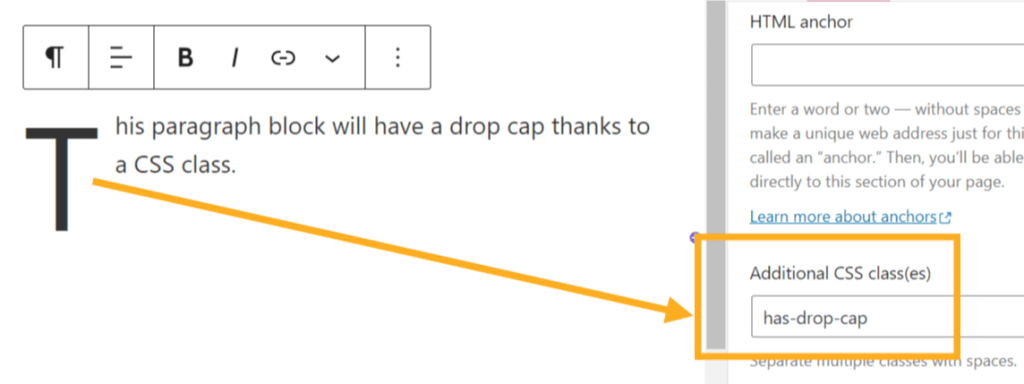
has-drop-cap class.Removing the class will also remove the drop cap effect.
Below is a list of other existing CSS classes that some blocks will support, but remember that theme styles may override these existing classes. For best results, use one of the Recommended themes.
aligncenteralignrightalignleftalignwidealignfullhas-small-font-sizehas-large-font-sizehas-huge-font-sizehas-drop-cap

