Email Forwarding lets you use your domain in your email address. This guide will show you how to set up this free email solution.
In this guide
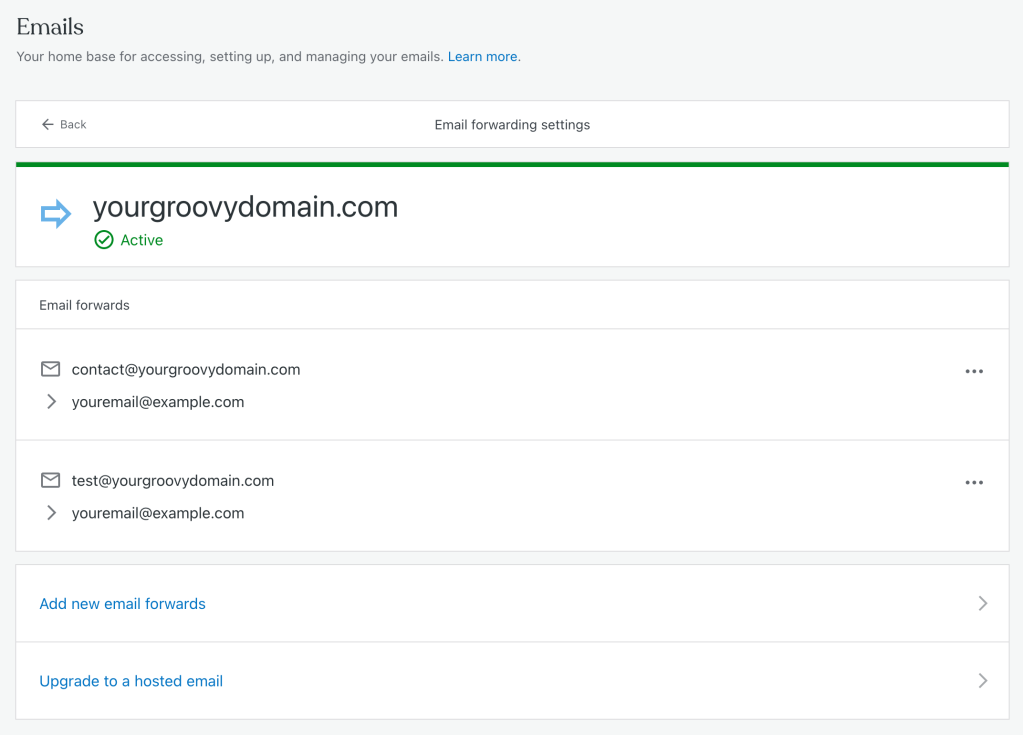
With Email Forwarding, you can create an email address that uses your domain. All your mail will be forwarded to a personal email address you choose, and any replies will be sent from your personal email address.
For example, if your domain is yourgroovydomain.com, you can create an email address like hello@yourgroovydomain.com. Anyone can send an email to that address, and you will receive it in your personal email inbox like jane.doe@gmail.com. When you reply to an email, the recipient will see it as coming from jane.doe@gmail.com.
Administrators on sites with the Free, Starter, and Explorer plans can add 25 email forwards for each domain. Administrators on sites with the Creator and Entrepreneur plans can add 100 email forwards for each domain.
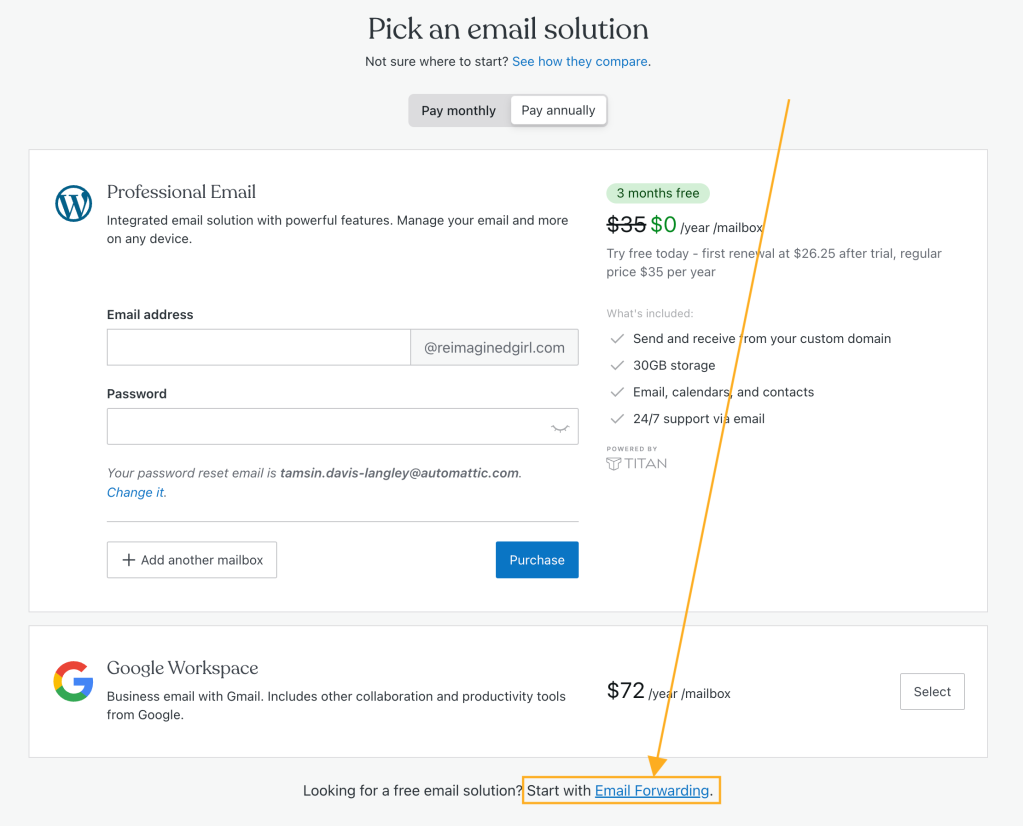
Email forwarding will be unavailable if you have signed up for a fully-hosted email service like Professional Email or Google Workspace. Remove any other email service to access email forwarding.
If you wish to use fully-hosted email solution that will send and receive email using your domain, consider Professional Email or Google Workspace instead. If you already have an email provider, you may be able to set up email forwarding directly through your email provider (setting up email forwarding here would cause your custom email to stop working.)
To set up a new email forward:
- From your site’s dashboard, navigate to Upgrades → Emails (or Hosting → Emails if using WP-Admin) to view email options for your domain.
- If you have already signed up for an email service like Professional Email or Google Workspace, email forwarding will not be available until you remove the other email service.
- If you have multiple domains on your site, you will first need to click the “Add Email” button to the right of the domain to which you wish to add email forwarding.
- At the bottom of the page, click the “Start with Email Forwarding” link.
- Fill out the following fields:
- Emails sent to: the name of your new email address (what appears before the @ symbol.)
- Will be forwarded to this email address: the destination email, typically your personal email address.
- After entering these settings, click the “Add” button:

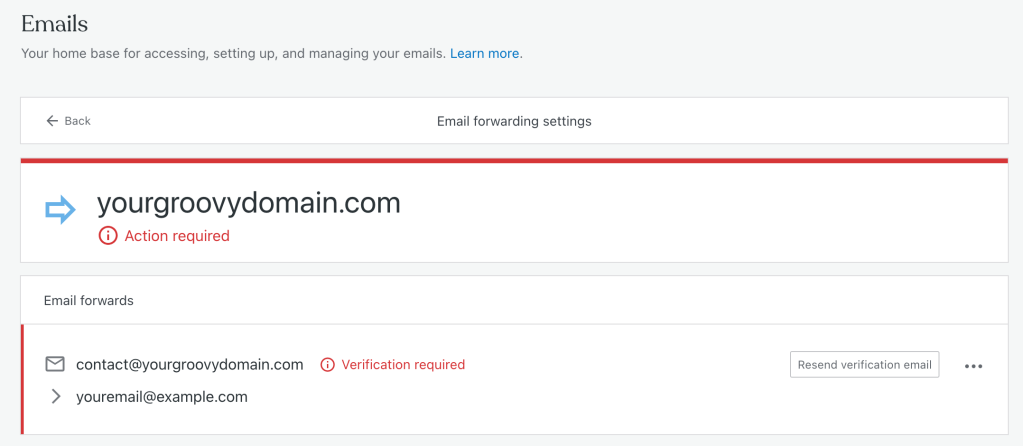
- You will receive an activation email at the destination address you specified. Click the link in the email to complete the email forwarding setup.
If you haven’t clicked the link in the activation email, you will see an “Activation required” warning on the Emails page. You can click the “Resend verification email” button to resend the activation email to your inbox:
Once you’ve set up an email forward, you can test it by sending an email to the forwarding address. This must be done from a different email account than the one you are forwarding to.
If the email forwarding doesn’t work, two common reasons are:
Ensure you don’t have an existing mail host connected. If you have an existing mail provider and are no longer using it, you’ll need to remove the DNS records for that email service from your domain. To remove the existing mail host:
- Go to your Domains page (Upgrades → Domains or Hosting → Domains) and select your domain name.
- Select “DNS records” and click the “Manage” button.
- Remove all of the DNS records related to your email host. This will likely include MX and possibly A and CNAME records.
- See more information about managing your DNS records.
Double-check that your custom domain’s name servers are pointing to WordPress.com. To check this:
- Go to your Domains page (Upgrades → Domains or Hosting → Domains) and select your domain name.
- Select the “Name servers” option.
- Verify that “Use WordPress.com name servers” is switched on.
- See more information about changing your domain’s name servers.
To delete an existing email forward:
- Visit your site’s dashboard.
- Navigate to Upgrades → Emails (or Hosting → Emails if using WP-Admin).
- Click the three dots next to an email forwarding address and then click the “Remove email forward” option.
You can edit an email forward by deleting an existing one and setting up a new one with the updated settings.