WordPress.com has partnered with Google to make integrating Google Workspace (formerly known as G Suite) into your site as easy as possible. This guide will show you how to add Google Workspace to your domain.
In this guide
We offer the Google Workspace Business Starter plan, which includes custom and secure business email, 30 GB of cloud storage, 100-participant video meetings, Google Docs, Calendar, and more.
By purchasing Google Workspace on WordPress.com, we automatically set up your domain so you don’t have to manually configure DNS records. In your site’s dashboard, visit Upgrades → Emails (or Hosting → Emails if using WP-Admin) to view pricing for Google Workspace and other email solutions.
If you already have a Google Workspace account, it is not possible to transfer your billing to be managed by WordPress.com — you can continue your subscription directly with Google. If you already have an account with Google Workspace, use these steps to configure your email.
If you have email forwarding set up with your domain, that will stop working. Email forwarding cannot be used simultaneously with a full email service like Google Workspace. Instead, you can set up forwarding within your Gmail settings.
You can add Google Workspace to any domain that uses WordPress.com name servers (registered and connected domains.) To add Google Workspace to your domain, follow these steps:
- Visit your site’s dashboard.
- Navigate to Upgrades → Emails (or Hosting → Emails if using WP-Admin). At the top of the page, you can choose between a monthly or annual subscription.
- Scroll down to the Google Workspace option and click the “Select” button.
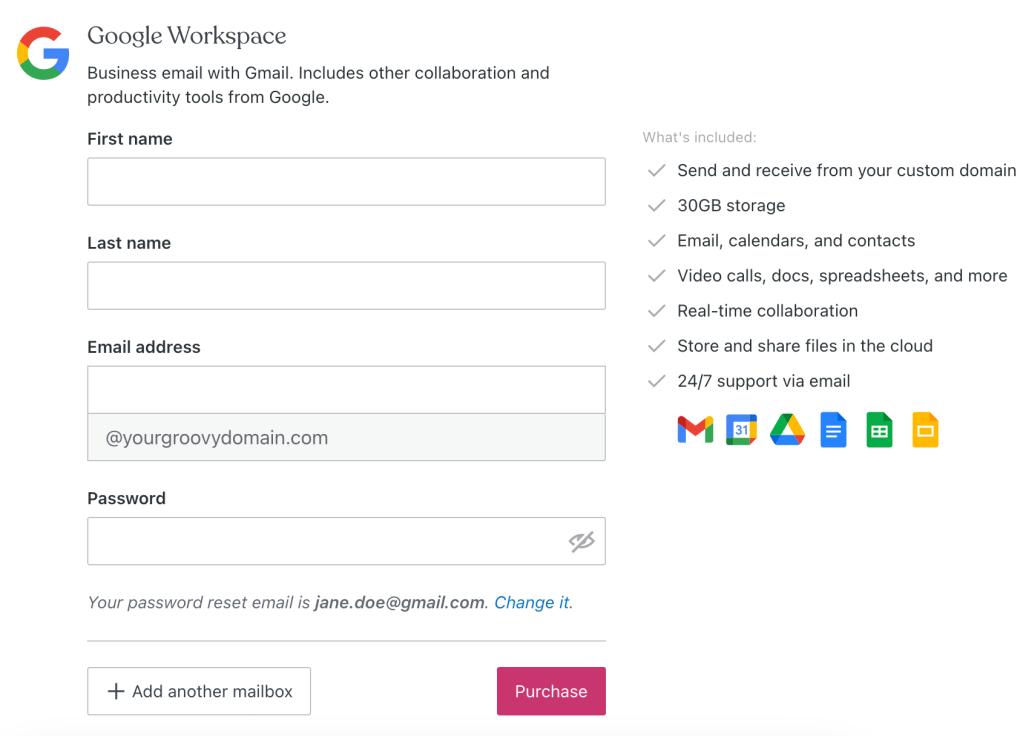
- Enter the following details:
- The name of the account owner.
- The name of the email address you wish to create (the part before the @ symbol.)
- A password for your Google Workspace account (minimum 12 characters.)
- If you want to create multiple email addresses, click the “Add another mailbox” button and fill in the same details for the new account. Note that pricing is per mailbox.
- Click the “Purchase” button and complete the checkout process.
- Go back to Upgrades → Domains where you’ll find a message to finish the Google Workspace setup.
- Alternatively, you’ll receive an email to the email address on file for your WordPress.com account with instructions on how to log in and accept the Google terms of service.
- Click on the “Finish Setup” button. In the next window, select whether you know your Google Workspace password.
- If you need one generated, the next window will provide a temporary password that you can use.
- Select the “Log In to Google Admin” option.
- Accept the Google terms of service and change your password to begin using your new Google Workspace account.
If you don’t already own a domain, you can register a domain and add Google Workspace simultaneously. After selecting the domain you’d like to register, you will be asked if you would like to add email and taken through the same steps listed above.
If you see an error such as “Google Workspace has been removed from your cart, as you have an active subscription for that domain with another provider”, verify whether you – or any other user on your site or associated with your domain – have purchased a Google Workspace account previously. If you’ve had a Google Workspace account in the past or signed up for a free trial, contact Google support directly here. If you are sure you’ve never had a Google Workspace account for this domain before, it’s possible that the previous owner of your domain did (since a domain may have had a different owner in the past.) If this is the case, submit the recovery form here.
You will find most options for your Google Workspace account through the Google Admin Console. To access the Admin console, log in at admin.google.com using your Google Workspace email address and password.
If you are already logged into your Google Workspace account, you can also access the admin console by:
- Clicking the dotted grid to the left of your username in the top right.
- Then, click More.
- Click the Admin icon.
Here, you can control and configure Google Workspace services and features for your account. For help with any aspect of your Google Workspace admin, visit Google Workspace Admin Help.
While most of the settings related to your Google Workspace account are managed from the Google Workspace Admin console, if you want to cancel your Google Workspace subscription or add new users, you can do that on your WordPress.com account as described below:
Your Google Workspace account can have multiple users, each with their own email address and inbox. To add a new user to your Google Workspace account:
- Visit your website dashboard.
- Navigate to Upgrades → Emails (or Hosting → Emails if using WP-Admin).
- Click the “Add new mailboxes” button.
- Fill out the form with your new user’s information and click the “Continue” button.
- You will be taken to your shopping cart to review your purchase. When you are ready, click the “Pay” button to confirm the purchase.
- Shortly afterward, you will receive an email with the new user’s login information. Give this information to the new user so that they can log in and begin using their mailbox.
The cost for additional users will be charged according to the time left until the first Google Workspace account renewal date.
For example, suppose you purchased your first Google Workspace mailbox on January 1, 2020, and paid $72 for the year. If you added a new user on September 1, 2020, the email would be added at a pro-rated price between September 1, 2020, and January 1, 2021, which is 4 months.
So, you will only be charged $72÷12×4= $24 for the new user license. From the next renewal date onward (January 1, 2021, in our example), all the Google Workspace emails will be renewed at the full price to keep the renewal date for each mailbox in sync.
You can rename a Google Workspace user’s address (the part before the @ symbol) and display name by following the steps from Google here.
You can change the primary domain associated with your Google Workspace account (the part after the @ symbol) by following the steps from Google here.
You can cancel your full Google Workspace subscription to delete all mailboxes in the account. If you wish to remove just one or some users but keep your account, see this guide to removing a Google Workspace user in the admin console instead.
To cancel Google Workspace completely, follow these steps:
- Visit your site’s dashboard.
- Navigate to Upgrades → Purchases (or Hosting → Purchases if using WP-Admin).
- Select the Google Workspace subscription.
- Choose the cancel option at the bottom of the screen.
We can issue a refund for your Google Workspace purchase or renewal when you cancel your Google Workspace account within 14 days of the purchase or renewal.
By canceling your entire Google Workspace subscription on WordPress.com (i.e., all licenses), your Google Workspace account will automatically be transferred to Google for a 30-day trial/grace period. You will receive an email from Google with instructions on how to set up billing with Google to continue your subscription uninterrupted. Ignore this if you do not wish to continue using Google Workspace.
If you transfer your Google Workspace account to Google, you will lose the remaining period of your current billing plan with WordPress.com. We are not able to refund you for the remaining period.
If, for any reason, you need to reset your Google Workspace DNS records back to their default settings, here’s how you can accomplish that:
- In your dashboard, go to Upgrades → Domains (or Hosting → Domains if using WP-Admin).
- Click the domain name the Google Workspace email is associated with.
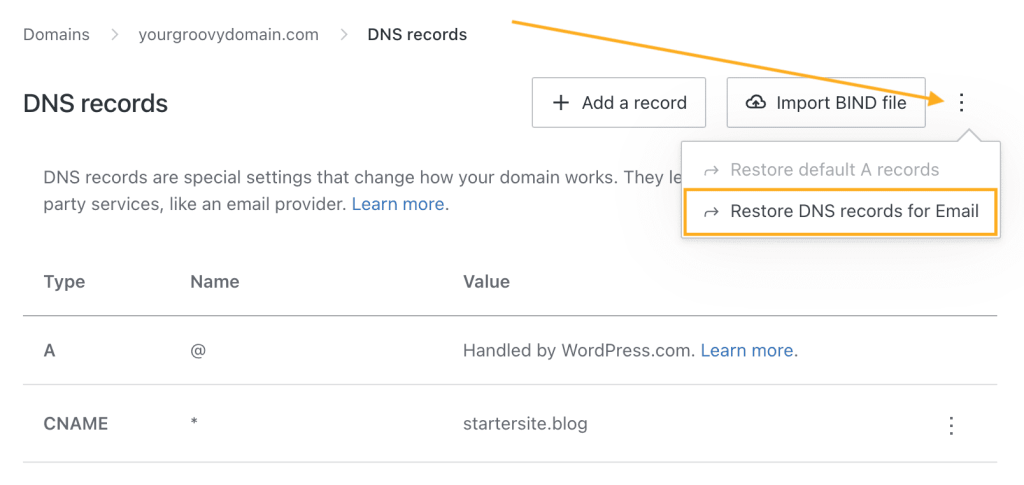
- Click “DNS records” and then click the “Manage” button.
- To the right of the + Add a record button, click the three dots, and choose “Restore DNS Records for Google Workspace.”
If you don’t have the “Restore DNS Records” option:
- Your email records are set up correctly
- Your DNS is not managed through WordPress.com
Contact us if you are not able to use your email.

