If you already have an Office 365 subscription, you can use this guide to set up your Office 365 email services with your WordPress.com-hosted domain. Alternatively, pick one of our email solutions and we’ll set it up automatically.
In this guide
⚠️
If you have purchased Office 365 via a reseller such as GoDaddy, the instructions in this guide may not apply. Please refer to where you purchased Office 365 for help with setting up.
Use the following steps to verify your domain with a custom TXT record. These steps will also automatically add the necessary MX and CNAME records to your domain so your Office 365 email will work with your WordPress.com-hosted domain.
- Log into your Microsoft 365 admin center
- Navigate to Show All → Settings → Domains.
- Copy the TXT record provided. It looks something like
MS=ms12345678.
📌
If you’ve previously verified your domain in Office 365, you may not see the option to verify again. If this is the case, you can add
MS=ms12345678in that verification section.
- In your WordPress.com dashboard, navigate to Upgrades → Domains (or Hosting → Domains if using WP-Admin).
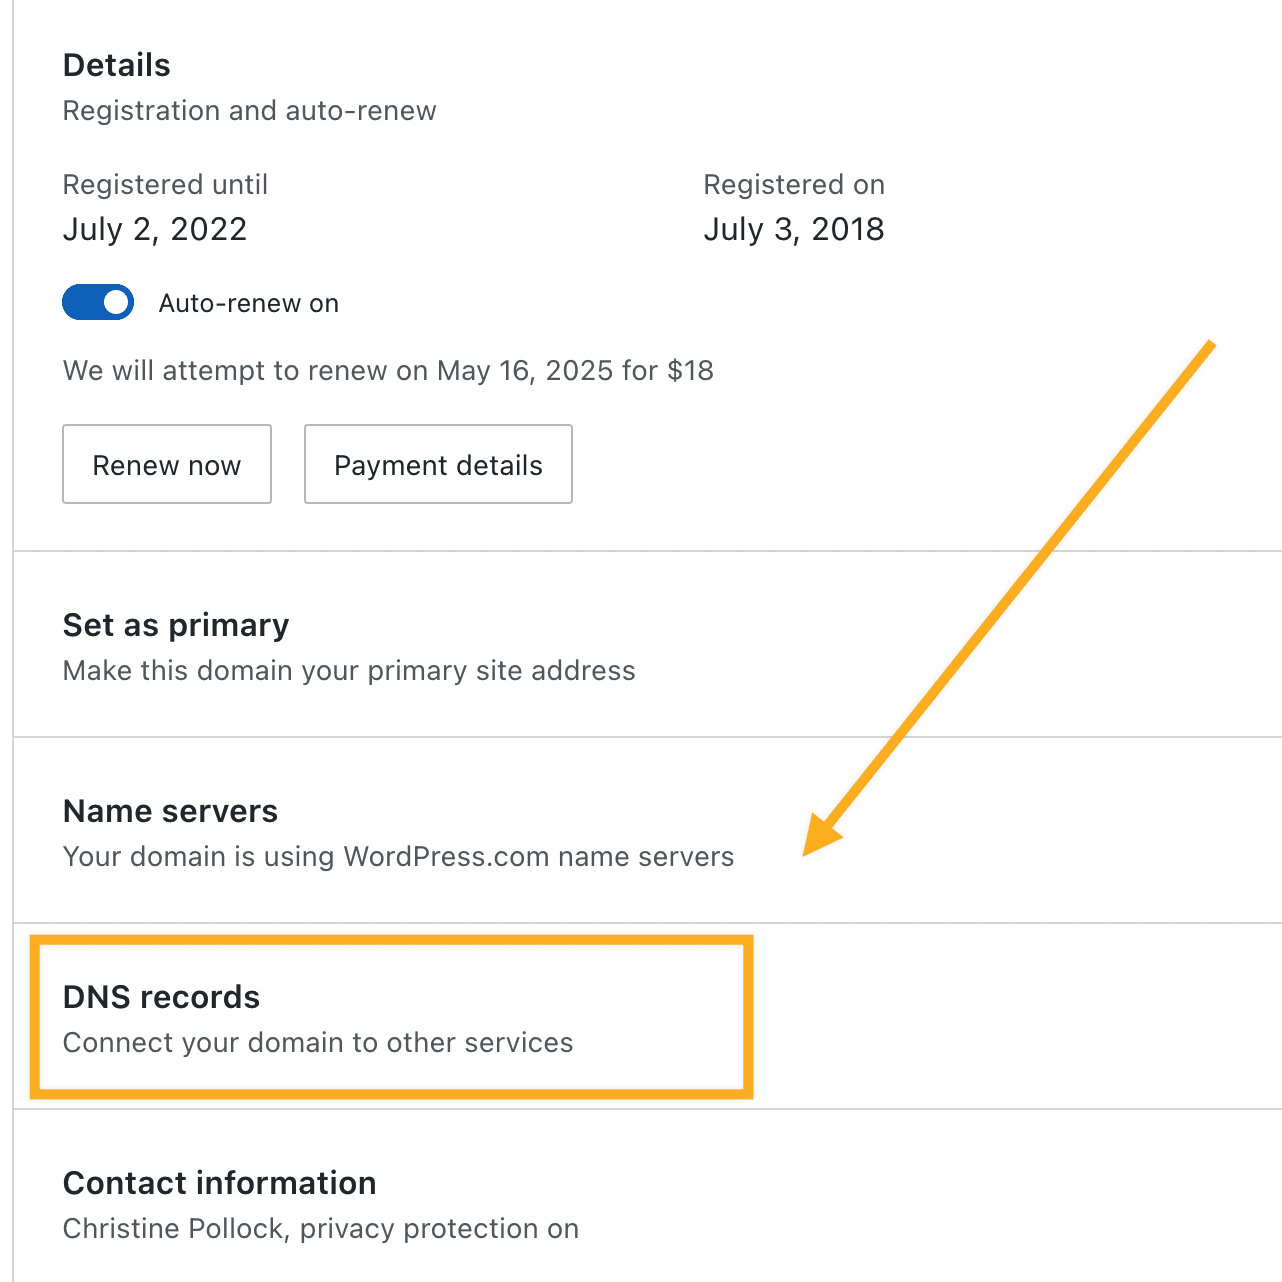
- Here, click on the domain you’d like to use with Office 365.
- Click on “DNS records” and then the “Manage” button.

- On the “DNS records” screen, there will be a TXT record that says
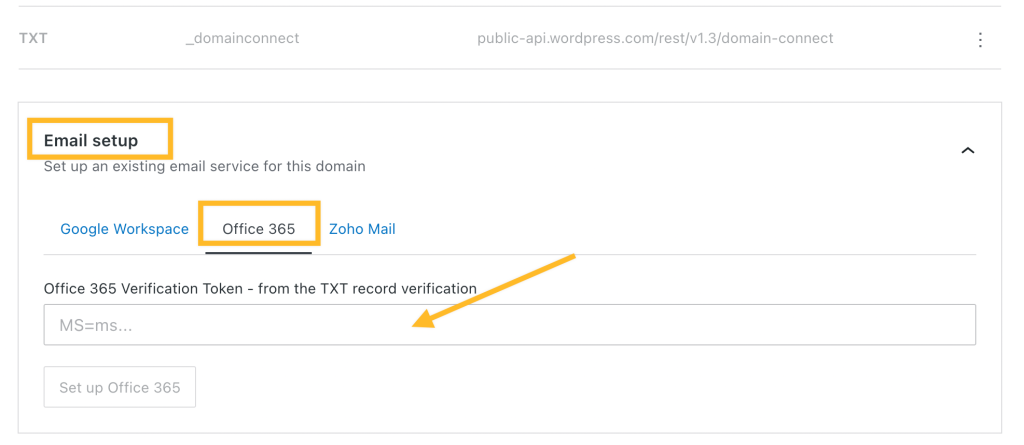
_domainconnect. If the TXT record is grayed out, enable it by clicking the three dots to the right of the record and clicking the “Enable” option:

- Next, click on “Email setup.”
- Here, you’ll find some buttons for setting up different email services. Click on the “Office 365” tab:

- Here, add the TXT value you copied earlier.
- Click the “Set up Office 365” button:

A green verification message will appear at the top of the screen to confirm the records were created. You’ll also notice several new DNS records added to your domain automatically. These records allow you to send and receive emails via Microsoft Office 365 with your domain.
Back in the Office 365 Admin screen, you may find a button that says “Verify“. When you click this button, Office 365 will check your domain to see if it has been verified. It can take a little while before Office 365 can find the record to verify your domain, so don’t worry if it doesn’t find it right away. You can try again in 15-30 minutes when the record has had time to update.
Need alternative domain verification methods? Check out Microsoft’s guide on domain verification.
Once Office 365 verifies your TXT record, you will want to test sending and receiving from your email. Log into your Outlook account in Office 365 and send an email to an external email address. Then, use a non-Office 365 email to email your Outlook email address.
And that’s it! You should now be able to send and receive emails through Office 365 using your custom domain name here at WordPress.com.
