
You have an idea, and you know you need a website to get it off the ground. You’re excited to make it happen but also worried because you aren’t sure how or where to start. We’ve all been there at some point, so we’ve created a website launch checklist to help you go from idea to site launch without a hitch. Once you’ve completed this checklist, you’ll have a site that’s ready to share with the world.
This might look like a lot of information and things to do. Fortunately, all of these items are easy to complete, even if you’re not technical, so let’s get started.
Note: A few of the items may differ slightly if you aren’t hosting your website with WordPress.com, but the general idea will be the same.
In this article:
- 1. Choose a plan
- 2. Choose a domain
- 3. Choose a design
- 4. Add essential pages
- 5. Check your header
- 6. Check your footer
- 7. Optimize your navigation menu(s)
- 8. Include your social media links
- 9. Test your forms
- 10. Test responsiveness
- 11. Look for broken links and broken images
- 12. Test your site’s speed
- 13. Check your site’s security
- 14. Enable Google Analytics
- 15. Optionally install Google Search Console
- 16. Proofread all your copy
- 17. Ensure all authors have a user account
- 18. Check the Gravatar profile for each author
- 19. Ensure you have a backup solution in place
- 20. Optimize page titles and meta descriptions
- 21. Check your URL structure and make sure it’s well-optimized for SEO
- 22. Organize your blog’s categories
- 23. Submit your XML sitemap URL to Google Search Console
- Ready to launch!
- Get your own copy of our Website Launch Checklist

1. Choose a plan
You’ll need to sign up for an account with WordPress.com if you haven’t already. To do that, choose the WordPress.com plan that best fits your needs. Since we don’t know what your specific needs are, we’ll just start with an example. Let’s say you’ve decided to earn a little extra money as a mural artist. You’ve painted wall murals for yourself, for friends, and for family. Everyone agrees you have what it takes to offer your services. And if your side hustle works well, who knows, maybe it can even become your full-time gig in the future.
Since you’ll need to collect payments, you’ll want one of the paid plans. And since you might want to show off your work with videos, Premium or above would be a great choice. If you’d like to also use third-party themes, a Business plan is ideal.

2. Choose a domain
Next, type in some descriptive words that you’d like to base your domain name on.

For our example, we chose Milly’s Murals. WordPress.com will suggest some matching domain names that are available. All professional domain names are free for the first year, or you can choose to use a free WordPress.com subdomain instead.

3. Choose a design
Now, you’re ready to choose a design. Don’t worry; no matter which theme you choose, you can always select a different one later.

And just like that, you’re ready to start adding content to your site. Let’s add some pages!
4. Add essential pages
Although every website is unique, there are a few common pages across most of them. Visitors generally expect to see these 5 pages:
- Homepage
- About page
- Contact page
- Product/service pages
- Blog (optional)
It makes sense to start by updating the default Homepage that WordPress.com provided for you. So let’s begin there.

Replace text and images with ones that make sense for you.
Next, add more pages. WordPress.com makes this easy by suggesting page templates that you can add with just one click, and then edit and customize to make it totally yours. Of course, you don’t have to choose one of the sample templates. You can also start with a blank page if you prefer.

Once you’ve added your pages and tweaked them to your liking, it’s time to focus on the supporting elements of your website.
5. Check your header
Make sure your header contains everything a visitor needs to immediately see.
- A logo is the most important element of your header. It should be visible on every page and in all sections, like the navigation menu, footer, and sidebar. If you need a logo created, our logo maker can help.
- Your website name, if not displayed in the logo, is a vital branding element of your site.
- A tagline helps visitors quickly identify what your site is about.
- You might also want to include contact information, such as your phone number and email address.
- Having social media links in your header helps encourage visitors to follow you on different platforms so they can stay up-to-date with new posts from your blog or news about events hosted by your business. We’ll discuss social media links later.
- Including the navigation menu in your header is vital. We’ll discuss this in more detail soon.
There are several possible ways to edit your header, including:
- The Customizer on Classic Themes
- Plugins
- The Site Editor on Block Themes
A comprehensive tutorial on how to edit the header on your WordPress website can be found here.
And find even more tips for designing an effective WordPress website header here.
6. Check your footer
Visitors are used to finding specific information and links in site footers. Don’t disappoint them. You’ll want to include links to your privacy policy and terms of service. If you have any other links that are important for visitors to be able to find, such as social media profiles or an about page, you should also add those in the footer. You’ll find plenty of footer styles across the web, but WordPress.com’s is a good example.

Learn how to customize your WordPress footer.
7. Optimize your navigation menu(s)
Of course, your navigation menu(s) should be front and center in your pre-launch planning. Proper navigation is vitally important for the user experience, so spend some time with this.
Your navigation menu should be visible on all pages, and it should be structured logically. The menu should also be easy to use and consistent throughout your site.
To ensure that your navigational options are as simple and clear as possible, you’ll want to ensure that they’re in the same place on every page of your website. This ensures visitors won’t get confused or frustrated if they don’t see them there.
The items themselves should be easy for visitors to understand as well. Name each link after its purpose so that there’s no confusion about where it leads when someone clicks it.
Get more tips on how to add helpful, well-designed navigation menus here.
8. Include your social media links
Social media links are an important part of your website. A visitor should be able to easily find and connect with you on the platforms where they spend most of their time. Common platforms include:
If you maintain a presence on these or other social media platforms, include a link to your profile here.
It’s also important to have a website link in the bio of your social media accounts so that people can easily find you if they want more information about you or your business.
WordPress.com’s Social Icons Block makes this really easy to do. Here’s a quick tutorial to add this to your site.


Once you’ve selected the platforms, add your profile link to each icon.
9. Test your forms
Most people have at least one form on their site, usually a contact form. Fill it out with test data and check the following:
- It works as designed with no errors
- You haven’t forgotten to ask for important information such as name, email address, etc.
- Form details are successfully delivered to the proper email address(es).
- All data entered is included in the email received

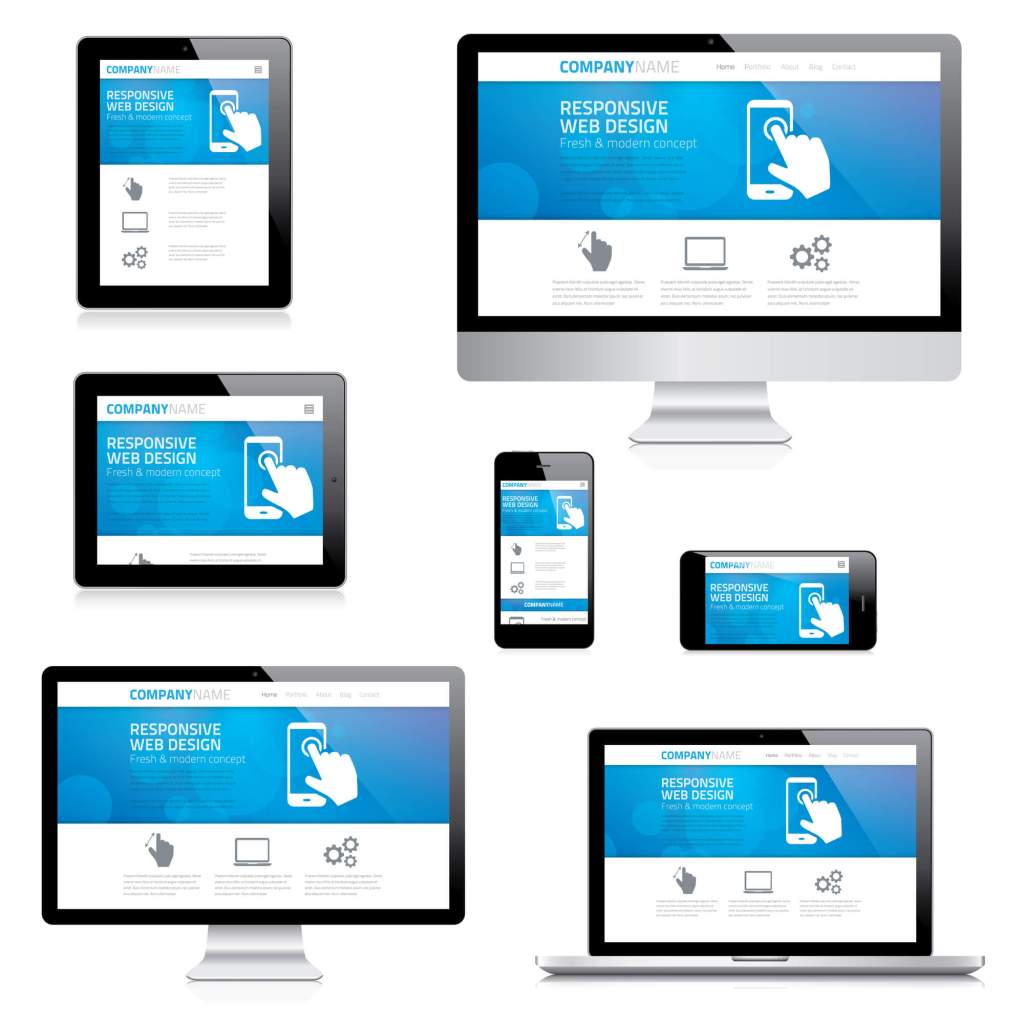
10. Test responsiveness
Visit your site’s pages on various devices, including desktops, tablets, and mobile devices. Your site should respond and adjust its layout based on the screen being used.
Don’t forget to test on as many different browsers as possible, as well. This includes Firefox, Google Chrome, and Safari for Mac users.
Click here for more information on creating mobile responsive websites.
11. Look for broken links and broken images
Visit your site from a browser that has never been used to view the site, so you can be sure your browser isn’t loading any images from its cache. If your browser is showing you an image from its cache, but the image no longer exists on the web page, you won’t know it’s missing. However, users visiting the page for the first time or from a new browser will not see an image. Instead, they will probably see a broken image that often looks something like this:

Broken images are those with missing file names or references to their location on the website (e.g., paths), which can result in an error message when they’re requested by a browser, causing major problems such as:
- Browsers trying to load nonexistent files from your hard drive consume system resources and cause pages to load more slowly. This may lead to poor performance on mobile devices or lower performance overall due to increased CPU usage by each request made by your browser
- Content appearing where it shouldn’t be because of missing image files
Next, click on all the links on your pages to ensure they don’t lead to a 404 Not Found page. Correct any bad link URLs you find.
12. Test your site’s speed
No one likes a slow website! Not sure how fast your site loads? Test it at GTMetrix or other speed testing sites. Each site uses different methods to test, so choose one and stick with it. Otherwise, you’ll be comparing apples to oranges.
Luckily, WordPress.com is already optimized to serve blazing-fast sites, by default. But if you want to tweak performance even more, just follow our guide to improving site speed in just one afternoon. You’ll make visitors happy, and search engines will also look more favorably upon your site.
13. Check your site’s security
Ensure you are using strong login passwords, unique usernames, and other best practices to secure your site, such as two-factor authentication.
WordPress.com is a managed hosting service that takes the security of your site seriously. Many aspects are handled by WordPress.com, so you don’t have to worry. Learn how WordPress.com protects sites from common security issues.
If you aren’t a WordPress.com user, you can always check the health of your site by using the Site Health tool, located under Tools in your admin. Follow any recommendations the tool suggests to solve potential security issues.

14. Enable Google Analytics
From the moment you launch your site, you’ll want to know details like:
- How many people are visiting my site?
- Which pages are they viewing the most?
- How did they find the site?
- Are they taking the actions I’d like them to take?
WordPress.com provides graphs, charts, and data on how many visits your site gets, which posts and pages are the most popular, and more. If you want more detail to enhance the built-in stats, it’s easy to add Google Analytics to any eligible plan. Just go to Tools > Marketing > Traffic to turn on Google Analytics. If you aren’t a WordPress.com user, you should install a plugin to make the connection.

Check out all the details on how to add Google Analytics to your site.
15. Optionally install Google Search Console
Google Search Console adds additional data beyond what Google Analytics provides. For example, GSC allows you to:
- Monitor which search terms bring traffic to your pages
- Troubleshoot problems when your pages lose rankings or aren’t being indexed
- Receive messages from Google about your site’s search performance
- Verify your website
- Add a sitemap to your site

Learn more about the advantages of Google Search Console here.
16. Proofread all your copy
Typos are embarrassing enough, but some can be costly. In 2019, Amazon made a typo in the price of some high-end camera gear, selling $13,000 equipment for only $100. Even if your typo is only a simple misspelling, your reputation can take a hit.
Now it’s time to make sure that your text is written correctly.
- Read aloud: This can be one of the most effective ways to find errors in your work! When you read out loud, you are more likely to notice things that sound awkward or just plain wrong than if you were simply reading silently over what you had already written.
- Have someone else proofread: If possible, ask a friend or family member who knows English well enough to give you some constructive criticism about how clear your message was. Even if they aren’t native English speakers themselves, they may still have helpful suggestions.
- Use a spellchecker and/or grammar checker: If there are specific words or phrases that might cause confusion without being fully understood by everyone who reads them (for example “then” vs “than”), then using these types of tools will help catch these errors before publishing. Grammarly and Hemingway are two popular free or freemium tools to help you check your website copy.
17. Ensure all authors have a user account
Do you have multiple authors writing posts on your site? If so, you’ll build authority and increase trust if each author has their own user profile. Sure, you can just type By: Jane Doe at the top of the article, but a real user profile garners more trust. Plus, visitors can click the profile name to view all content written on your site by that author. A text byline won’t provide that for you. Just go to Users > Add New to add a user for each author on your site.

WordPress uses roles to determine what each type of user can do. These roles include Administrators, Editors, Authors, Contributors and Subscribers. See our guide to managing WordPress users and roles to help you determine which role you should assign to each user.
18. Check the Gravatar profile for each author
Ask your authors to completely fill out their Gravatar profiles. Every user profile can display a user’s image avatar from Gravatar.
What is Gravatar?
An “avatar” is an image that represents you online—a little picture that appears next to your name when you interact with websites.
A Gravatar is a Globally Recognized Avatar. You upload an image and create your public profile just once, and then when you participate in any Gravatar-enabled site, your Gravatar image and public profile will automatically follow you there.
https://en.gravatar.com/support/what-is-gravatar/
Did you know that WordPress can not only import an author’s Gravatar image into an author bio card, but other Gravatar profile information as well? Not all themes or author plugins make use of the additional Gravatar fields, but when they do, it is handy to have your authors fill in that information. For example, if you check my author profile at the bottom of this article, you’ll see my photo, my name, and a one-sentence description / bio about me. It looks like this:
The image and the descriptive sentence is dynamically pulled directly from my Gravatar profile. Every article a user writes on your site will use the same information. This consistency lends credibility to the authors on your website.
19. Ensure you have a backup solution in place
Backups are extremely important. When something goes wrong, such as a site that has lost all its data, you can restore the site back to the last good version from a recent backup. Backups should be automatically scheduled to ensure no one forgets to create them.
WordPress.com users can rest easy knowing that their site is regularly backed up, thanks to the built-in Jetpack integration. Everyone else should consider using Jetpack Backup or any of the other available backup plugins.
20. Optimize page titles and meta descriptions
Search results such as Google usually include a page title and description. The title links to the web page containing the information related to this result, and the description gives a little more information about the page’s content. Both can encourage searchers to choose that particular result to click on.

Your title tag is the first thing that searchers see in search results, so it’s important to make it as relevant as possible. The best way to do this is to make sure your titles are between 60 and 70 characters long, have your target keyword in there somewhere (if appropriate), and don’t include any extra words or phrases that aren’t necessary. This will help keep them readable while still making sure they get noticed by Google or Bing.
The page title listed in the search results is usually the same as the web page’s title tag (aka meta title) and is one of the most important on-page SEO factors.
You may have heard the term “meta description” before, but what exactly is it? A meta description is the short text that shows up in your search listing. And while the meta description has no direct SEO value, it is equally useful as the title tag for compelling users to click through from the search results to your web page. Meta descriptions should be between 150 and 160 characters long and written in a way that makes them clear and easy to understand at first glance, yet enticing enough for readers to click through to your website.
WordPress, by default, uses your page or post title as the title tag, but you may not always want that to be the case. Although WordPress doesn’t include a way to directly change the title tag or the meta description of your pages and posts, there are numerous plugins that will help you accomplish this task. SEO plugins, in particular, such as Yoast SEO, Rank Math, and others, make it easy to change any page or post’s title tag and meta description. We cover the details on how to use Yoast to add, edit, and optimize title tags here and why it’s important to check this critical factor.
21. Check your URL structure and make sure it’s well-optimized for SEO
WordPress assigns a permanent, unique URL for every page and post on your site. These are called Permalinks, and you have some control over their structure. Search engines may use the words they find in URLs as hints to help them determine the topic and content on the page. While WordPress defaults to a permalink structure of example.com/?p=123, it is advisable to choose a more SEO and user-friendly structure.
For example, would a user more easily remember and understand the topic of example.com/?p=83727 or example.com/contact-us? Search engines would understand the topic of the page better with the latter as well.
Simply go to Settings > Permalinks to choose a different URL structure. Post name is a popular choice, but others may be more suitable for different use cases.

It is advisable to do this only once and to make this decision before you launch your site. While you can change it later, doing so could result in a lot of broken links across the web that use the old links.
Learn more and get tips to set up your Permalink structure here.
22. Organize your blog’s categories
If your site has a blog, double-check your categories. It’s best to plan your category structure in advance, use a consistent naming structure, and organize your content into the categories appropriate for your audience’s needs. Organizing your content into categories helps users discover similar posts, navigate more easily, and narrow their searches.

Learn more about choosing your categories here.
23. Submit your XML sitemap URL to Google Search Console
XML sitemaps are specially-formatted files that list each post and page that you want indexed by search engines like Google. This enables search engines to quickly find, analyze, and rank your site’s pages and posts when users are looking for information.
To use this feature, you’ll need to first generate a sitemap and then submit it to Google Search Console. Although you could create the sitemap manually, it is far easier and more accurate to let a tool create it dynamically.
WordPress.com and Jetpack users can navigate to Tools > Marketing > Traffic to turn on Jetpack’s sitemap generator, which will create a sitemap with the URL in the form of yourdomain/sitemap.xml. Then, just supply your sitemap URL to Google Search Console. That’s all you need to do to provide this information to Google.
If you aren’t a WordPress.com or Jetpack user, your best option is to install an SEO plugin that generates a sitemap for you. Then submit the URL that plugin supplies to Google Search Console.

Ready to Launch!
It’s the moment you’ve been waiting for: you’re ready to launch your WordPress site.
Lean on the experts who’ve launched a thousand sites. We’ve broken it all down into easy-to-follow steps.
With this checklist, you can take your idea from a mere thought to a fully launched website in relatively little time.
Get the Checklist
We’ve included three ways to get your own copy of our checklist:
- A downloadable checklist (PDF)
- An interactive Google Doc checklist
- A version you can just copy and paste
So take your pick and then…
Get that idea out of your head and onto the web today!
1. Download the Website Launch Checklist (PDF)
2. Get your own copy of our Website Launch Checklist (Google Doc)
3. Copy and paste the checklist below
□ Choose a plan
□ Choose a domain
□ Choose a design
□ Add essential pages
□ Check your header
□ Check your footer
□ Optimize your navigation menu(s)
□ Include your social media links
□ Test your forms
□ Test responsiveness
□ Look for broken links and broken images
□ Test your site’s speed
□ Check your site’s security
□ Enable Google Analytics
□ Optionally install Google Search Console
□ Proofread all your copy
□ Ensure all authors have a user account
□ Check the Gravatar profile for each author
□ Ensure you have a backup solution in place
□ Optimize page titles and meta descriptions
□ Check your URL structure and make sure it’s well-optimized for SEO
□ Organize your blog’s categories
□ Submit your XML sitemap URL to Google Search Console
□ Launch!
Want more tips? Get new post notifications emailed to you.

