
You pull up a blank document, ready to write a blog post, but the white emptiness stares back. How do you begin?
We’ve all been there, staring into that vast white space, wondering where to start. I’ve felt that subtle anxiety too. Yet, with the right approach, that daunting task can turn into a delightful journey. With an established process, writing becomes less about filling the space and more about connecting deeply with your readers.
Dive into the steps in this post and uncover the secrets to crafting a blog post that truly engages and resonates with your audience.
Table of Contents
- How long does it take to write a great blog post?
- Step 1: Identify your topic
- Step 2: Do your research
- Step 3: Choose the type of blog post you’ll write
- Step 4: Create an outline
- Step 5: Write your post
- Step 6: Pen a headline
- Step 7: Edit and proofread your content
- Step 8: Add your meta data
- Step 9: Publish your post
- It’s all about practice
How long does it take to write a great blog post?
As you get into writing blog posts, you might wonder how long you should take to write a good one. Are you taking too long? Should you spend more time?
Orbit Media Studios found that bloggers take an average of four hours and one minute to complete a blog post in their 2022 survey. For reference, these folks wrote an average of 1,416 words per blog post.

But think of this number as an estimate. It takes everyone a different amount of time to write a blog post based on factors like:
- Personal writing speed: All bloggers write at a different pace, and they’re all valid.
- Subject matter knowledge: It’s faster to write about a subject you know over one you don’t.
- Topic complexity: Most people will need more time to write about piezoelectric ceramics than how to blow a bubble with gum.
- Research requirements: It’ll take longer to put together a blog post that weaves together original interviews than one with a few online sources.
Plus, Orbit Media Studios discovered that bloggers who spend more time on their blog posts get more success. Thirty-three percent of respondents who spent six or more hours per blog post reported “strong results.” Compare that number to the 22% benchmark.
Step 1: Identify your topic
You’ll see that the first steps to writing a blog post involve careful preparation. Start by choosing a topic to write about.
Get as specific as possible when you pick your subject. Specificity lets you differentiate your content from blog posts on similar topics and helps you cover an idea in-depth. Let’s say you want to write about how to cook a steak — you could narrow that down to how to cook a T-bone steak on a grill.
After you decide on a topic, establish the angle you want to take. Going back to our example of how to cook a T-bone steak on a grill, you could come from a scientific angle. For your blog post, you could consult a scientist on why certain techniques make a better steak.
Step 2: Do your research
Now that you know what you want to write about, you can research your topic. Blog post research falls into three categories:
Original research
Original research comes from data you generate yourself by consulting other people. Not every blog post needs to have original research to have high-quality content, but it can contribute to truly unique writing.
Try these tactics to get one-of-a-kind sources for your post:
- Surveys: Use a free tool like SurveyMonkey or Google Forms to ask people questions on a large scale. Find people who know about your topic at your organization, subscribed to your mailing list on the subject, or in an online community.
- Polls: Polls work well for asking a broad audience a single question. Many social media and communication apps have built-in poll features, such as Twitter and Slack.
- Interviews: Ask experts on your subject for an interview over email, on a video call, or in person. Reach out to your colleagues and network to see if they know anyone. You can also use a service like Help a Reporter Out to get expert quotes.

Topical research
Topical research is the research you conduct around the internet. Use your preferred search engine to find online sources with these traits:
- Authoritative: The author or website should have plenty of experience or credentials on the topic. When applicable, they should use solid research to back up their claims.
- Recent: Aim for resources written three or fewer years ago when possible.
- Helpful: When your reader clicks through to your source, they should get value out of it and understand how it connects to your article.
Competitive research
This type of research often flies under the radar for newer blog post writers. Competitive research involves evaluating other articles on your subject. By understanding the other content out there on your topic, you can find ways to improve upon it.
Don’t just look for what ideas the other blog posts include. Instead, think about what they’re missing. Maybe they don’t cover a point you feel is important, or you could format your content more clearly than them.
Step 3: Choose the type of blog post you’ll write
With knowledge of your topic on hand, it’s time to decide how you’ll present it. Some popular blog post genres include:
List
List blog posts organize information into a list with headings naming each item. They often come in the form of numbered lists with a title featuring the number of items, such as “5 Ways to Fold a Towel.”
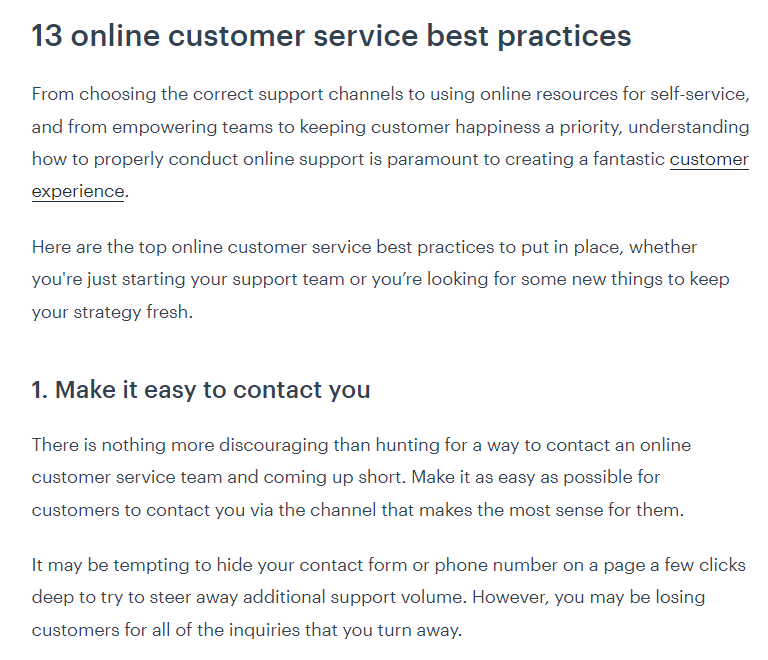
When you write a list blog post, you don’t have to make your list the only content. HelpScout’s 13 Best Practices for Improving Online Customer Service introduces online customer service, then digs into its items.
Checklist
A checklist blog post provides a checklist for readers to follow to perform a task.
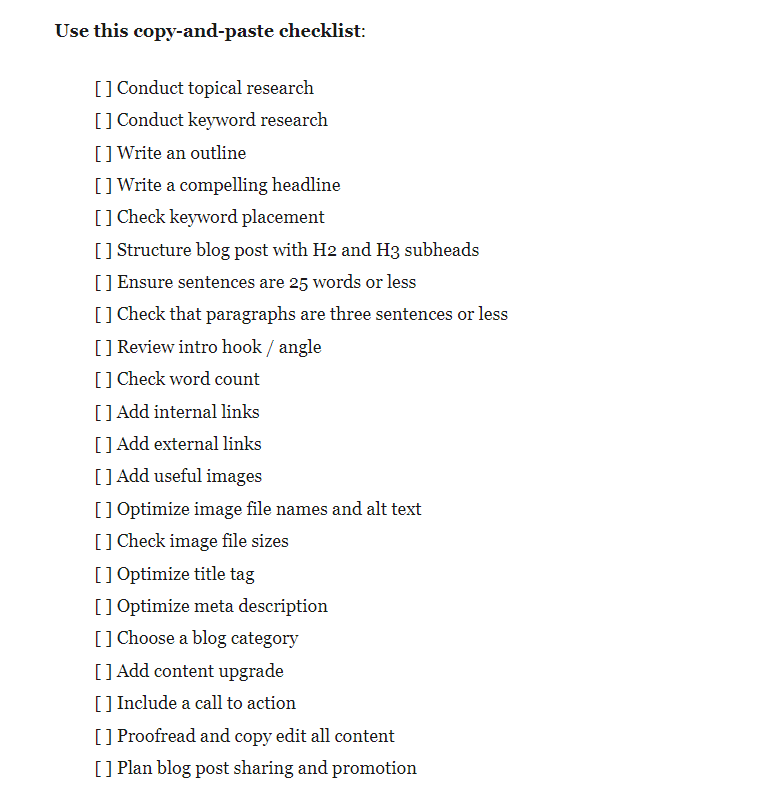
These posts often provide a simplified checklist to follow and then provide more details for each item, like our blog post checklist.
How-to guide
A how-to guide walks the reader through the steps it takes to perform an action.

These blog posts rely heavily on lists and images to help readers understand each part of the process. Melly Sews’s how-to guide to sewing a flat-felled seam uses both.
Interview
An interview blog post showcases an interview the author has with someone who has insights to share about the article topic.

You can go about one of these blog posts in two ways. Either list out your questions and answers in a Q&A format or use your interview answers to tell a story. Notion did the latter in Three-time YC founder and first-time mom finds flow in Notion.
Feature article
A feature article brings together original research and interviews to explore a subject. Since features often involve interviews, they can overlap with interview blog posts.

Some blogs take a feature-first approach to posting, such as Microsoft’s Unlocked blog. One example of one of their features is Can an alphabet save a culture?
Essay
In the context of blog posts, an essay presents the author’s argument or opinion. The writer uses research and evidence to back up their points.

Media Strategies Aren’t as Crazy as They Seem from the Animalz blog features real-life examples that back up a unique perspective.
News post
News posts share news from your community or company.

On business blogs, a lot of news posts relate to company and product updates, like SparkToro Now Has 50% More Podcasts from SparkToro.
Case study
A case study tells a success story about a product or service. It generally focuses on one event or customer.

This type of blog post requires original interviews with the customer involved so you can get their perspective on your work. With some products, you can share the results of how you helped the customer. Take Buffer, a social media scheduling tool, sharing posts from its customer in this case study as an example.
Product review or comparison
Product reviews and comparisons evaluate the usefulness of products for the reader. Reviews focus on a single product, while comparisons compare the features of multiple products.

Some of these product posts come in the form of a list ranking the best products in a category, like Zapier’s email newsletter software roundup.
Link/article roundup
Link and article roundups bring together links to online resources or articles on a specific subject.

Some of these roundups are more purchase-focused, such as Good On You’s roundup of eco-friendly fashion deals.
Expert roundup
Expert roundup blog posts present opinions on a topic from multiple subject matter experts.

This format can overlap with other formats, like in Databox’s blog posts that synthesize expert opinions into lists. The Heroes of Business Transparency is one example.
Step 4: Create an outline
Many people skip or rush through this step even though it’s just as important as the actual writing. A detailed blog post outline gives your article structure and lets you evaluate your overall argument before you write out the full post.
It also helps combat writer’s block. At the outline stage, you only have to get a basic idea down, taking off the pressure of writing a complete idea. Then, when you get to the writing stage, you’ll have your outline to reference when you don’t know what sentence to write next.
Follow these steps to write an outline:
- List each section and subsection of your blog post. Each section could cover a list item, a point in your argument, a step in a process, etc.
- Add up to three main points per section. Here’s where you’ll start forming the ideas you’ll cover. As you practice making outlines, you might find it helpful to get even more detailed at this stage.
- Include any links and examples you want to include for your points. Place your sources where you plan to reference them so you can add them easily in the writing stage.
Here’s a hypothetical outline for a blog post by my cat on why I should feed her a second dinner:

You can go more in-depth with your points in your outline, but here’s how the formatting should look.
I recommend writing your outline in a separate document and copying any headers and links over to your draft document. It can be tempting to write your outline and fill out your draft from there, but your document will get disorganized quickly with this approach.
Step 5: Write your post
Onto the writing itself!
Make sure to follow web writing best practices when you write your content.
People read 25% slower onscreen, and they skim rather than read. Web text should be short, scannable, and structured as linked, topical pages.
Nielsen Norman Group
Shortening or “chunking” your content helps readers skim, so try to keep your sentences to 25 words or fewer and paragraphs to three sentences or fewer. Make sure to follow the style guide for your blog if you have one as well.
A blog post consists of three main sections that require different approaches:
Introduction
Integrate your blog post’s angle and an emotional hook into your introduction. This technique establishes what makes your post unique from the start and draws in the reader.

For example, in this blog post, I’m trying to provide a comprehensive process so you never feel lost when writing. I explained that angle in the second paragraph of my intro.
As for the emotional hook, try putting yourself in the reader’s shoes or telling a story. I used the example of staring at a blank page wondering what to do next because I’ve been there and know others have, too.
You could also use the Animalz technique of using an unexpected hook and referencing it throughout your blog post. This method takes practice and careful thought, but that hard work really pays off.
Whichever hook you use, keep your introduction concise — about three paragraphs or fewer. An intro that goes on too long can lose the reader’s interest.
A quick side note: You don’t have to write your introduction first if it comes easier to you after you write the rest of your post. Mark it for later and revisit it when you have more context to work with.
Body content
Your body content consists of all the words between the introduction and conclusion.
As you write this part of your post, try to cover all the information important for your reader to know. If you have a word limit to stay within, consider linking out to resources on complicated sub-topics.
Speaking of linking, include links to other posts on your blog and trusted sources throughout your body content. Search engines prioritize websites that link relevant pages to each other. Plus, it works as a way to cite your sources when you use outside information.
Just make sure that any site you link to is relevant to your post. Adding links for linking’s sake will make it harder to establish authority and search engine performance.
Lastly, make sure your writing is crisp, clear, and concise by keeping paragraphs three sentences or less, and each sentence 25 words or less.
Here’s an example of a well-structured post’s body content.

Conclusion
Time for the grand finale. You have multiple ways to go about writing a conclusion, such as:
- A summary: Summarize the key points you covered in your post.
- A takeaway: Provide a takeaway from the ideas you presented in your post. You could go back to the angle you established at the beginning, for example.
- A redirection: Connect your blog post to another post on your blog and direct your reader there for further reading.
- A bonus tip: Offer one final tip for the reader to use as they apply the knowledge in your post.
When it feels appropriate, you can also add a call to action to subscribe to your newsletter, try your product, or perform another transactional action. Connect your call to action back to the rest of your conclusion so it doesn’t feel pigeonholed.
Step 6: Pen a headline
After you finish writing your first draft, give it a headline. You can write the headline before your post if you like — there’s no hard and fast rule. For this blog post, we’re writing the headline after the content so you have your draft on hand to inspire your headline.
Follow these steps to craft a top-notch headline for your article:
- If you write blog posts with search engine optimization (SEO) in mind, grab the top keyword for your article. This keyword should have a direct relation to your subject.
- Write down 25 versions of your headline to give yourself plenty of choices to consider. Make sure your keyword feels like a natural part of each headline if you include it.
- Narrow those 25 options to your five favorites.
- Choose a “winner” from your five finalists.
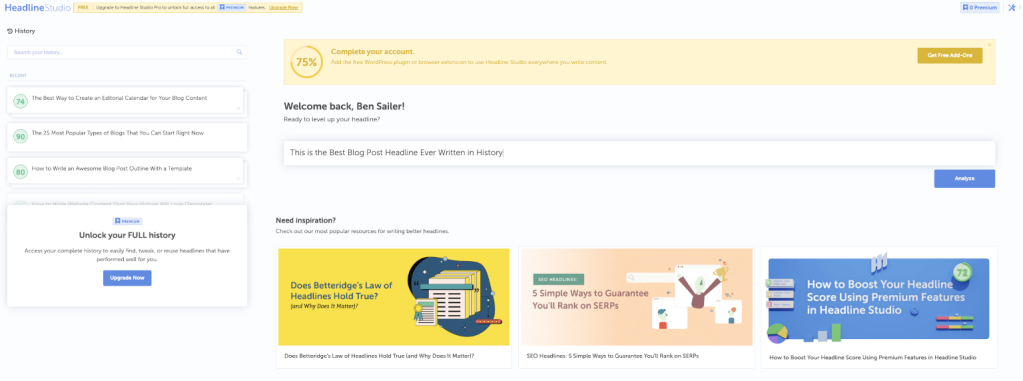
CoSchedule’s Headline Analyzer Studio can help you identify what headlines will hook readers and work for SEO. It has a Google Chrome extension and WordPress plugin. If you don’t have a plan that supports plugins, the extension provides a prompt alongside your WordPress headline.
Step 7: Edit and proofread your content
Every blog post needs editing to shine, no matter how talented the writer is. Give your content plenty of this TLC to create quality results.
Start with a basic spelling and grammar check using your word processor’s tools. Then, you can use a tool like Grammarly or Hemingway for more in-depth fixes. While Grammarly performs an advanced spelling and grammar scan, Hemingway checks sentence structure, like so:

After you perform these checks, you should still read through your writing manually. Your human eyes will catch mistakes the computer misses. Plus, your editing should focus as much on the quality of your ideas as it does on your spelling and grammar.
We provided some tips to make the manual editing and proofreading process easier in an earlier WordPress blog post. I also suggest asking yourself these questions as you go through your content:
- Do my logic and arguments make sense?
- Did I use my SEO keywords? Did I insert them naturally?
- Do I notice any words being used frequently that I can mix up with adjectives?
- Did I vary my sentence structure for more dynamic reading?
- Will my blog post be readable for my average reader?
- Did I follow my blog’s style throughout the post?
Step 8: Add your meta data
Your blog post’s title tag, meta description, and URL all influence how people find and understand it.
The title tag and meta description are the title and description you see for a page in search results. By default, WordPress uses your headline as the title tag and your excerpt as the meta description. But, if they aren’t the proper length for search results, they can get cut off.
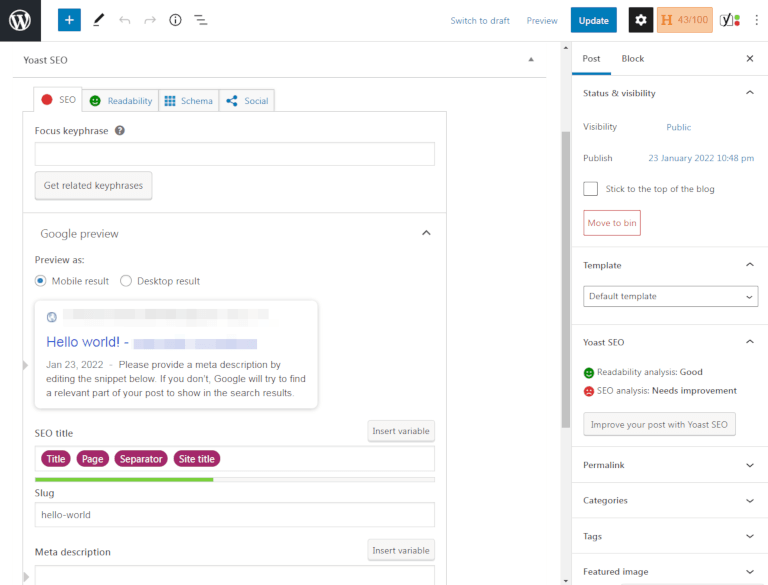
It’s best practice to write a separate title tag and meta description so you know they’ll look good. In WordPress, you can edit this data by changing your post’s code or using a plugin.
Yoast and All in One SEO are two popular plugin options. These plugins add a box below your content in the WordPress editor where you can manage your title tag and meta description. They also guide you through writing those search specs well.
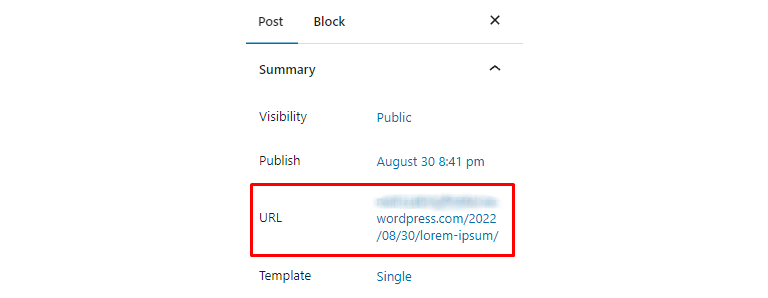
Your URL slug is the unique string of words that appears at the end of your URL.
For example, this blog post’s URL is:

Its slug is:

That’s the part of the URL that’s different for each blog post.
WordPress pulls your URL slug from your headline, but that slug usually isn’t optimized for search results. According to Ahrefs, a good slug follows keywords and summarizes the essence of the blog post.
No need for a plugin or fancy coding to edit your URL slug. Go to the Block tab in the right-hand menu, then edit your URL using the URL option. Save your draft or update your blog post to save your new slug.
Step 9: Publish your post
Now that you have your meta data set up, you can finalize your content for publishing. Copy and paste your blog post from your word processor to your WordPress post. The formatting will carry over to the block editor.

Or, you may have written your blog post within the blog post editor. I generally don’t recommend this approach in case you accidentally click “Publish,” but I know some writers get by just fine doing it. You do you.
If you paste your content from a Google Doc or another online text editor, go through your post and re-upload your images from your computer. The images you paste from another source are kept on your editor’s website, and you’ll want them on your WordPress site for safekeeping.
It’s all about practice
Once you establish a solid process for writing your blog posts, the next step to mastery is practice. As you adjust your system to your workflow, you’ll know what to do next instead of hoping words will magically appear on your blank page. And we’ll be with you as you practice. Just use this guide to help keep you on track.

Pair your airtight writing process with a good topic generation system, and you’ll become an unstoppable blogger. We can’t wait to see what you write!
Want more tips? Get new post notifications emailed to you.

