
The new WordPress.com block editor is a significant upgrade for anyone who wants to build a professional website with minimum effort. Read on for specific and helpful steps to crafting a quality contact page with the new WordPress editor.
Add a new page
First, log in to WordPress.com and go to My Sites. Once there, click the Add button next to Site Pages, like so:
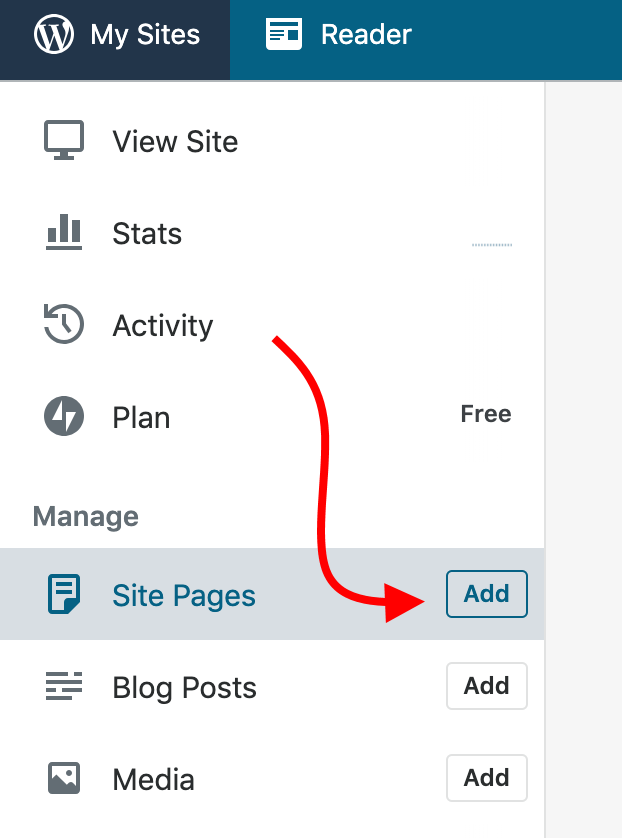
This will launch the new WordPress.com editor.
Create your contact page
Next, add your page title in the Add title field.

You’ll probably enter “Contact” there. Then, you can start adding your contact page’s content below the title.
It’s a good idea to include any key info that a person might need to reach you. You can change the details later, so you don’t need to stress about it too much at the start. The following is usually found on most contact pages:
- A general invitation to contact you.
- Your business contact information such as name, address, and telephone number.
- Links to your social media platforms.
- A live contact form.
Let’s break down some of these functions further.
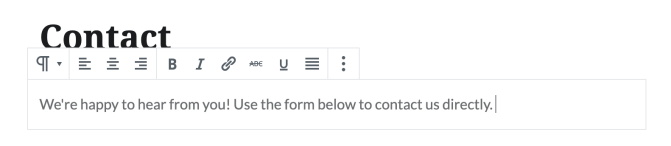
Add an invitation to contact you
Just place your cursor where it says, “Start writing …” and then type a friendly, inviting message. Here’s an example:
Add a contact form
To add a live contact form to the page, click the “+” button in the top left corner of the screen and select the block called Form.

The form will appear below the text you wrote a second ago.
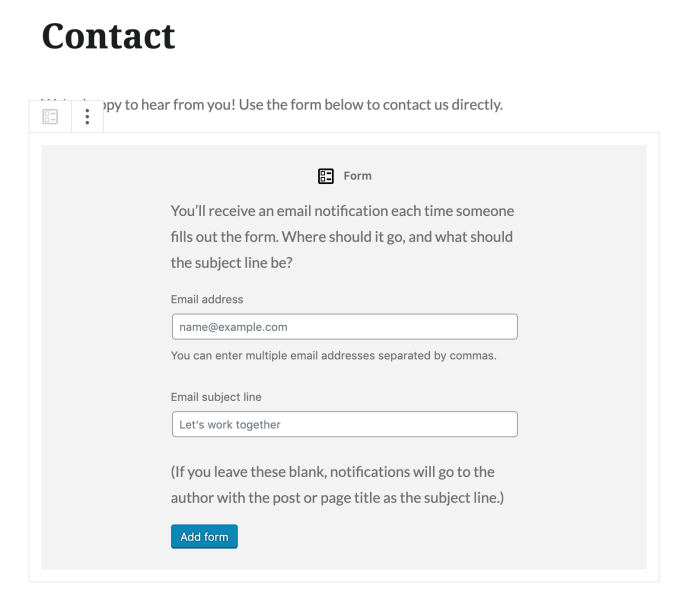
To fully enable the form, provide your email address (where you want to receive all contact messages from your visitors) and set the subject line that the emails should have. Click on Add form to finalize the setup.
Your new contact form will appear on the page. You can further customize it if you like.

For example, to remove a form field, simply click into it, then click the icon with the three dots, and select Remove Block.

Add your business information
Click the “+” icon in the top left corner again and select the Contact Info block. A whole new section is going to appear on the page.
You can fill it out with your company information by clicking into a given field and editing it. Similarly, you can delete individual fields if you don’t need them, just like we did when setting up the contact form.
Publish your contact page
Once you’re done adding content to your page, all that’s left now is to publish it. Click the Publish button in the top right corner of the page.

At this stage, you’ve successfully created your contact page! Still, this is just the tip of the iceberg of the new WordPress.com editor’s functionalities. We encourage you to learn more about it — and we promise, it’ll be worth it. Check out this WordPress.com editor explained page or learn how to use blocks in the new editor to get started.

